Persephone Pants Roundup

I have been admiring cropped wide leg pants on other people for years now, but I never thought they would look good on me because of my rather short height. Well well well how the turntables… I am now the proud owner of 4 pairs of Persephone Pants (pattern by @annaallenclothing) and I love them all to death! I vividly remember seeing Laura (@the.slow.sewist) in her glorious Persephones and falling in love with them way before I even considered picking up sewing. It was the first indie sewing pattern that stuck out to me, so it holds an extra special place in my heart <3
Since I tweaked the pattern quite a bit over time, I thought I would write a short (fingers crossed hahaha) blog post about each version I made and the modifications I did to the pattern to get the look and fit I was after. I hope you find it helpful, and if you have any further questions, you know where to find me!
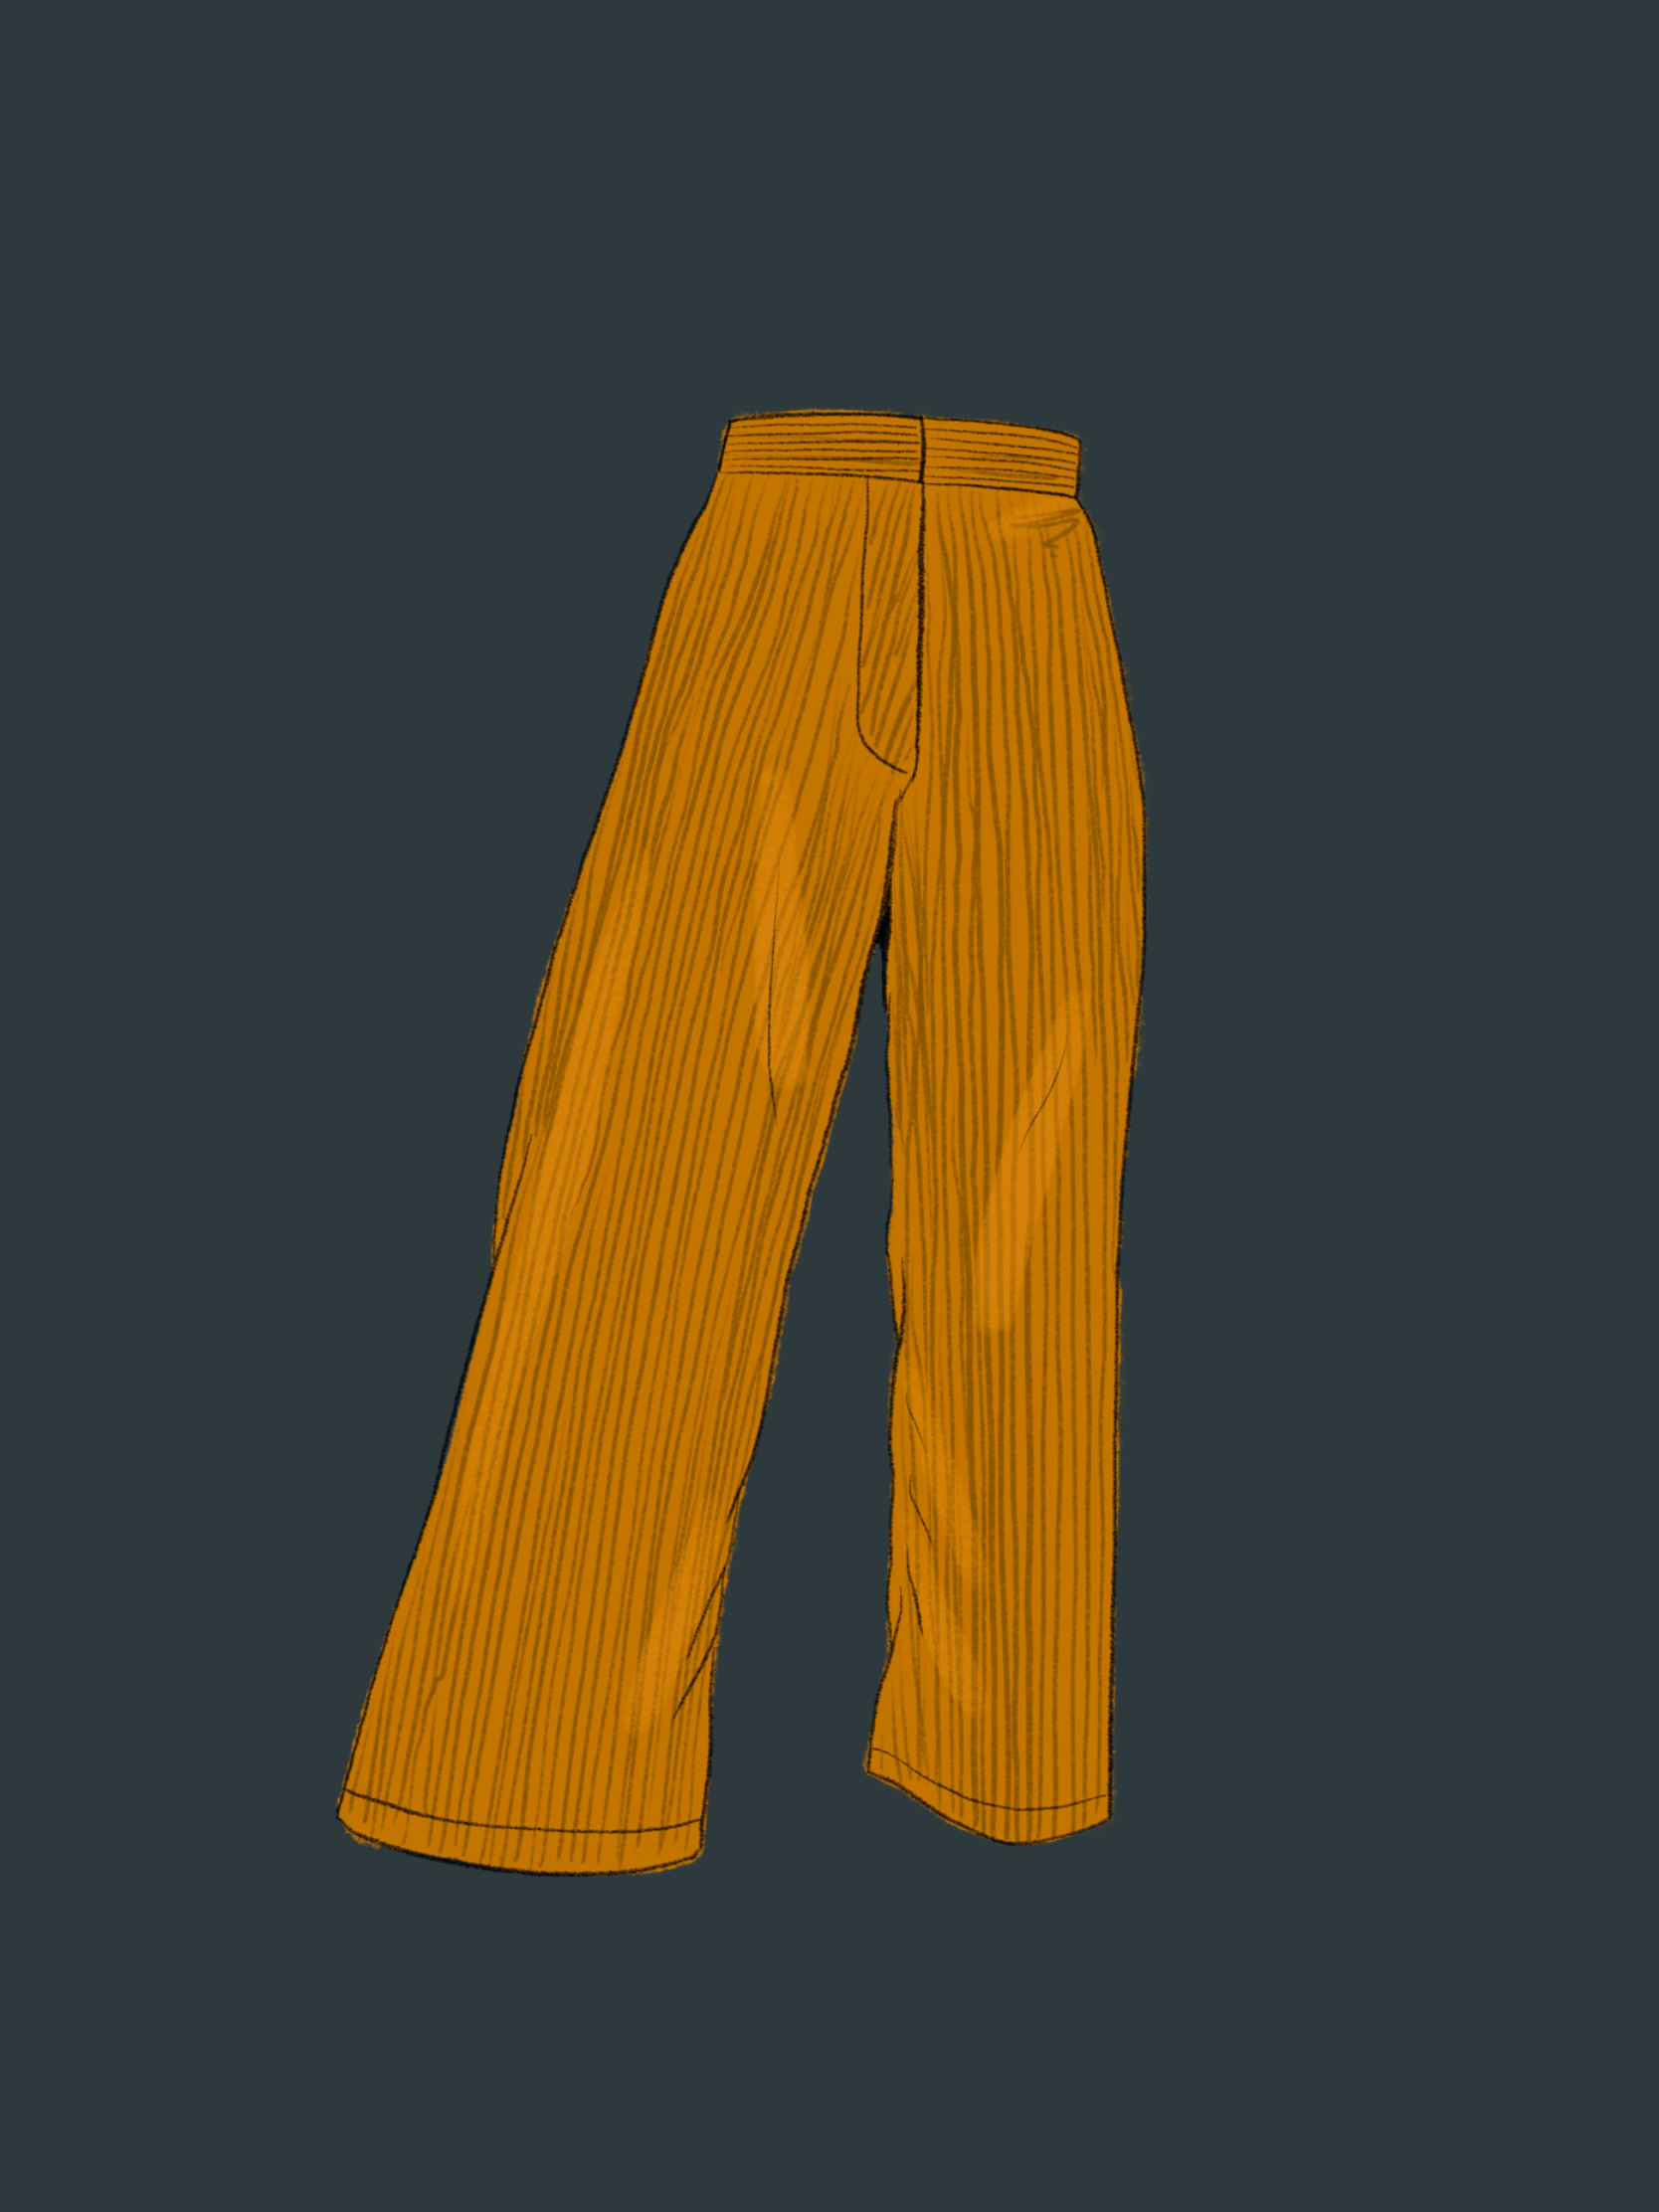
The Cow Print Denim (no.1) & The Mustard Corduroy (no.2)
The cow print denim and the mustard yellow corduroy were my first two pairs, and they are made using the same modified pattern.

Modifications:
I graded the waist down to a an imaginary size 00.
I doubled the width of the back dart. (My total intake was 5 cm.)
I shortened the pants by 10 cm using the lengthen / shorten line on the pattern.
I used my usual method for inserting a zip fly instead of the button fly that comes with the instructions.
I skipped the front pockets.
Drafted a simple, one piece, straight wasitband to fit my altered waistline.
Assessment:
I liked the overall fit of these two pairs, but I had a couple of issues I wanted to fix. Don’t ask me why I didn’t fix these before moving on to the second pair, I was feeling impatient that day!
The rise is a bit too high for my body, the waistband ended up going further up than the smallest part of waist, and therefore getting pushed down by my ribs. And since I altered the pattern to fit the smallest part of my waist, they felt quite constricting when they landed on my ribs instead of my waist.
My hipbones are protruding a bit too much with these pairs. I have received some helpful advice to relax the back darts a bit to help with this issue, more on this later.
I love the cropped length! They are just a bit above my ankles and I think this length really helps me look taller in them.
I’m very used to having deep deep pockets on my pants, and having no pockets on these two pairs is a bit of an issue. The front pockets that come with the pattern seemed a bit useless because of their teeny tiny size, but I’ll never skip finding an appropriate substitute in my future pairs! I might even go back to my cow print one to add some patch pockets to the back.
The Green and Black Check Wool (no.3)
I wanted to try my hand at making a more “serious” pair by using this lovely green and black checked wool I had ever since I saw Lorraine’s (@the.sewcialite) incredible wool pair!
With this pair I wanted there to be a bit more ease at the waist so that I could easily tuck in my bulkier sweaters, as well as a pocket that could hold my phone.
Modifications:
I shortened the rise by 2 cm using the lengthen / shorten line found on the pattern.
I reblended the front and back crotch curves after shortening the rise, and graded the waist to a smaller size than the 0 again.
I left the back darts as they are this time, to combat the protruding hip bones issue and to add in more space at the waist.
I shortened them by 5 cm for a slightly longer length, and used a hem allowance of 4 cm total. The hem is stitched by hand with a blind stitch.
I added a single welt pocket to the right side of the back, following this incredible tutorial from Diane Deziel.
I drafted a straight waistband to fit the new waistline, but instead of having it be 10 cm tall and fold over to the inside, I made it in two 6 cm tall pieces: one out of the main fabric, and one out of my lining fabric. I also did an extended waistband. I like a pretty firm waistband, so I used medium weight woven interfacing on the lining and stronger, waistband interfacing on the main fabric.
Did a zip fly and skipped the front pockets again.
Assessment:
The rise is much much better!
I added a bit too much ease at the waist, while they are super comfortable for tucking in sweaters, the waist is a smidge too loose for wearing with my more form fitting tops.
The hipbones are still protruding a bit, now that I think about it I think this is cause by having the centre front cut on the bias. Since bias cut fabric is more prone to stretching, it conforms to the shape of my body much more easily than fabric that’s cut on the straight grain. Since my hipbones stick out quite prominently, they show through the bias cut fabric much more easily than they would have if the center front was placed on the straight grain. This is what I think is happening in my case, I’m certainly not an expert and might be wrong, but I’m fairly confident that this is at least a contributing factor.
I love the extended waistband, I thought it would be way harder to construct, but it was actually easier! It reduced the bulk at the center front dramatically, gave them a more classic tailored look, and it’s just an overall cool touch. You can see the details of how I made the waistband over at my Wool Persephones highlight on my Instagram account. Also love having the soft cupro against my skin! I really like having a super firm waistband, so I loved this combination of interfacings. I know many people are not a fan of the harder, firmer waistbands but I find them much more comfortable, as long as the fit is right.
I got a lot of questions about whether or not I was planning to line this pair: The wool I used isn’t the smoothest thing in the world, so I was worried about it being uncomfortable but I decided to hold off on the lining until I could give them a try. I’m really happy that I did that, because they turned out super comfortable without the lining! Lining the waistband was certainly a wise choice, since it has the closest contact with my body and it was super simple to do, but I don’t think it would be worth the hassle to fully line them. Now, this may be because I’m really used to wearing scratchy wool garments and therefore built up a high tolerance for it, so consider your preferences about the textures of garments first.
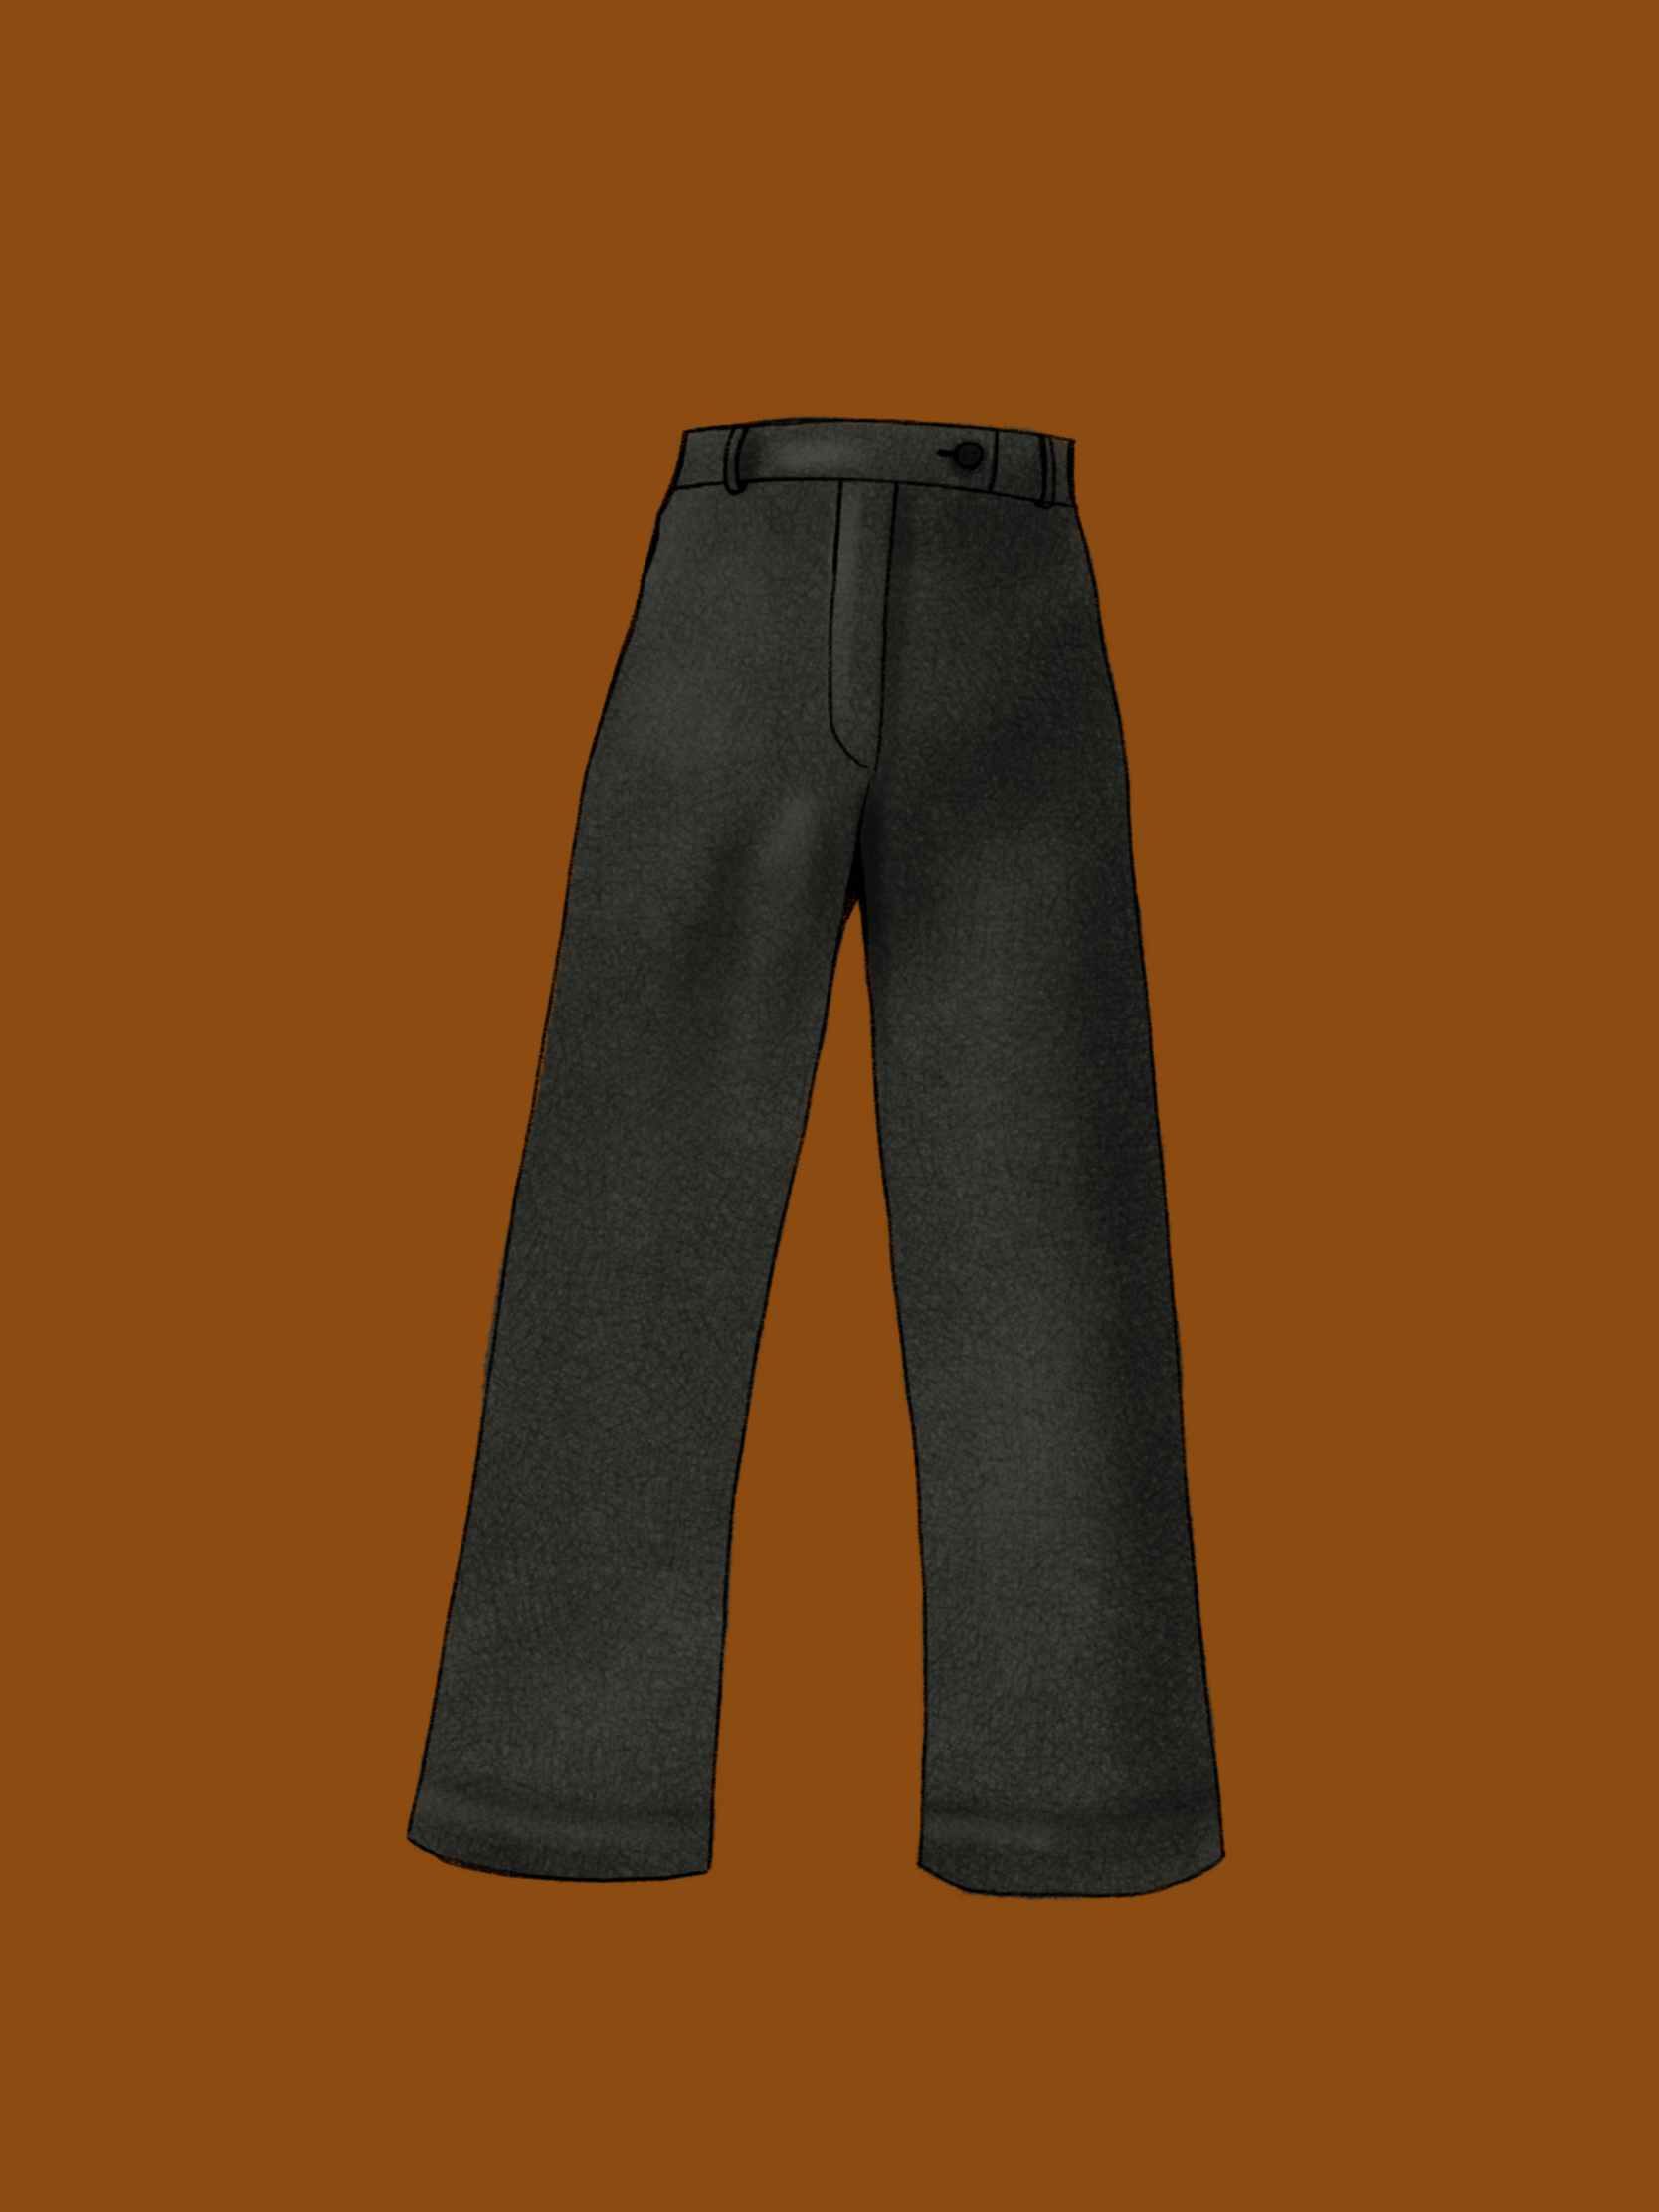
The Black Cotton Twill (no.4)
Having just made the wool pair with the slightly too big waist, I was eager to have one that fit *just right* in a neutral colour with more casual details. I used a medium weight cotton twill in black with cream coloured topstitching to achieve my vision of the perfect everyday pair.

Modifications:
Nearly all the fitting adjustments are the same as my last pair, with the shortened rise and graded down waist. I just increased the dart intake by 50 percent and took the waistline in at the back a tiny bit more to have it fit me more snugly at the waist.
I extended the back crotch hook by a teeny tiny amount.
I used a straight waistband to fit the new waistline, but I didn’t do an extended one this time.
I didn’t shorten this pair, but instead did a double fold at the hem with 9 cm of hemming allowance in total.
I quickly drafted some patch pockets to go at each side of the back.
Zip fly and no front pockets again.
Assessment:
Short and sweet: they fit me absolutely perfectly! I will be using this modified version of the pattern moving forward, unless the fabric I use calls for any specific modifications.
Final Remarks
I love finding good base patterns that fit me well and going to town on the details, making each iteration unique and special. The Persephone pants are so versatile once you get the fit right, they can go from relaxed and casual to super special with just the fabric choice. Plus it’s really fun to play around with the details like pocket types or topstitching to play into the vibe that comes off of your fabric! Knowing myself, I’ll probably end up making more in the future, but I think I’m at a good place for now!
If you’re considering tackling the Persephone Pants, my humble advice would be to make a toile and check the rise before anything else. Just shortening the rise has helped so much with the rest of my fitting issues. I would then move on to playing with the front and back crotch curves, and finally adjusting the length of the pants. I’ve also seen lots of friends getting incredible results with curved waistbands, so you might want to take a look at that option if you find that the waist fits you well but your waistband is gaping.