Adventures in Naturally Dyed Fabric and the Phen Shirt by Pattern Fantastique
Hey hey hey!
I have a wonderful collaborative project to share with you today. Liz from @bylizchick reached out to me back in March to see if I would be interested in sewing something using custom dyed fabric she would send me - I jumped on the opportunity because her work is just gorgeous! She uses food and floral waste to dye fabric and second hand garments and creates the most beautiful pieces.
The Fabric
We decided on a colourway of “dirty olive” with a subtle print and Liz got to work! Here’s how she described her process of dyeing this fabric:
The undyed textile was sourced from a fabric recycling org and first went through a process called “mordanting.” This is where metal salts are used to prepare the fabric to fully bond with the plant dye for a garment that will withstand continued wear and washing.
As natural dyes are highly temperamental and so many factors affect the final color, it is very challenging to color match and the result often ends up being a sweet surprise. I was shooting for “dirty olive” with a subtle pattern by layering henna, iron & eucalyptus.
The first layer of dye was henna, to achieve a greenish yellow color, produced by simmering the fabric in a “tea” of the dye material. (I do all of this out of my apartment!) The fabric was then submerged in a solution of iron to “sadden” the color to a dirty olive green and add additional longevity to the color. Lastly, the textile was eco printed with eucalyptus left over from a floral installation to create a subtle pattern on top. Eucalyptus was placed intentionally throughout the fabric, it was rolled up tightly and steamed— making a lasting impression. The fabric was then finished with a wash/dry/iron and is ready to be made into something beautiful! Dyeing with plants (and especially waste) is a beautiful way to create alongside the natural environment & design more slowly, intentionally and sustainably.Liz (@bylizchick)
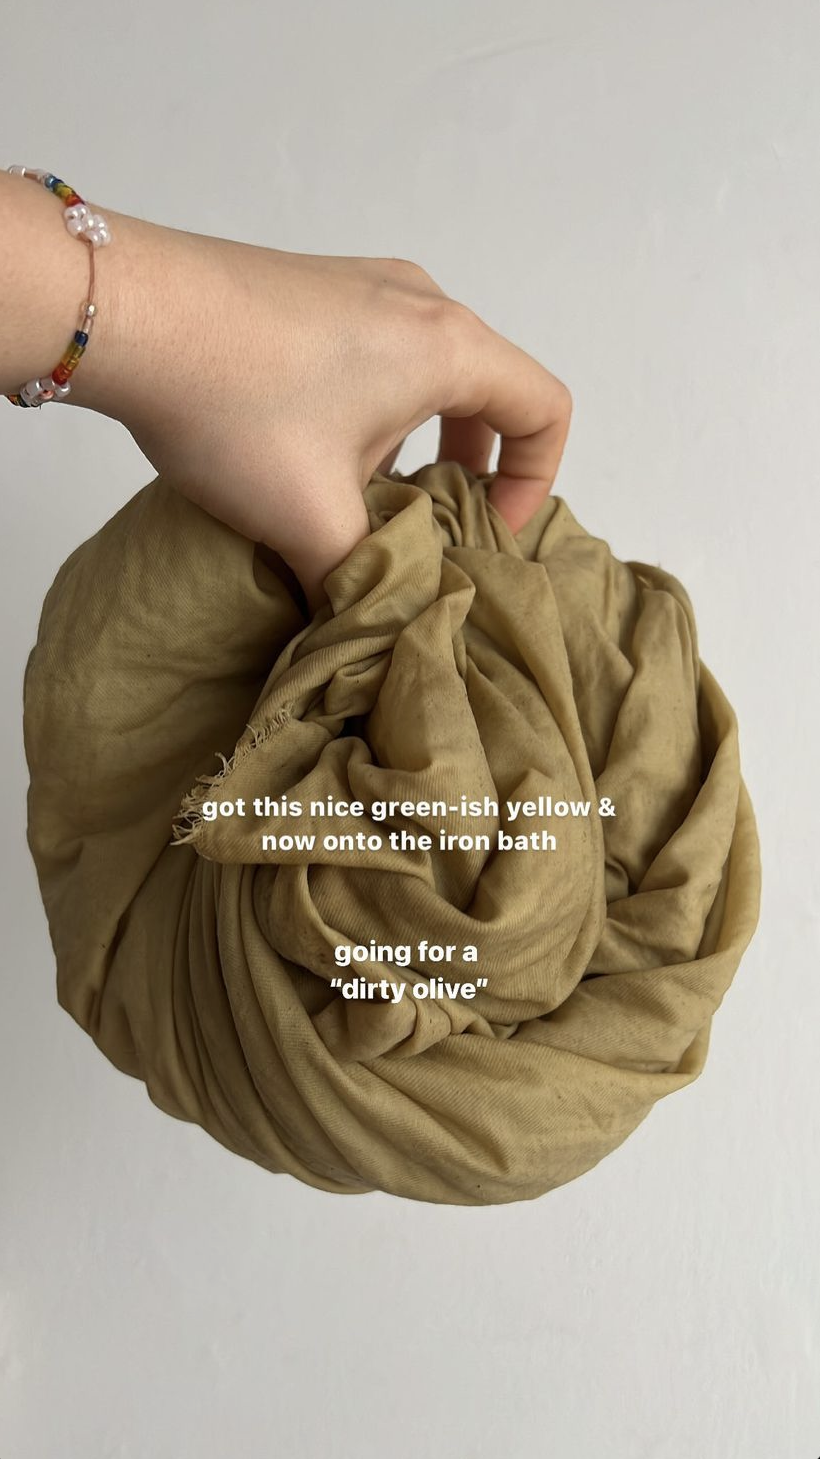
The henna bath (Photo by @bylizchick)
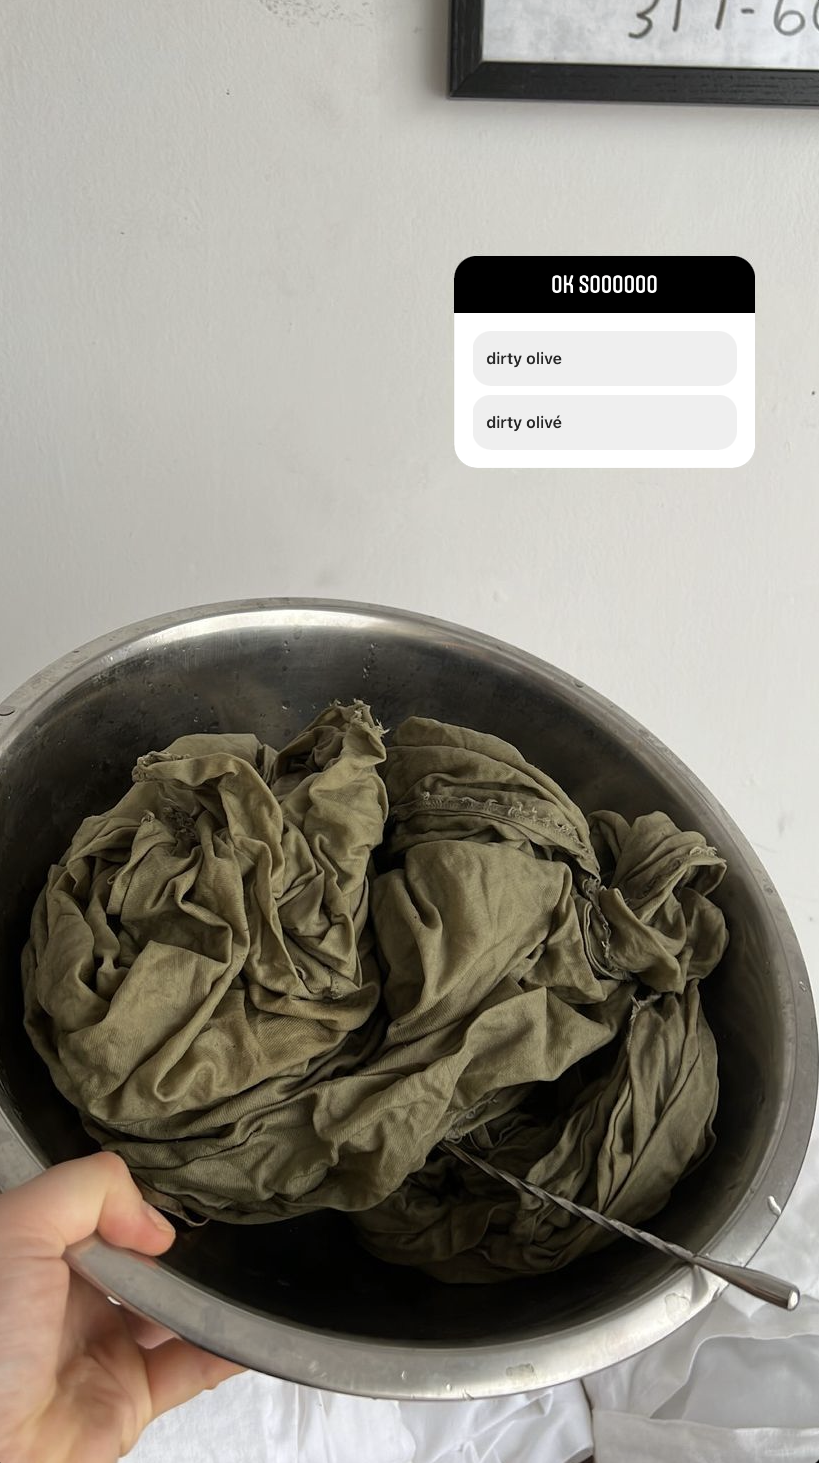
The iron bath (Photo by @bylizchick)

The eucalyptus print (Photo by @bylizchick)
After she worked her magic, we experienced a couple of painful months due to some extraordinary shipping troubles. I won’t bore you with the details but it put us both through some intense moments of despair and rage until one day, the package showed up at my doorstep against all odds! Believe me when I tell you I’ve never been more relieved to see our postman :’)
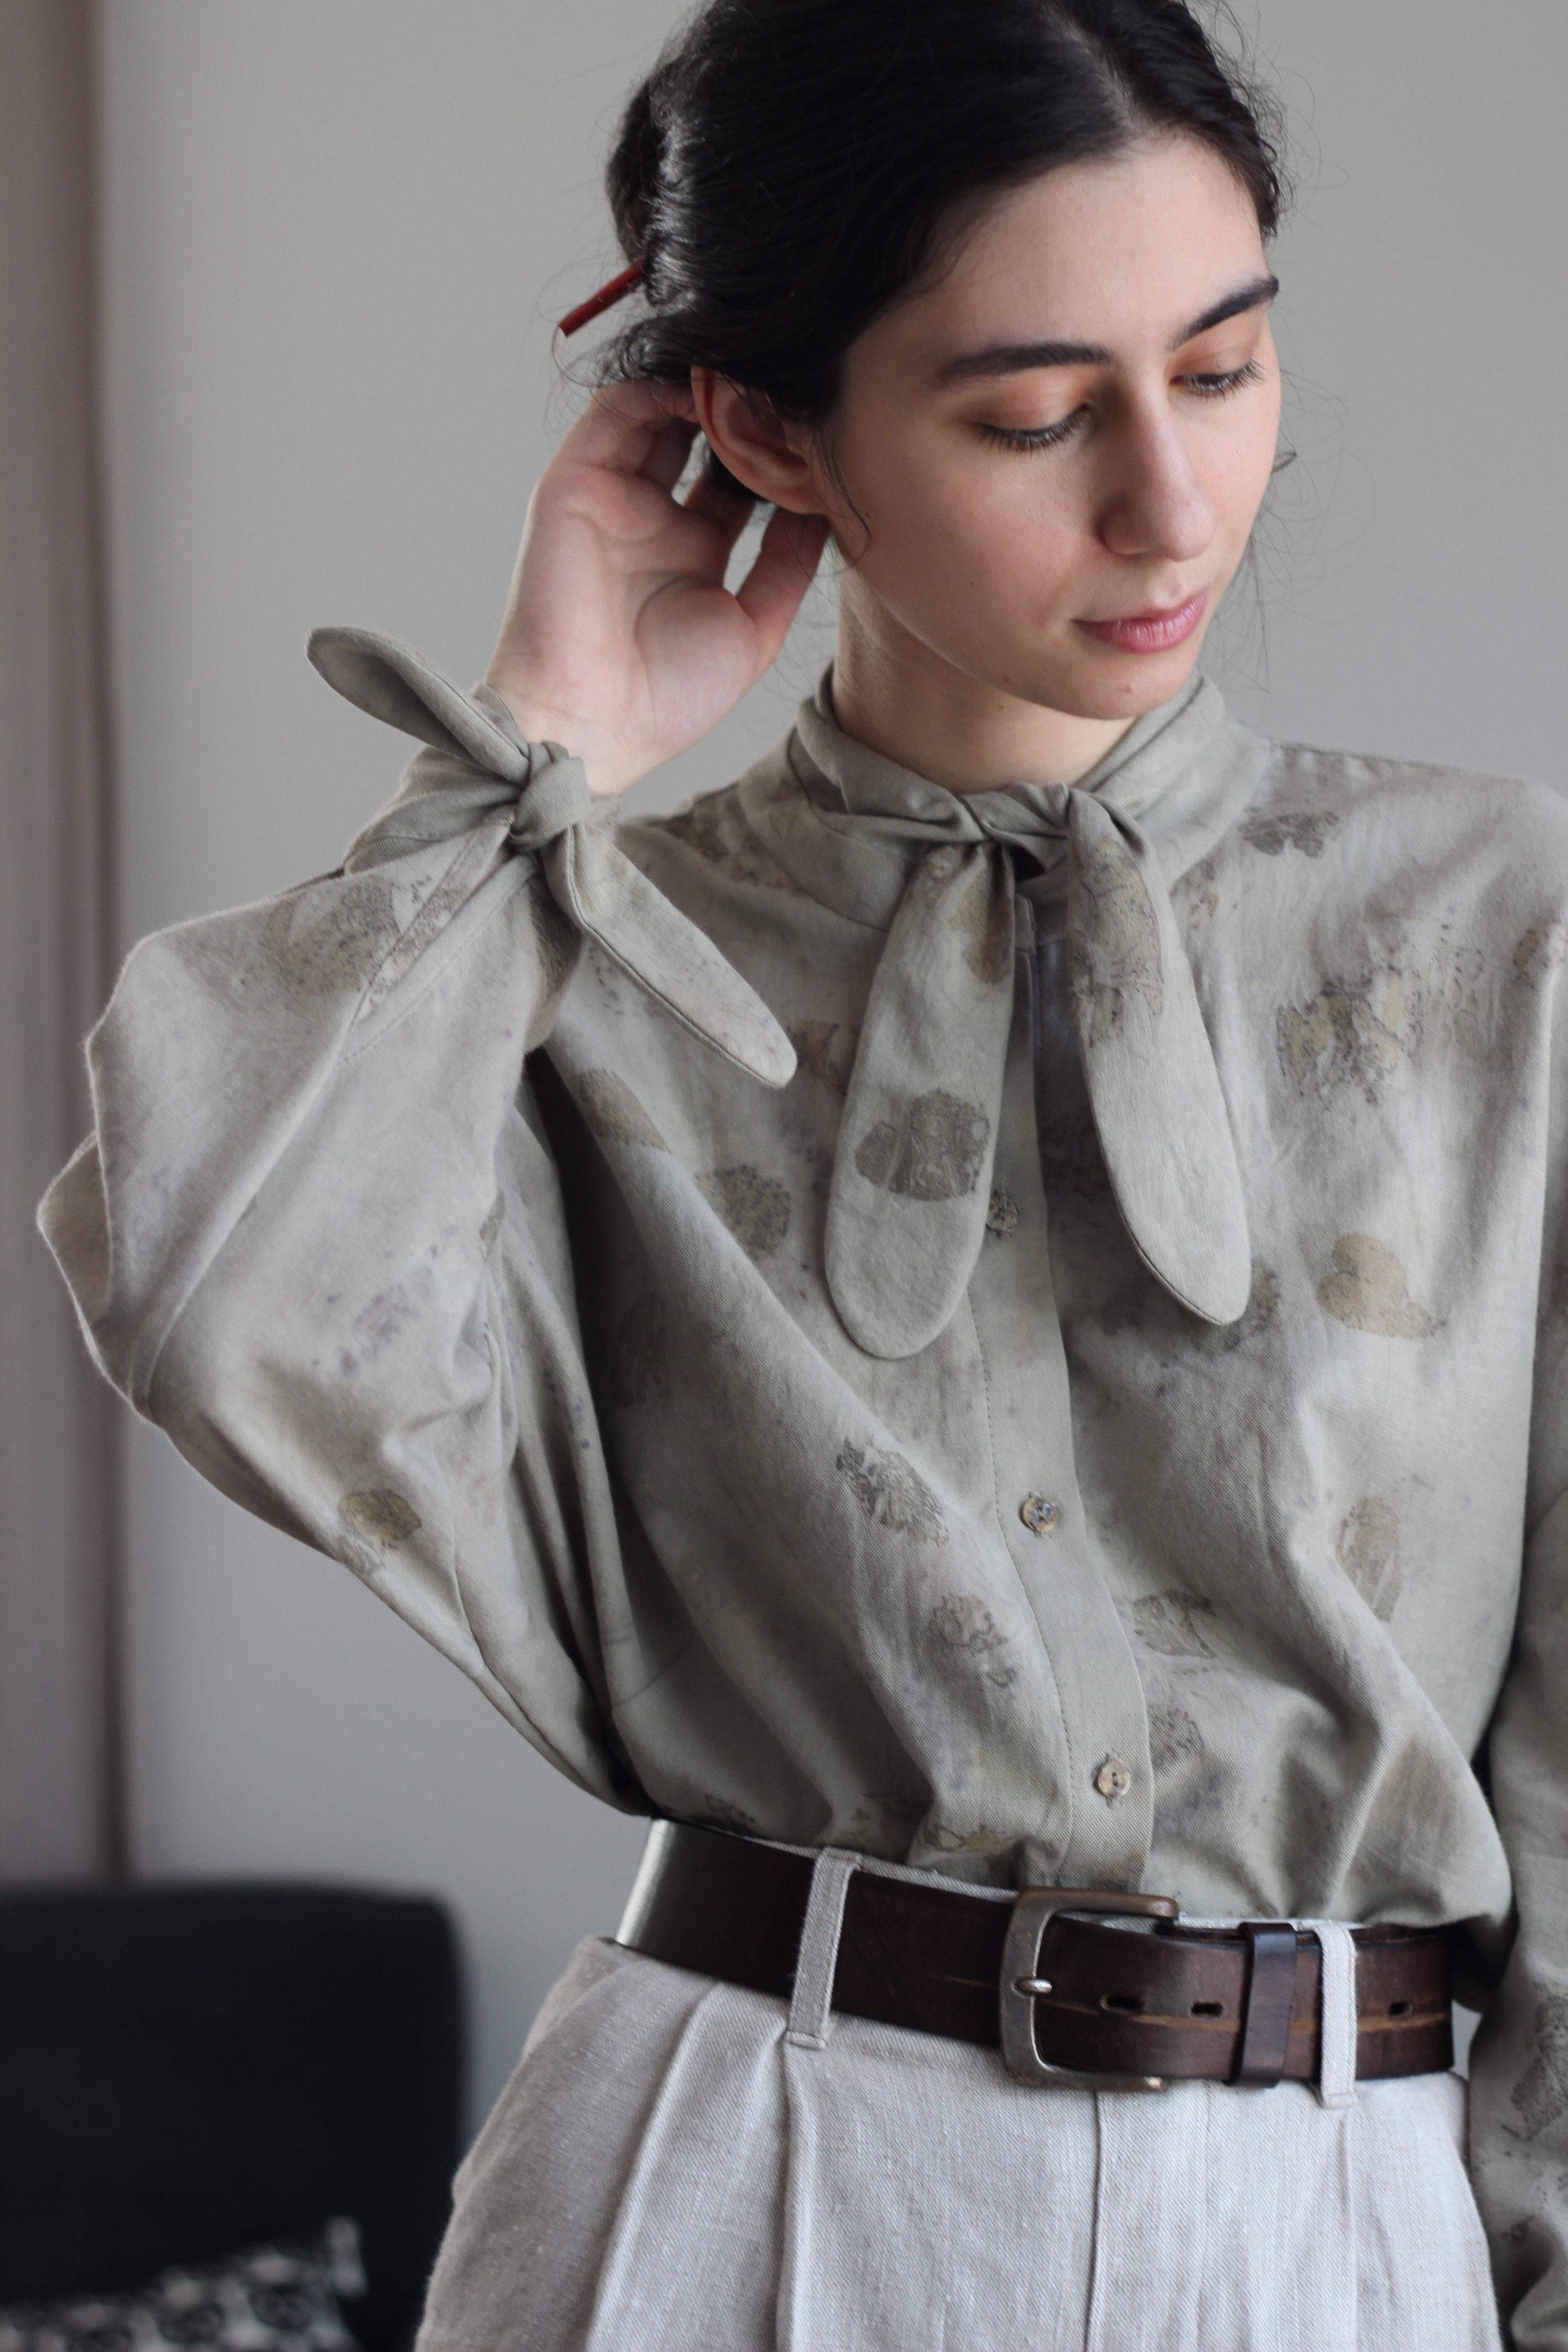
It turned out even more beautiful than I imagined it would, I love the sage green / pale olive colour of the base, the print left by the eucalyptus leaves, and my god, the smell! It smells absolutely divine, I feel like a very fancy cup of green tea when I wear the shirt.


The Pattern
Once I finally had time to resume work on this project after some intense months of thesis writing, I started thinking more concretely about the design I wanted. I knew I wanted to make a button up shirt, and I thought I wanted it to be more structured and streamlined. But after many unsatisfactory sketches, I realised that I wanted something more soft, round and balloony to go with the loose and free flowing print of the fabric. It was then that it dawned on me - the Phen Shirt by Pattern Fantastiqe was the perfect fit for this project! I had been seeing some incredible versions of it (notable examples include Kathleen’s, Eli’s, Harriet’s, Amy’s, and of course Nita’s) and I’m super glad that I finally got to sew it myself.


Nita describes it as the “not so classic, classic shirt” and that’s the perfect pitch to get me interested in a pattern. It features a lovely oversized fit, giant batwing sleeves with generously dropped shoulders, a really cool tie collar and cuff view and an interesting hemline. The size range is 6 - 26, covering a bust measurement of 81 cm (32“) to 131 cm (51 1/2”) and a hip measurement of 88 cm (34 1/2“) to 138 cm (54 1/2“). I went with the size 6 based on my bust (78 cm / 31”) and hip (84 cm / 33”) measurements and made no fit adjustments.
The only modifications I made were to extend the length of the neck ties to the size 14 line and omit the patch pockets on the chest. I also eliminated most of the topstitching because I wanted to interrupt the pattern of the fabric as little as I could. I only interfaced the button placket and one side of the collar stand while leaving everything else free so that the ties were nice and soft. I used the backs of some pearl buttons I always keep in my stash, and I still can’t get over how perfectly they matched the colouring and the print.


I really took my time in the cutting step, because I wanted to keep the print balanced across the shirt. I ended up using the mirrored print on the back, and the more dispersed area on the front. Once the bigger pieces were out of the way, I just squeezed all the other pieces to the remainder of my fabric. I don’t have too many scraps left, but I’ll make sure to put to them to good use to honour Liz’s waste-lowering philoshophy :)

I’m super happy with how this shirt came out! The tie collar and cuffs compliment the baloony, poofy silhouette of the shirt perfectly while adding a really interesting twist. I just have a couple of notes on the fit:
The body of the shirt is cut like a giant circle, which provides a lot of volume up top and a more tapered hem line. While this feature makes it really easy to tuck the shirt in, I don’t personally love how it looks when it’s untucked. It’s pretty fitted at the high hip line, and it doesn’t feel super comfortable at that point (despite my hip measurement being smaller than what the pattern was drafted for). That being said, I always tuck my shirts into my trousers and I really appreciate the lack of extra volume at the hem.
Anyone who knows me know I’m a sucker for big batwing sleeves and this pattern takes that to the max! While I love love love how it looks, the sheer drama of sleeves is a little restrictive in terms of movement - especially if you tuck the shirt in :’)

Here’s the front of the shirt, untucked.

And here’s the back, untucked. Excuse the wrinkles, it was tucked in for quite a while before taking these photos :)
All in all - I’m thrilled with the end result. It was really fun to try a new pattern, and it’s even more fun to feel like you’re wearing a work of art in the form of fabric! Huge thanks to Liz and Nita for helping me bring this wonderful article of clothing about <3 Oh and here’s a link to my Instagram post about the project! Hope you like it :)
