Let’s Make A Bomber Jacket!
Hello folks!
Today I’m sharing how I made my first item from my Make Nine list for 2021, a loosely 1940’s - 50’s inspired, wool bomber jacket! I shared my sewing process over on my Instagram stories (which are all saved into a highlight called Bomber on my profile) but I wanted to write this blog post to show my pattern drafting / modifying process so that you too can make a similar one if you’re interested!
This project was a real pleasure to work on, since I had a rough plan of where I wanted it to end up, but also had some room to play and improvise. I did this a lot when I first started sewing, and it was one of the things that got me hooked to sewing, so it was really nice to have a break from strict instructions :) I also love how it came out in the end! I ended up being a bit more 80’s than 40’s but I’m not mad at all, it looks like a cartoon bomb with its dark colour and bouncy, ballon like shape and it makes me smile every time I think of it. Alright, that’s enough of me rambling, let’s talk about how I made this thing!
Before we begin, a quick disclaimer: I don’t have any formal education in patternmaking, and it’s very possible that I’m doing certain things “the wrong way”, hence why I don’t call this a tutorial. This is merely a walkthrough of the steps I took to achieve my jacket. If you’re interested in making your own, I would recommend that you take this all with a healthy dose of skepticism, and experiment to see what you prefer :)


I used the free Paola Workwear Jacket pattern from Fabrics Store as the base pattern for my jacket, since a) I already know it fits me well and b) I wanted everyone to be able to follow along. You can access the pattern for free following this link.
Before I begin modifying a pattern, I like to make a list of the changes I want to make so that I don’t forget anything. For this project, my list looked like this:
Crop the body pieces
Shorten the sleeves to add cuffs
Lower the armscye for a slight bat-wing look
Make the sleeves more voluminous
Change the front into a notched lapel design (A quick note on this: I ended up not liking how this looked with the heavy fabrics I used, so I ended up going back to the original design of the Paola. Here I will show you the steps you need to take to achieve the look of the one I made, but if you do want to turn it into a notched lapel design, the book I used was -as usual- Helen Joseph Armstrong’s Patternmaking for Fashion Design.)
Okay, now that we have everything ready to go, let’s start:
Step 1 is to remove all the seam allowances from our pattern pieces, so that we are working with the net pattern. You could probably get away with leaving some of the seam allowances on, but I like to start with a net pattern so that I don’t get confused and have complete freedom to add in any last minute changes. The seam allowances for the Paola are 1.6 cm / ⁵/₈” for the main seams, and 1 cm / ³/₈” for the neckline. For the front pattern pieces, I found the center front (the little cross marks that show the button placement) and removed everything that fell outside of that.
Next, I shortened the front and the back pieces by 23 cm / 9”. This amount will of course depend on your preferences and measurements, but I wanted the finished jacket to hit right below my natural waist so that it would cover the waistband of my super high waisted trousers but wouldn’t go down too much further than that. So I measured from my shoulder to that point, compared that to the length of the jacket and shortened the pattern pieces accordingly. I also took out an additional 4 cm / 1 ⁵/₈” to accommodate for the waistband I would add at the end.
Then, I measured 3 cm / 1 ³/₁₆” down from the bottom of the armscye both on my front and back pieces and marked. From this mark, I blended up to the notches along the armholes. I cut off the excess. I repeated this on the sleeve pieces, marking 3 cm down from either side of the sleeve cap and blending up to the notches.
Now, since the Paola has a slightly dropped shoulder, I wanted the curve of the sleeve caps to be more flat. I measured the length of my new armholes and drew a new, much flatter sleeve cap that matched the length I measured. You basically want to decrease the height of the sleeve cap, which will also enable you to have a much more voluminous sleeve. I know this step is a bit vague, but hopefully the pictures help!
One final step for the sleeves: I shortened them by 5 cm / 2” so that I could add 5 cm / 2” cuffs later on.
For the front, I drew a 3.5 cm / 1 ³/₈” extension out from the centre front. I wanted my jacket to have a slightly double breasted look, if you want more of an overlap go for a bigger extension, if you want less of an overlap go for a smaller extension.
Now that we have the front piece ready to go, you need to see if the original collar piece works well the extension you added to the centre front. I liked the way the collar looked on mine as is, but if you added a smaller or larger amount as the CF extension, you might need to shorten or lengthen the collar to achieve the proportions you’re after.
We’re almost there! I decided on the length I wanted my waistband to be by measuring the circumference of my body just below my natural waist and adding 5 cm / 2” of ease. I compared this measurement with the length of the hem of my front and back pieces. I distributed the difference between the two on 6 pleats in total: two on either side of the back, and one on each side of the front. I marked where I wanted my pleats to go.
I marked four pleats at the hem of my sleeve, taking into account the fact that I would not be adding a sleeve placket since I didn’t think it would work well with my fabric.
I quickly drafted some rectangular pieces for the cuffs and the waistband.
Finally, the lining. I wanted it to be lined in the bodice, so I traced my front and back pieces. I drafted a wider facing for the front than the original facing of the Paola. I also drafted a facing for the back of the neck line, making sure that the widths of the back and front facings were the same at the shoulder line so that they would blend seamlessly when sewn up.
That’s it! Don’t forget to add your preferred seam allowance to all the pattern pieces (mine is 1 cm / ³/₈”) and make a toile of your new jacket before cutting into your nice fabric. We made a lot of changes to the pattern, so it’s very possible that something went in a direction you’re not into, and it’s really worth it to make a quick mockup of how your final piece will turn out.
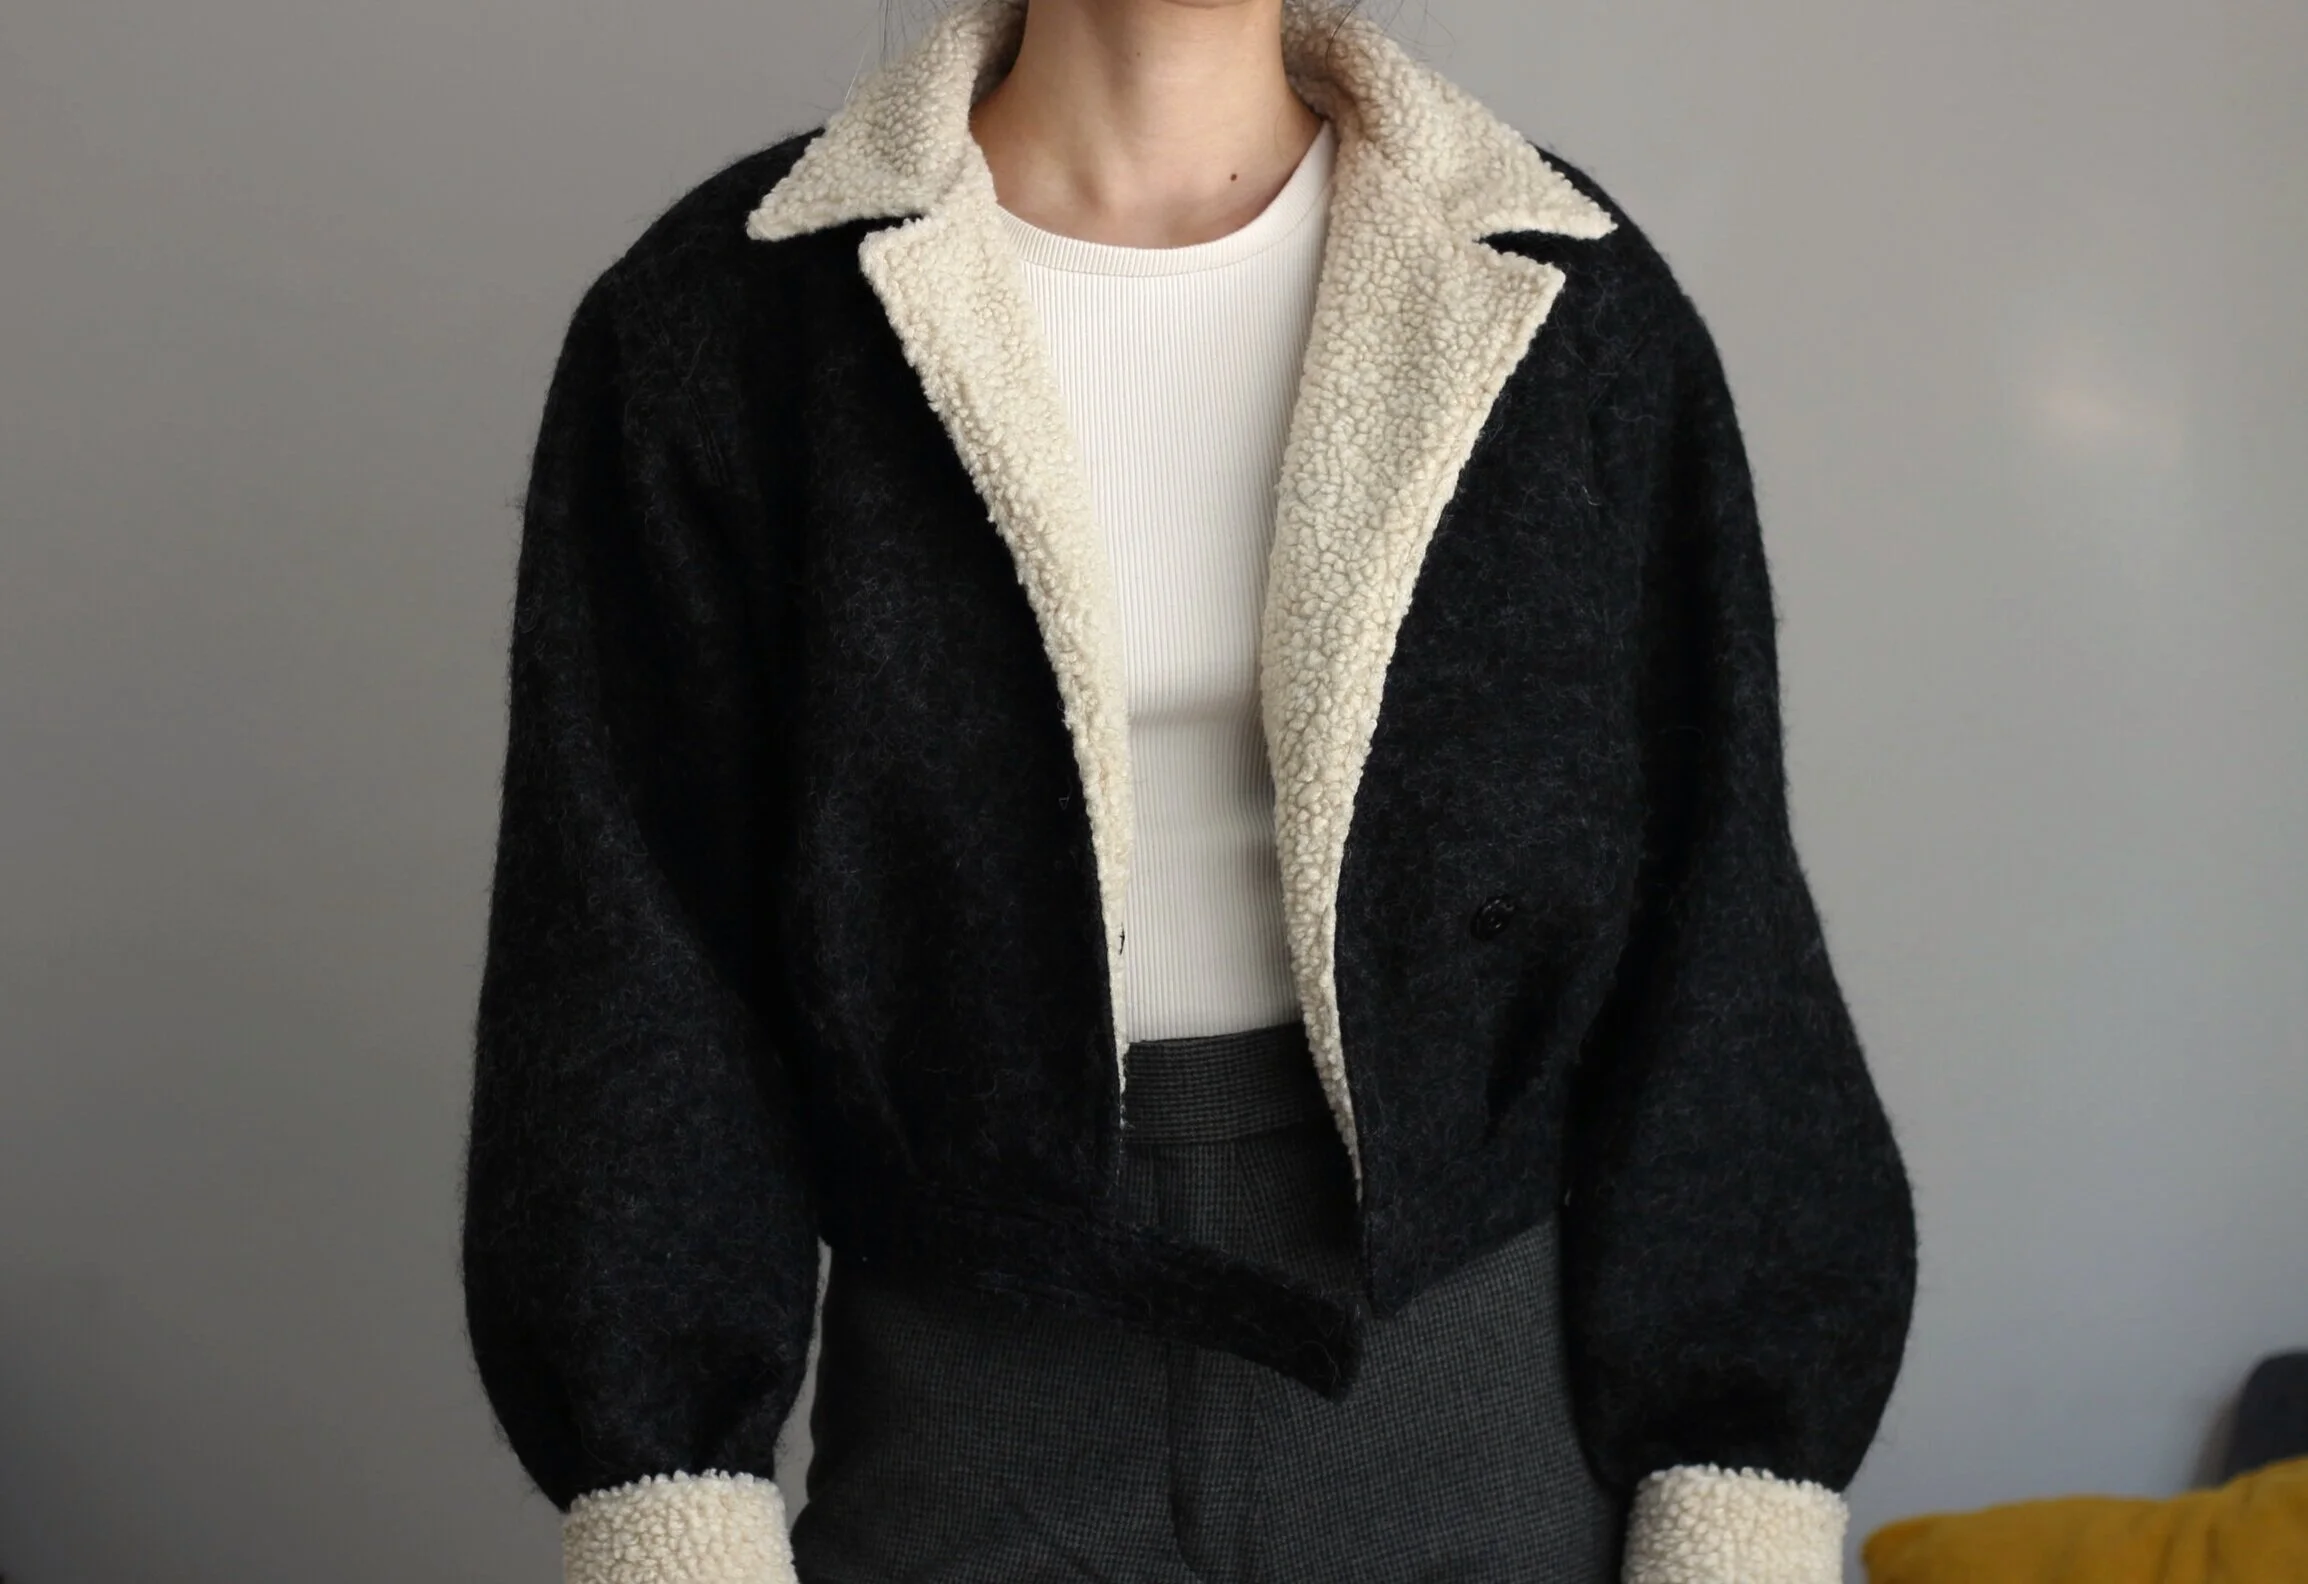
If you’re satisfied with your pattern pieces, cut everything out of your fabric of choice! I chose to use a felted wool blend for my main fabric, a black cupro for the lining, and a cream coloured sherpa for the facing pieces. I really like how much structure my wool has, I wanted my jacket to look as balloon-y as possible and the fabric really held up the shape I created with all those pleats.
Putting this jacket together is actually really straightforward, it’s mostly the same as a normal Paola. You can find the original instructions here. The only significant changes are the addition of the pleats, the cuffs, the waistband, and the lining. Again, you can see the entire sewing process of this jacket on my highlight on Instagram.
I also want to highlight some of the details I incorporated here, in hopes that it might serve as inspiration for yours!


Some Construction Details
I initially wanted big cargo pockets on the chest, but they weren’t going to work with the proportions of my jackets so I added a single welt pocket to the inside of the jacket, on the left side. I sized it so that my phone fits perfectly in it.
I finished the armholes of the lining with some bias tape, and tacked the lining to the main fabric on the shoulders and near the armpits so that it wouldn’t move around too much.
My fabrics were quite bulky and didn’t respond too well to pressing, so I added a single line of topstitching around the lapels and the collar. I used a cream coloured topstitching thread on the top and some black all purpose thread on the bobbin, so that the stitching would blend nicely into my two fabrics.
I also added a line of topstitching to either side of all my main seams on the felted wool, by moving my needle 2 mm to one side and following the initial seam. This really helped with keeping my seams flat.
To reduce the bulk at the spots I pleated the fabric, I ran a zigzag stitch within the seam allowance so that it would flatten that area. This worked really well, the zigzag stitches pulled the pleated areas back to the original thickness of the fabric!
I had to do some innovating at the cuffs. I decided on using the same cream sherpa for the cuffs to tie it all together, but that meant that there was no way I could assemble it the usual way because of the massive amounts of bulkiness it would cause. So, I decided to attach my cuff pieces using a blanket stitch and some embroidery thread in a matching cream colour. This way, I can wear them folded up or down.
Finally, I added some snap closures to the front of the jacket, since I knew there was no way I could get all those layers under my buttonhole foot. I added one to the waistband, and one to the body. You could also add one to the very top, right under the collar to wear it fully closed, but I decided I would mostly wear it open, so I skipped that for now.
Phew! I think that’s all? Overall, I really like how it came out, even if it’s not the most versatile piece. I really want to make another version that is more similar to my original vision, but that really depends on me finding the ~perfect~ fabric for it, so we’ll see how that goes.
If you think I missed something, or still have questions after reading this and watching the Bomber highlight, feel free to leave a comment down below or shoot me a dm. Also, please tag me in your pictures if you do end up making something similar! I would absolutely love to see your versions <3
