Making a Tailored Waistcoat
I like to start the new year off strong by tackling one of my Make Nine items early in the year, and this year was no exception! For my first big project of 2023, I decided to jump in and make a canvas front, tailored waistcoat and some matching pleated trousers. I’ve been wanting to try my hand at tailoring for many many months at this point, and I feel like a waistcoat is the perfect place to start.
After making my first Veronica Vest from Just Patterns, I knew I wanted to make a more tailored, structured version, and I knew my best option would be to fully canvas the front. I’ve been seriously intimated by this technique for a long time for some reason, which is why I wanted to document my process and share it in a blog post for anyone else who might be in the same boat! I’ll walk you through my entire process here, but keep in mind that this is basically a learner’s log, and definitely not a tutorial from an expert :) Good? Good! Let’s jump in.


Fit Adjustments
As this was my second time making the Veronica, I had a few pattern adjustments I wanted to make to improve the fit from my first version. I’ll briefly mention them here so you can reference them if you have a similar body type to mine.
I removed 2 cm / 3/4” of length from the upper bust area, using the lengthen / shorten lines found on the pattern pieces. The pattern is drafted for a height of 165 cm / 5’5”, and I’m 163 cm / 5’4”, but I have a shorter torso for my height. Removing excess length from this are brought the dart points up to the correct spot on my body.
I straightened out the shoulder slopes. My shoulders are pretty much completely straight / square, so the angle of the shoulder slope on most patterns causes gaping along the back of the neck. I started sewing the outer edges of the shoulder at 1 cm, but increased my seam allowance up to 2 - 2.5 cm / around 1” as I got closer to the inner edge.
I took in the side seams by 1 cm / 3/8” at the waist, tapering to nothing towards the armscye and the hem.
The Canvassing & Taping Process
The changes I was planning to make all revolved around the front pieces, so I sewed the back and the lining as instructed in the pattern. For the front, I skipped the fusible interfacing which the pattern instructs you to apply to the entire front. Instead, I cut an identical piece out of horsehair canvas. Horsehair canvas is often used in tailoring as an inner support layer, and it’s made out of a blend of horsehair and other fibres (such as cotton, linen, or polyester). The horsehair runs along the warp threads, so you can easily scrunch it up sideways but it will show some resistance if you try to scrunch the canvas lengthways. This property helps keep the front of your waistcoat or jacket nice and upright, while still having flexibility where it is required. To prep the canvas, I soaked it in water for 30 minutes and then pressed it using a hot, dry iron. This shrink and softens the canvas a bit, preparing it for use. When cutting the canvas, I made sure to keep the grainline of the pattern parallel to the horsehair insertions, because my main goal was to keep the front of the waistcoat nice and upright while minimising the scrunching and creasing that was happening with my prior version.
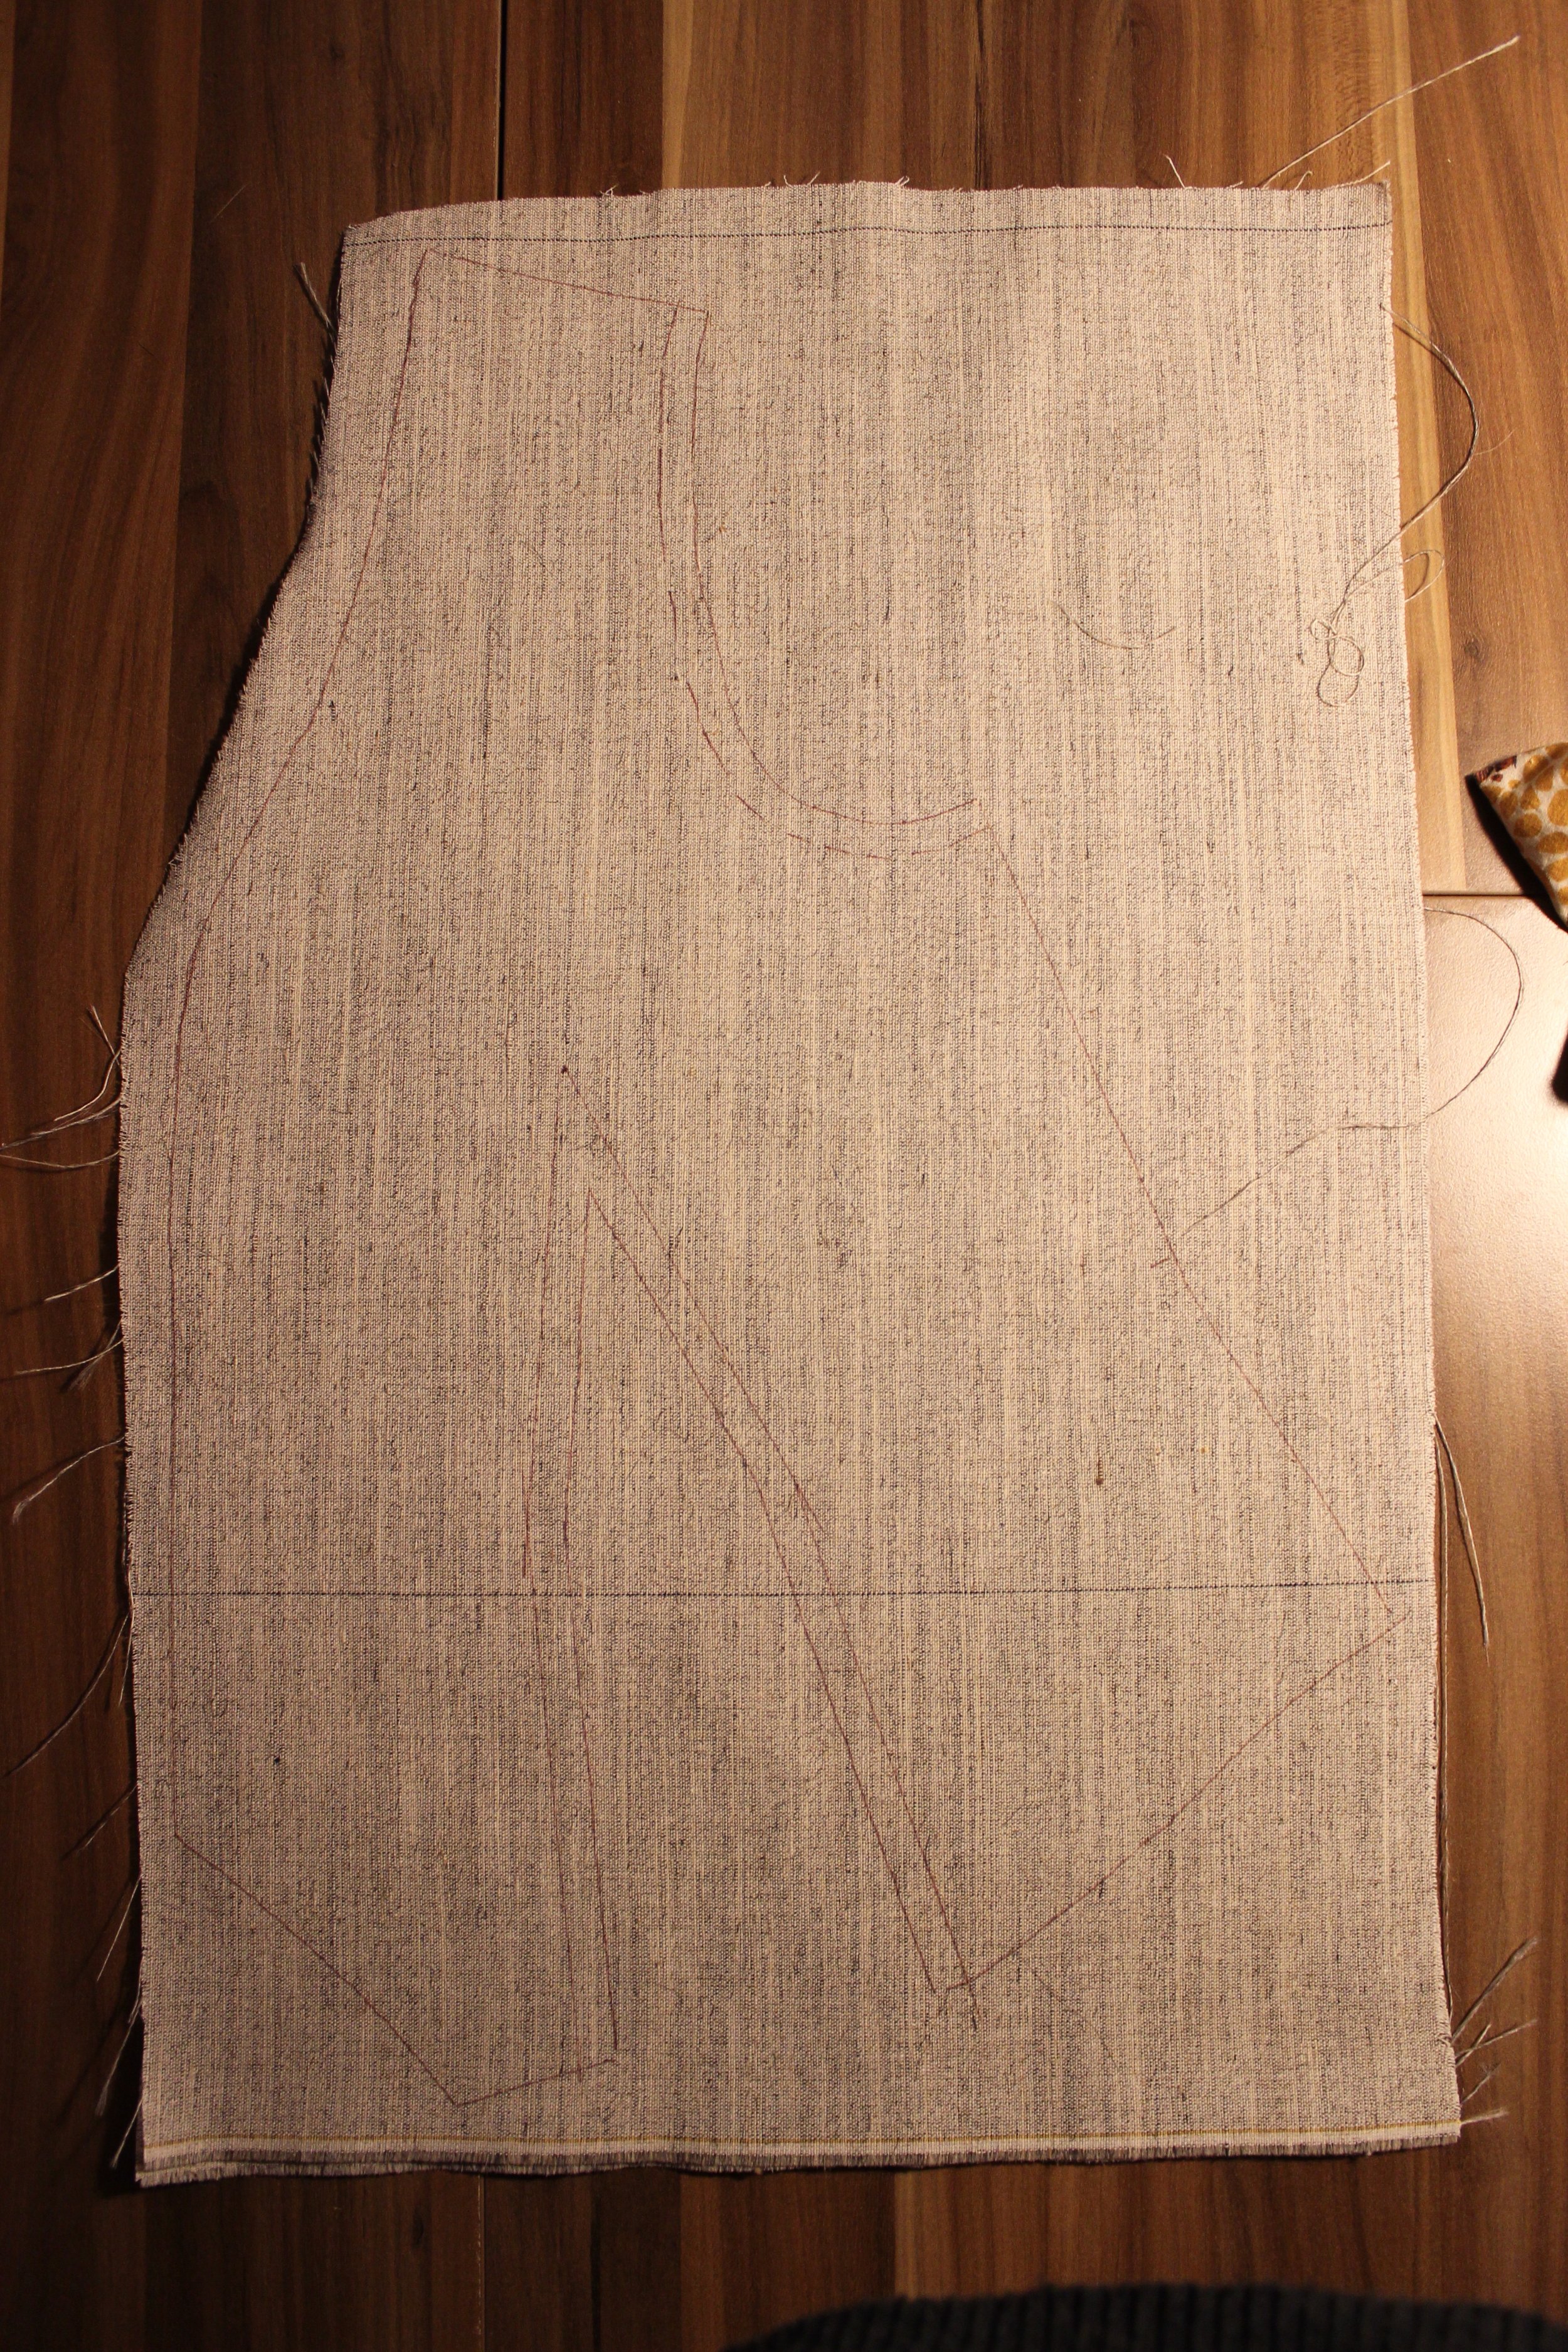
The Veronica features a single dart on each side of the front for shaping, so the next step was to deal with the dart on the canvas. To minimise bulk, I marked the seam allowance (which was 1 cm / 3/8”) on both sides of the canvas, and overlapped the dart legs one on top of the other. I had to cut up to the tip of the dart to be able to overlapI pinned them into place first, making sure that my pins were piercing the canvas through the markings on both sides. I then basted them into place using some cotton thread, once again making sure to stay exactly on the marked lines.


Here you can choose to machine or hand sew the darts. For the former you’ll want to use a zigzag stitch, but I went with the slower approach. I did some cross stitches on both sides of the canvas, securing the overlapped flaps down. I sewed some extra stitches around the tip of the dart, as that is the most compromised area. My final preparatory step for the canvas was to trim the seam allowances off the armscye and the front edges to minimise bulk and allow for a smoother curve.

Turning my attention to the self fabric, I basted and sewed the darts closed as instructed, with the right sides facing. I gave them a good press using a tailor’s ham, lots of steam and my makeshift wooden clapper. I also added some lightweight fusible interfacing on the area where the welt pockets were going to go to add some extra strength to the pocket opening.
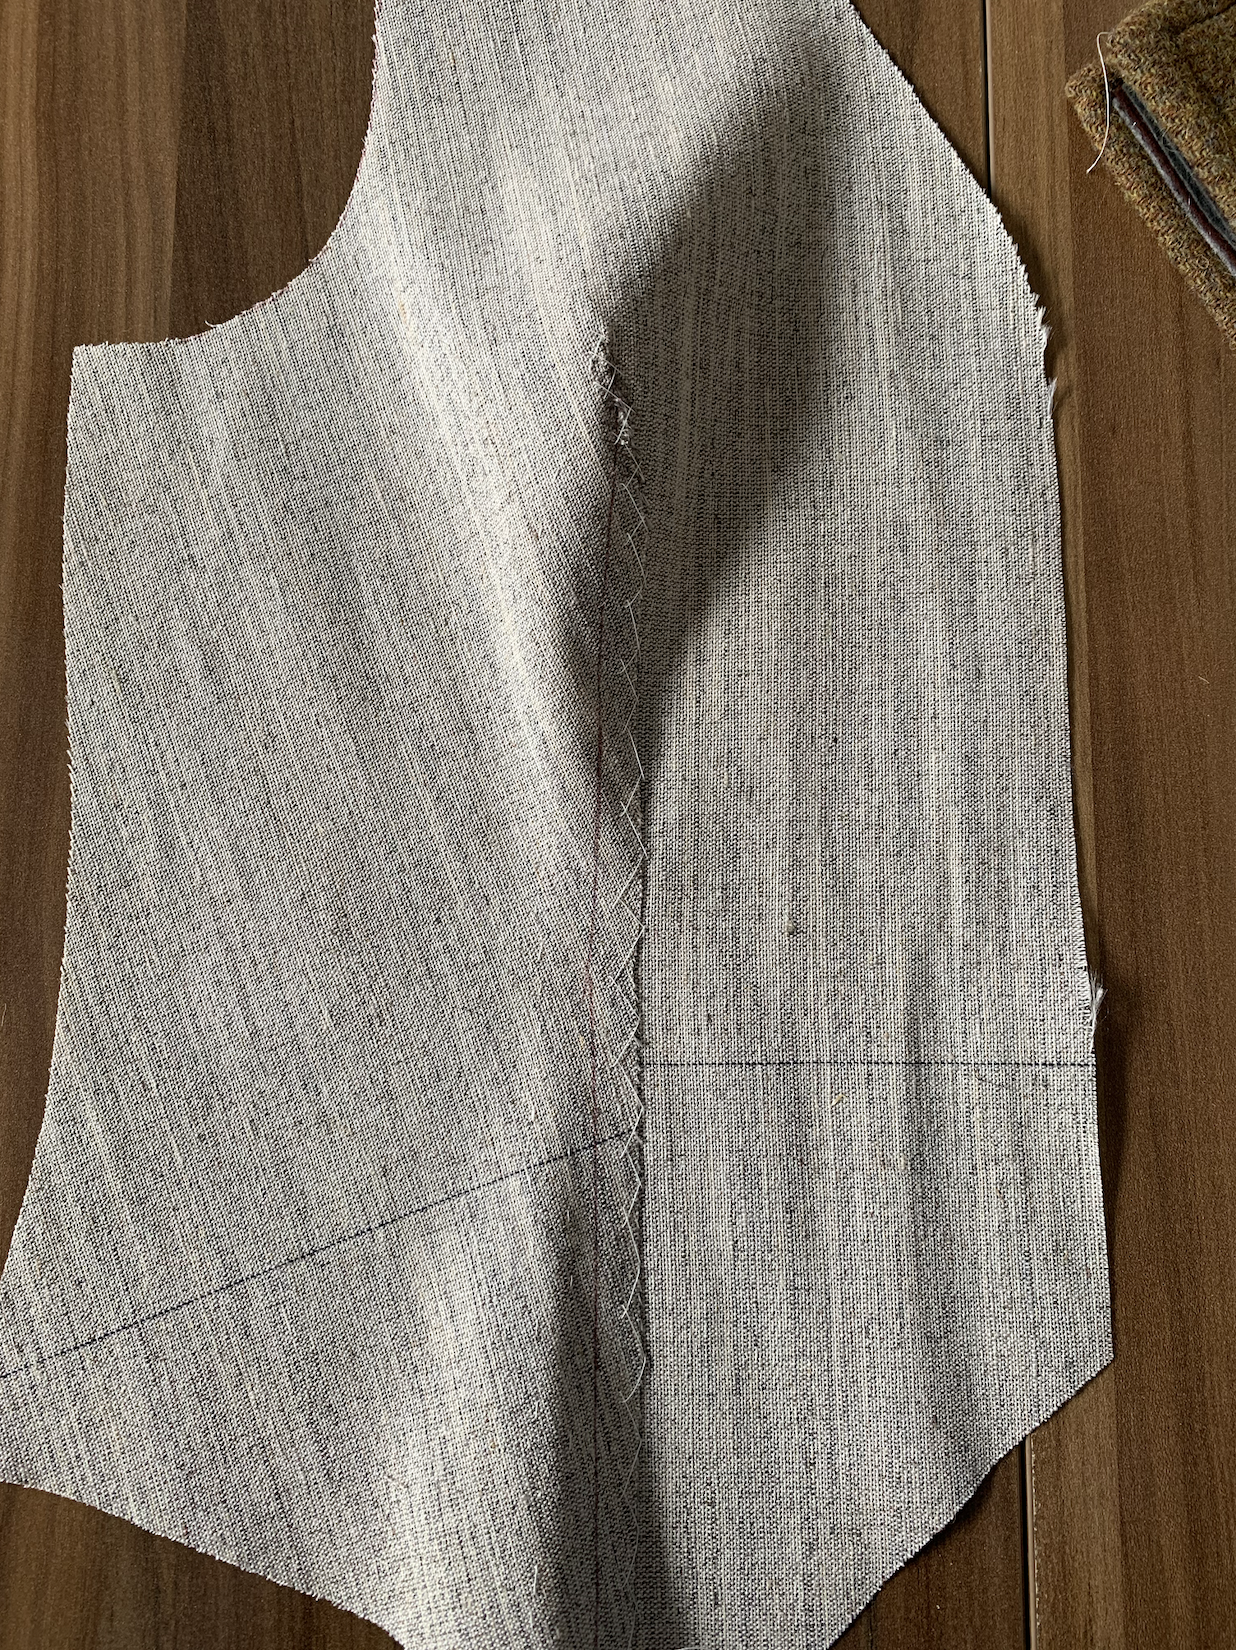
With the canvas and the fabric layer both ready, it was time to combine them together. To do so, I layed the self layer down with the wrong side up, and placed the canvas on top. I lined up the shoulders, the side seams and the hems, as the armscye and the front edge won’t line up edge to edge with the trimmed seam allowances. I placed a few pins to keep everything in place, and then started to baste them together using some cotton thread. I don’t think it hugely matters how many rows of basting you do, however many you feel you need to keep everything secure should be good. While basting them together I tried to keep the rounded shape created with the dart, and supporting the two layers with a tailor’s ham was super helpful. For the front edge, I’d recommend staying about 2-3 cm / 1” away from the edge of the fabric, as we’ll be sewing some tape to the front edge in the next step which will take up another centimetre of space on the edge of the canvas.
Once I was satisfied with the basting job and everything felt smooth and aligned, I moved on to taping the front edge. I used some 1 cm / 3/8” wide cotton twill tape I had in my stash, which I had pre-shrunk by submerging in water for 10 minutes and pressing it with a hot, dry iron. I aligned the tape with the edge of the canvas, which sat 1 cm away from the edge of the fabric. I sewed both sides of the tape down using a cross stitch and a felling stitch. The outer edge gets sewn onto the self fabric, while the inner edge gets sewn on to the canvas layer only. I have two tips for this step:
Apply a bit of tension around the neckline to prevent any gaping that may occur on that area. This creates a really beautiful fit that sits close to the chest.
When you’re sewing the outer edge of the tape to the self fabric, make sure your stitches land a few millimetres from the edge of the tape and the canvas. This will ensure that they won’t show on the right side after your sew the facing on. For the first side I did, I used a felling stitch and didn’t go as far out as I should have, so you can kinda see tiny stitches along the very edge of the front. For the second side, I used a cross stitch and managed to completely hide those stitches deep in the seam allowance.


With the canvassing and the taping done, I pretty much just followed the instructions to sew the rest of the waistcoat.
Other Construction Details
I’m pretty loyal to my preferred way of sewing welt pockets (click here and here for some great tutorials from Diane Deziel, from whom I learned to sew welt pockets and never looked back) so I just went ahead and did my own thing with the construction of the pockets. I documented the whole process on my Instagram stories and saved them under this highlight, so you can check that out if you’re curious. I usually get much smoother and sharper results using this technique, but the canvas layer caused some trouble around the corners of the pockets. I couldn’t get them as crisp as I would have liked with the added bulk, so I will definitely experiment with that area in the future. I’ll probably try trimming the canvas around the pockets and see how that goes.
I also worked some handsewn buttonholes down the front! I’ve been admiring handsewn buttonholes for years now (check out the queen of handsewn buttonholes, Julia Bobbin!) and I finally taught myself how to do them a couple of months ago for this article I wrote for Threads Monthly. After sewing many, many samples for the tutorial sections of that article, I felt confident enough to try them on an actual garment! I opted for a keyhole style as I was planning on using shank buttons, and used some topstitching thread from Gütermann in a matching dark brown. They aren’t perfect, but I’m so proud of them :o)

I’m also in love with the buttons I chose. I got them from my local haberdashery without a project in mind because I loved the organic shape and texture they had, and I’m so happy that I got to use them on something so soon after. I feel like buttons have the power to completely change the feel of a garment, and in this case I think they really elevated this waistcoat and made it look that much more special.
Phew, I think that’s it! I hope you find this post useful if you too are apprehensive about doing a full canvas front waistcoat or even a jacket. I’m a big believer in learning-by-doing, so my advice would be to just go for it and figure it out as you go! This whole process was muuuch much less scary than I thought it would be, I’m so proud of and happy about the final result.
Happy sewing!

