Making a Reversible Fowler Quilted Jacket
Hiii! It’s been a rocky couple of years which meant I could not prioritise this space (or even my Instagram), but I really want to get back into posting about my projects in a semi-regular basis. I thought the perfect way to start would be by sharing all the juicy, nerdy sewing details about one of my newest makes - this reversible Fowler Jacket!
Pattern
Let’s talk about the pattern first - this is the brand new Fowler Jacket from Closet Core Patterns. If you’re reading this in January 2026, it’s available as part of Closet Core Crew (you can either join for a month or the whole year to get it). It will be available as a regular, stand-alone pattern starting February 2026, so if subscriptions aren’t your thing - you’ll just have to wait for a month to get it.
Some of you may know that I work for Closet Core Patterns as a Pattern Production Coordinator, which means that I get to witness (and contribute to!) how these patterns are produced from the first muslin to the last sentence of the instruction booklet. I fell in love with the Fowler Jacket from the very first sketch, and I feel very lucky to had some time to make this cool little version for myself.
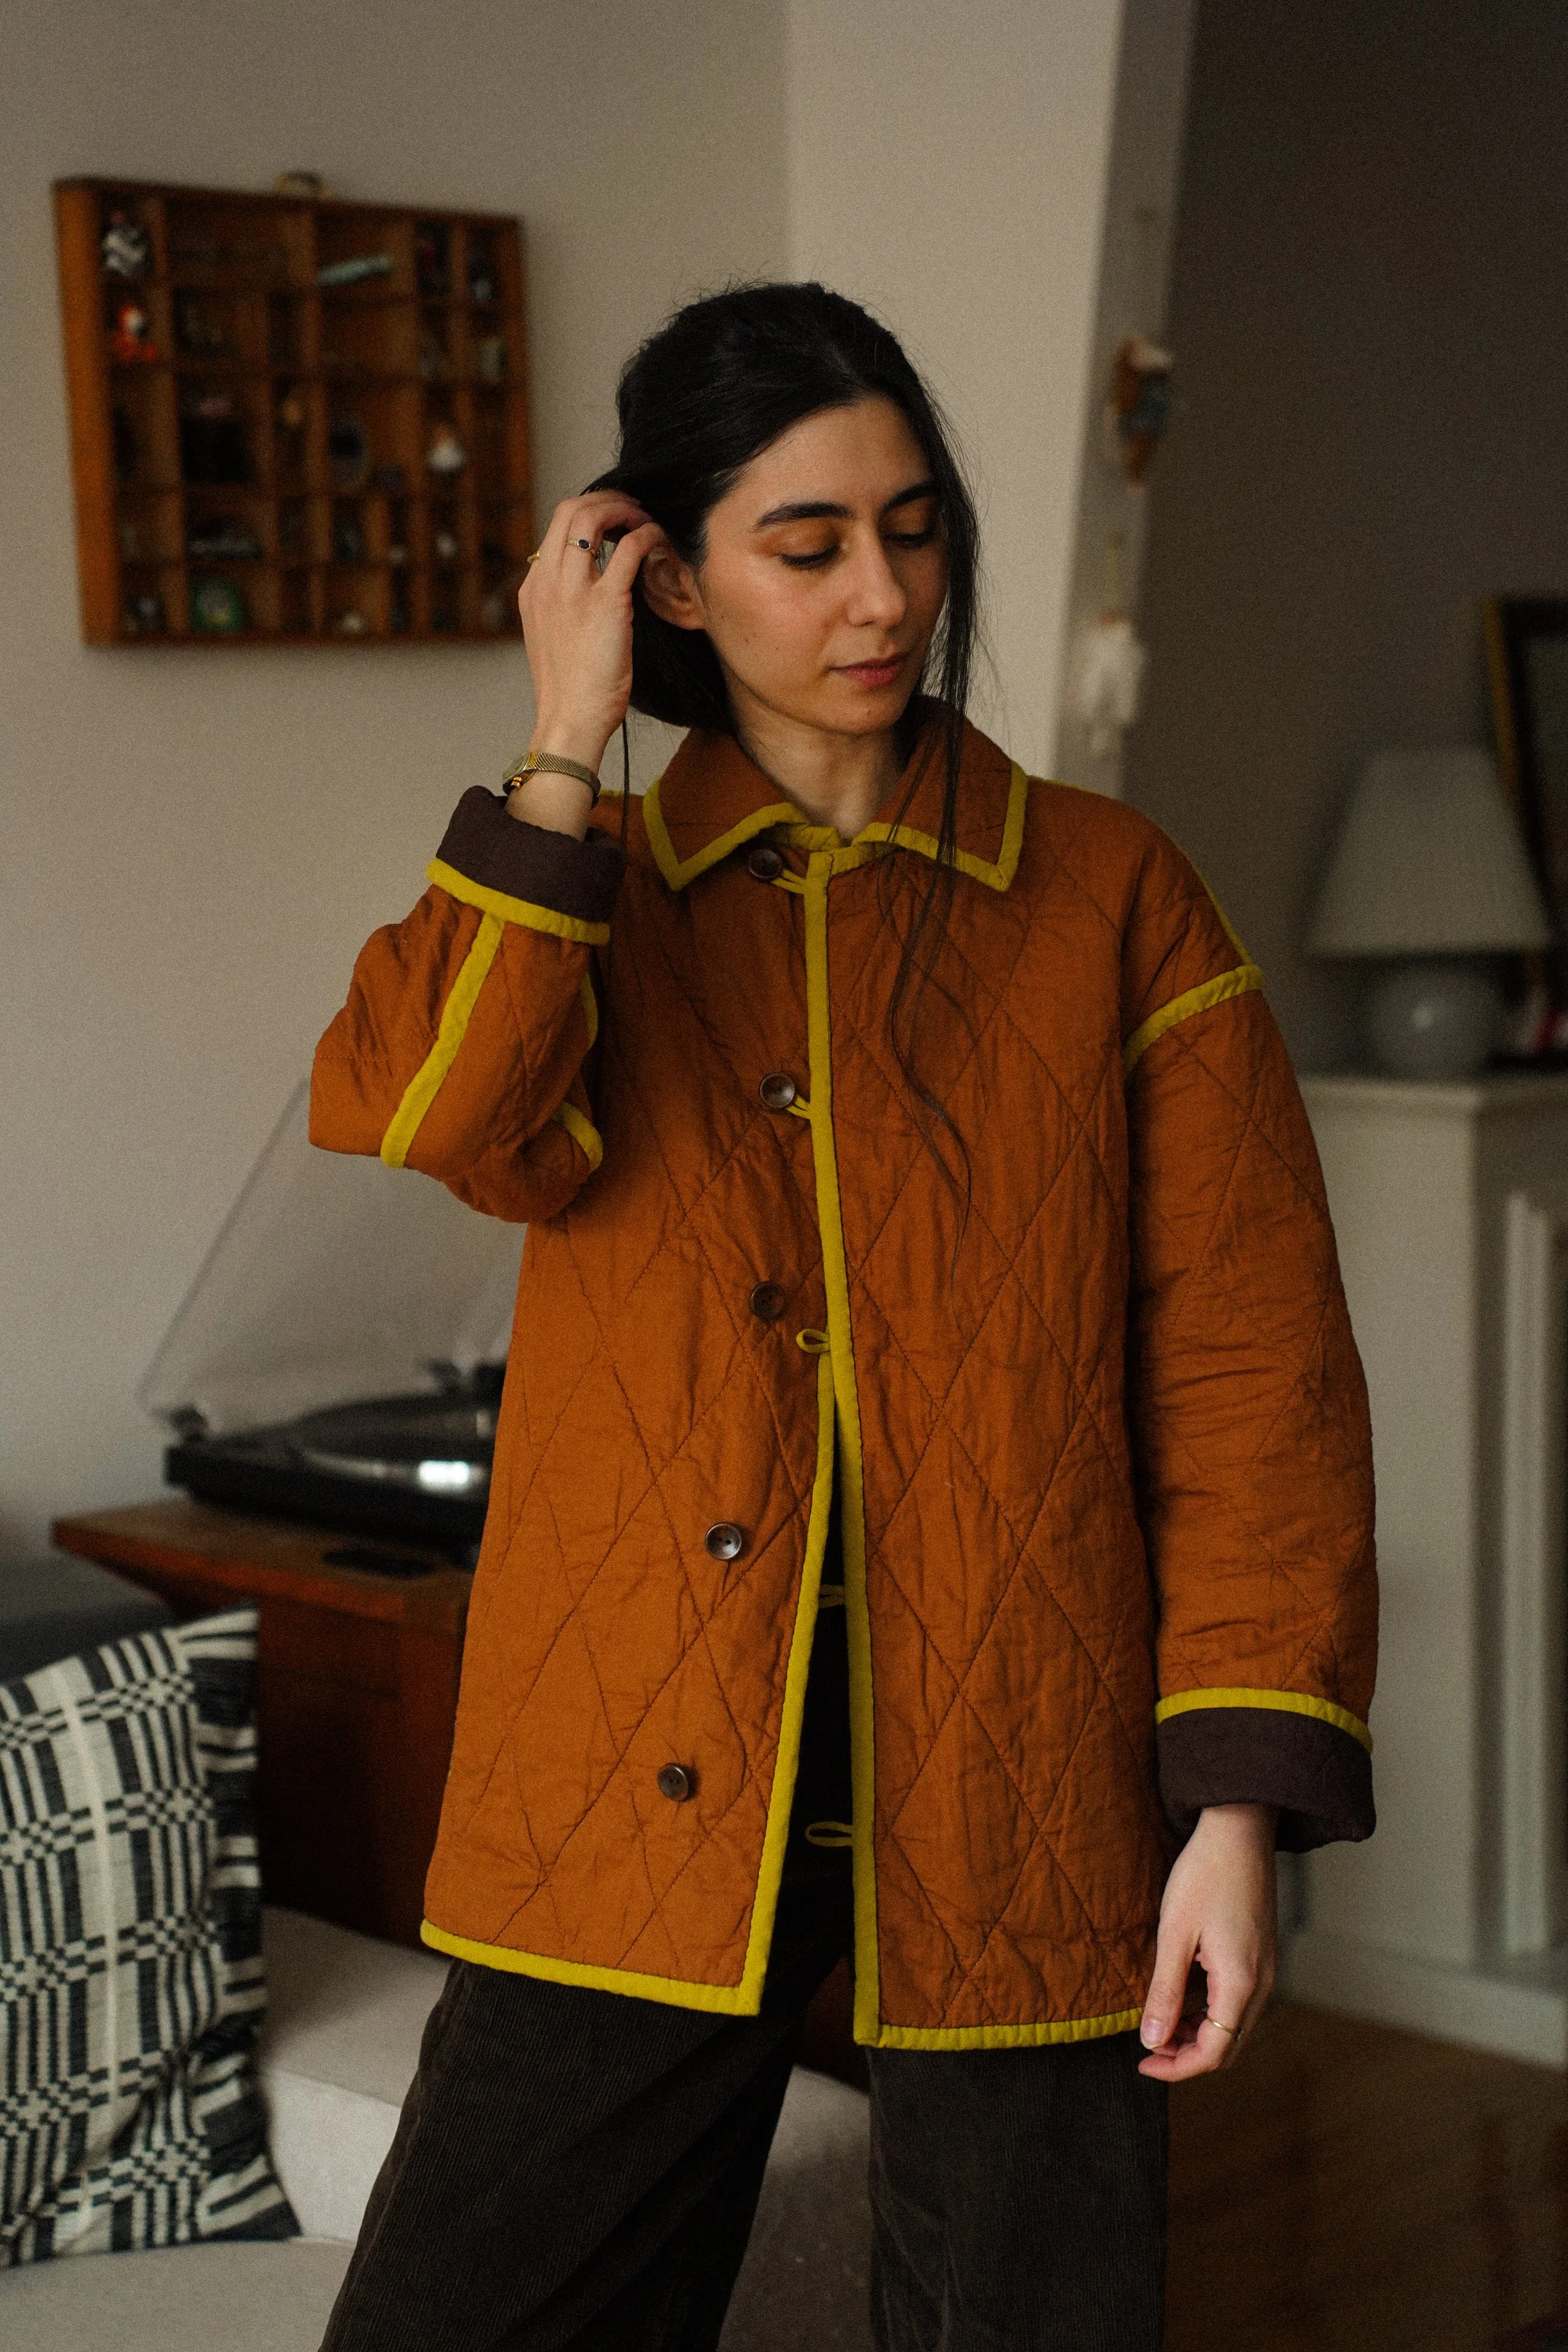
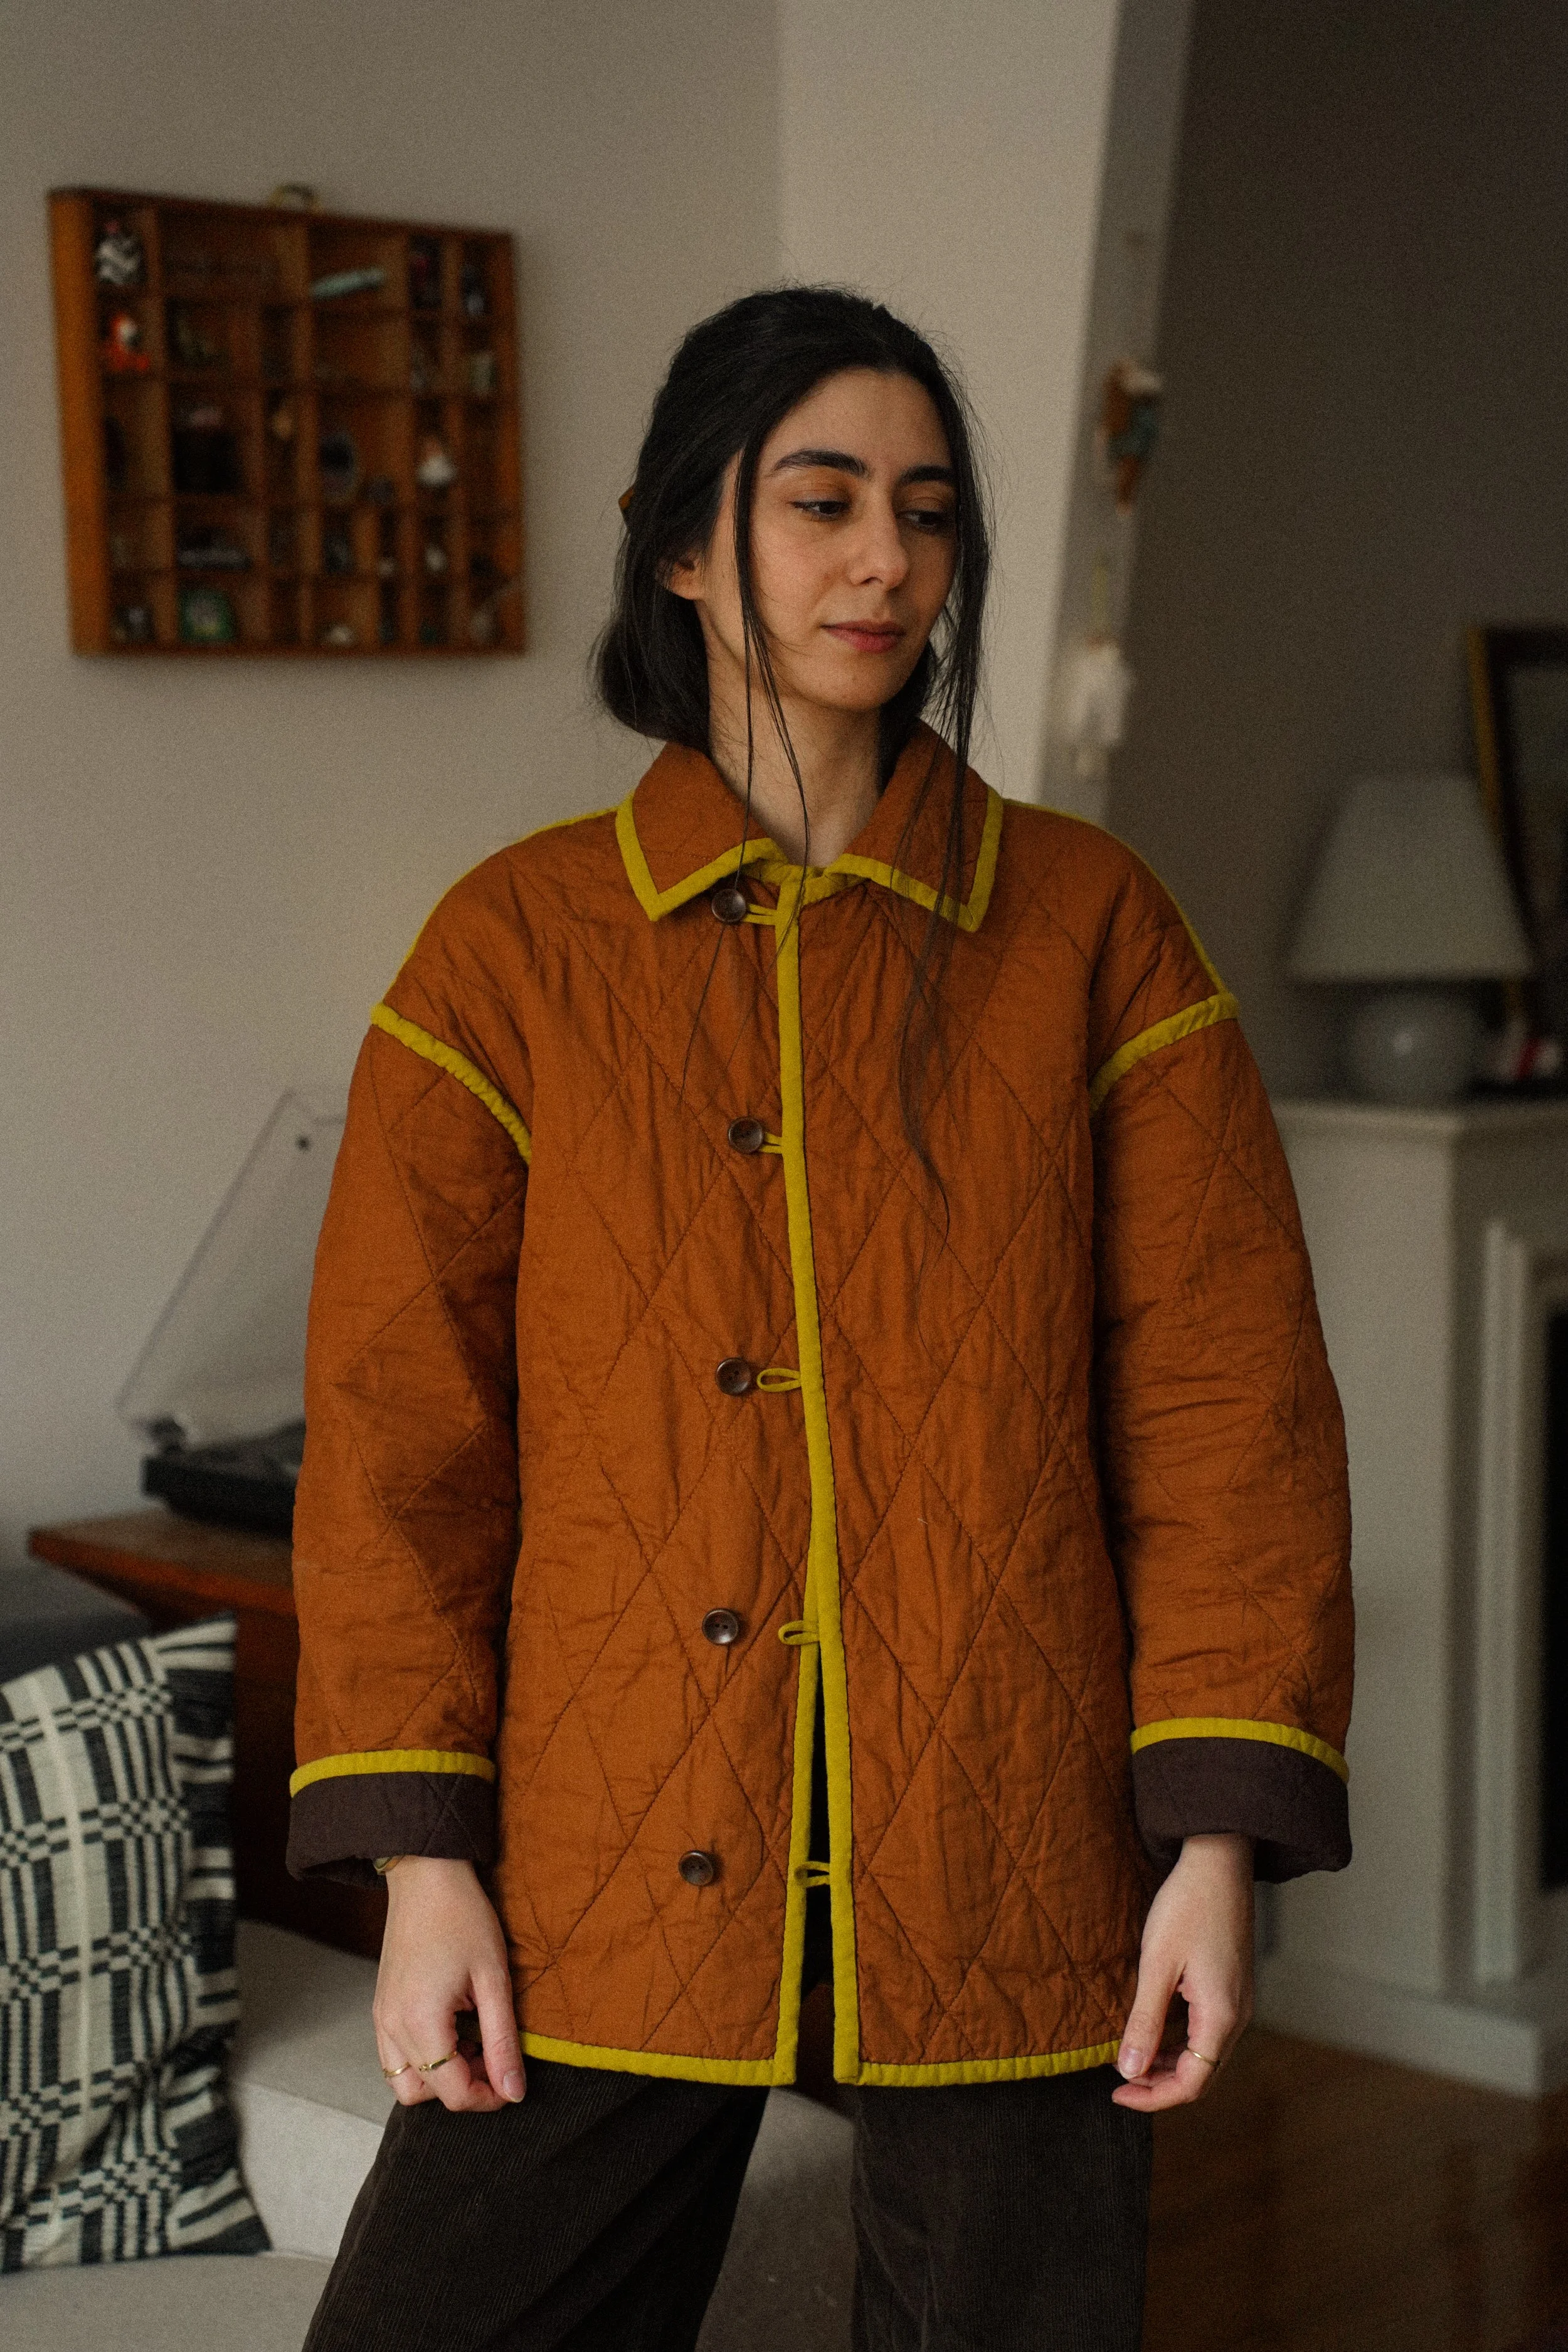
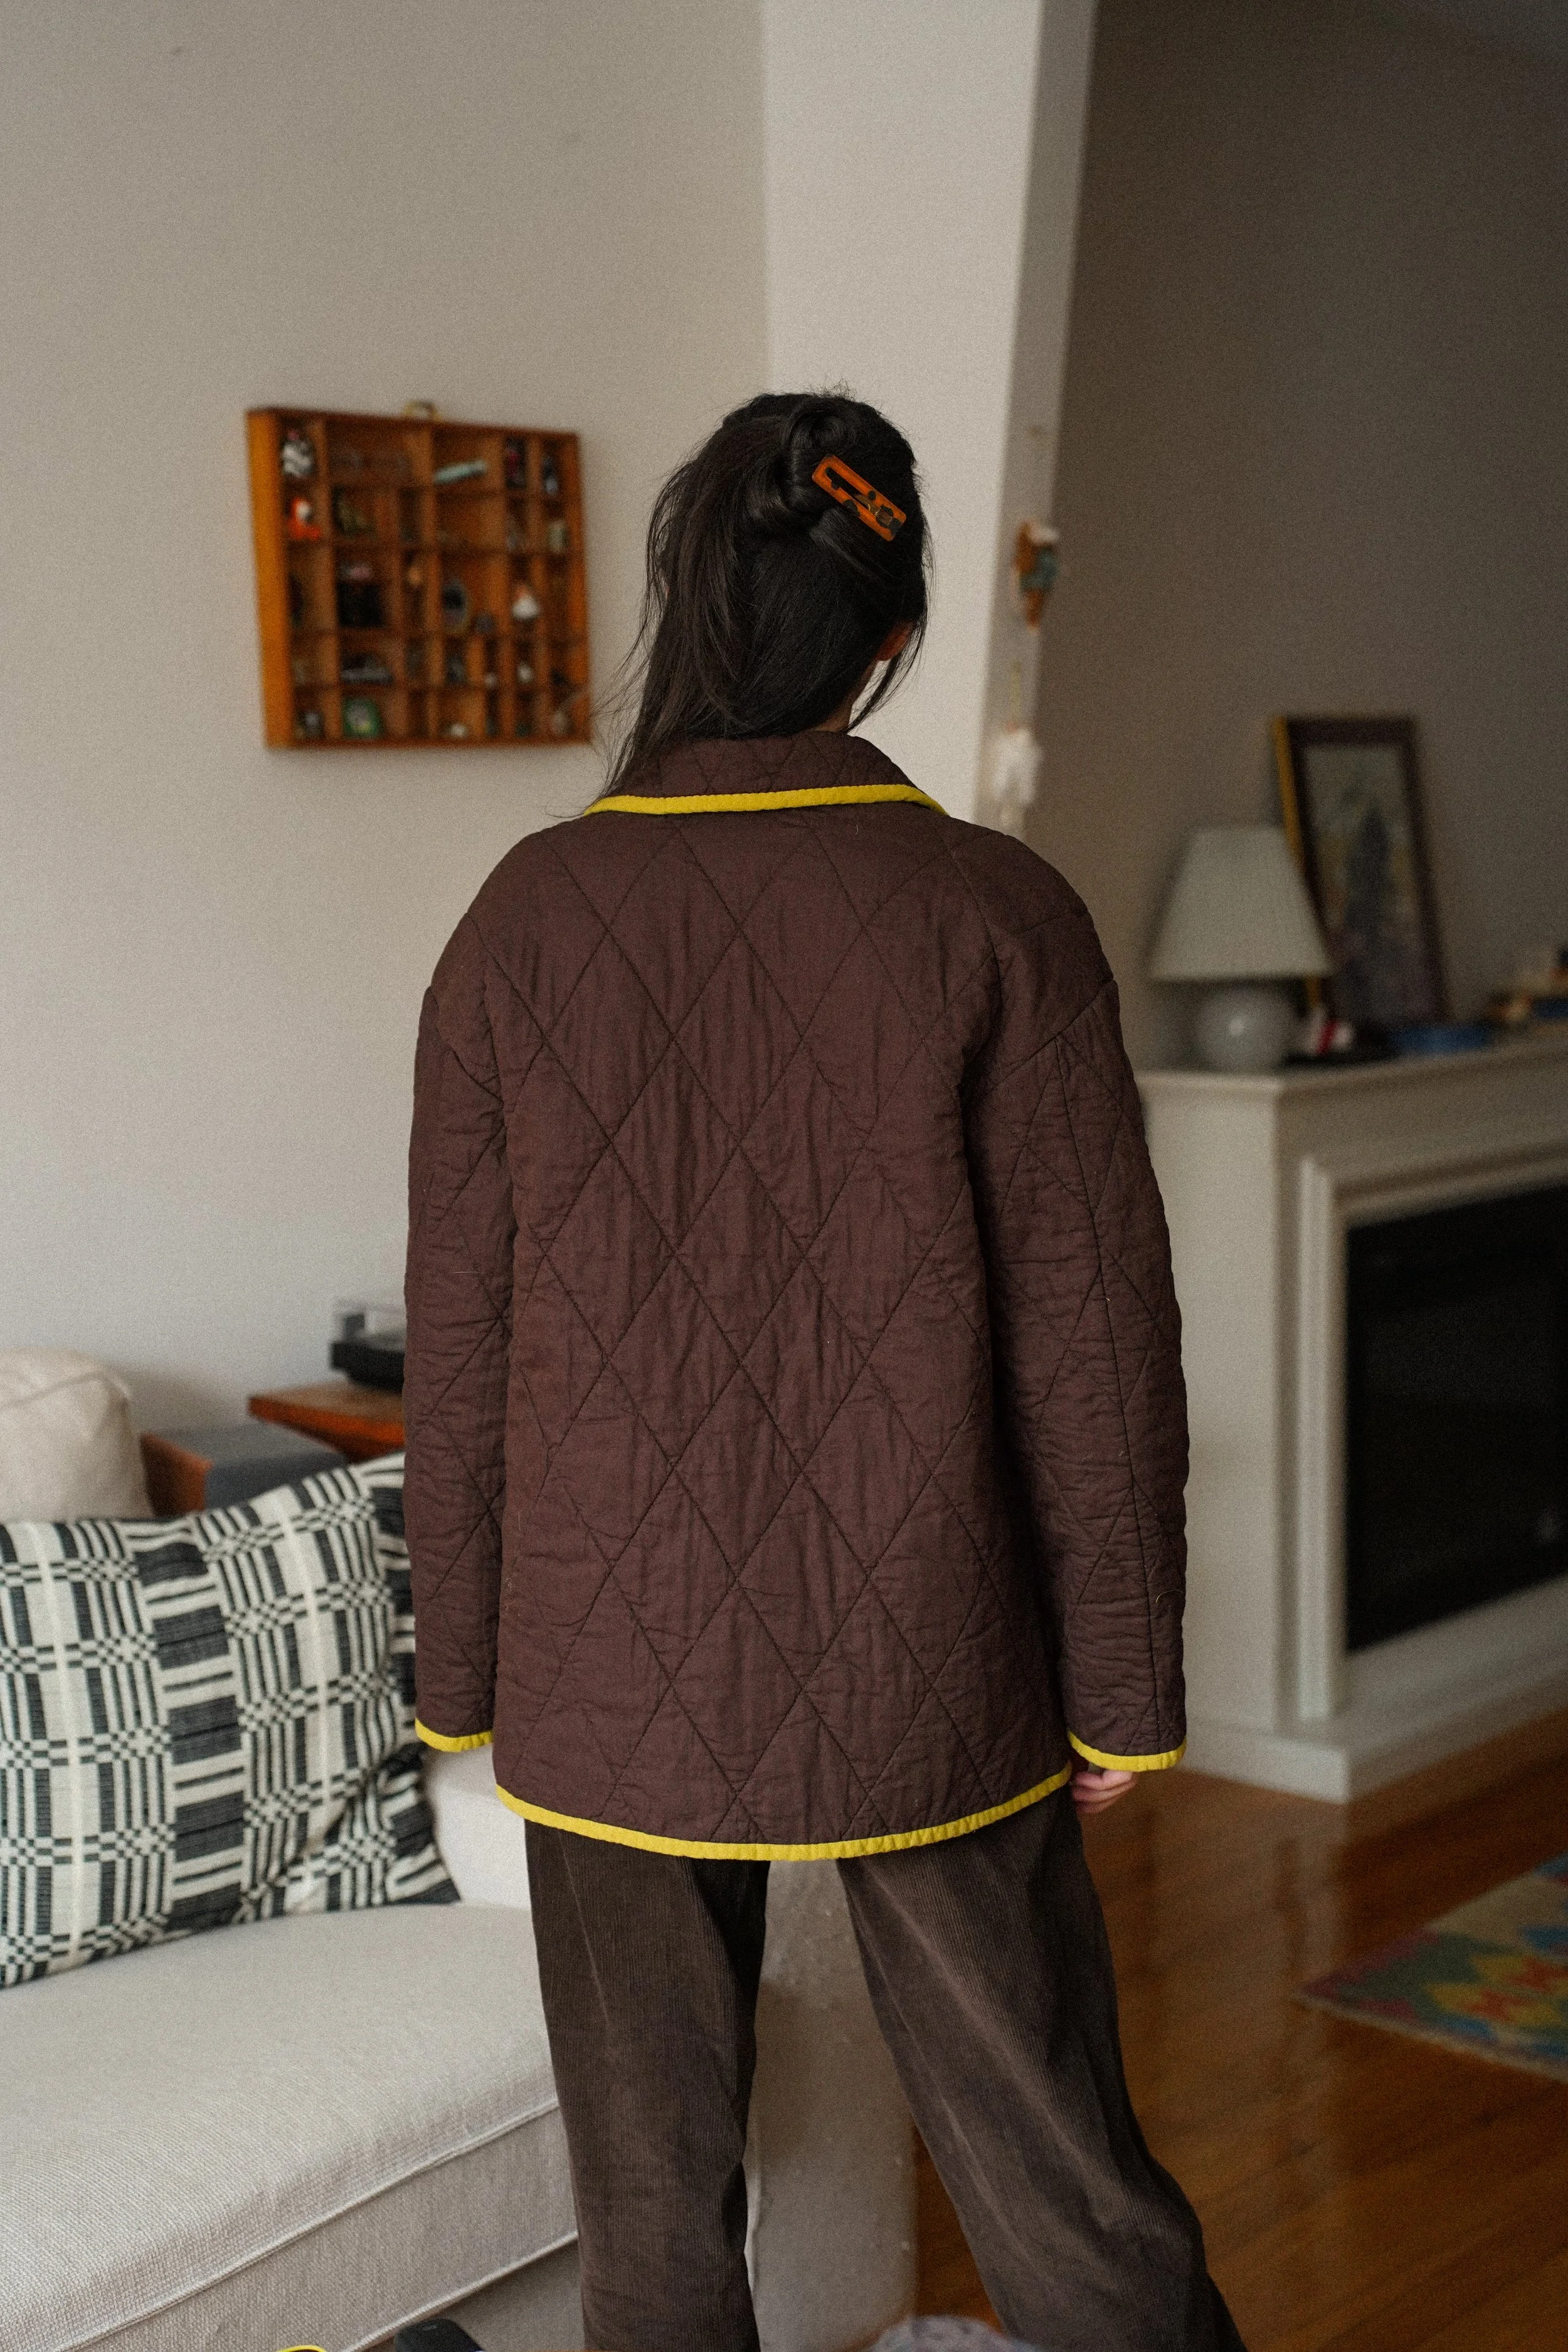
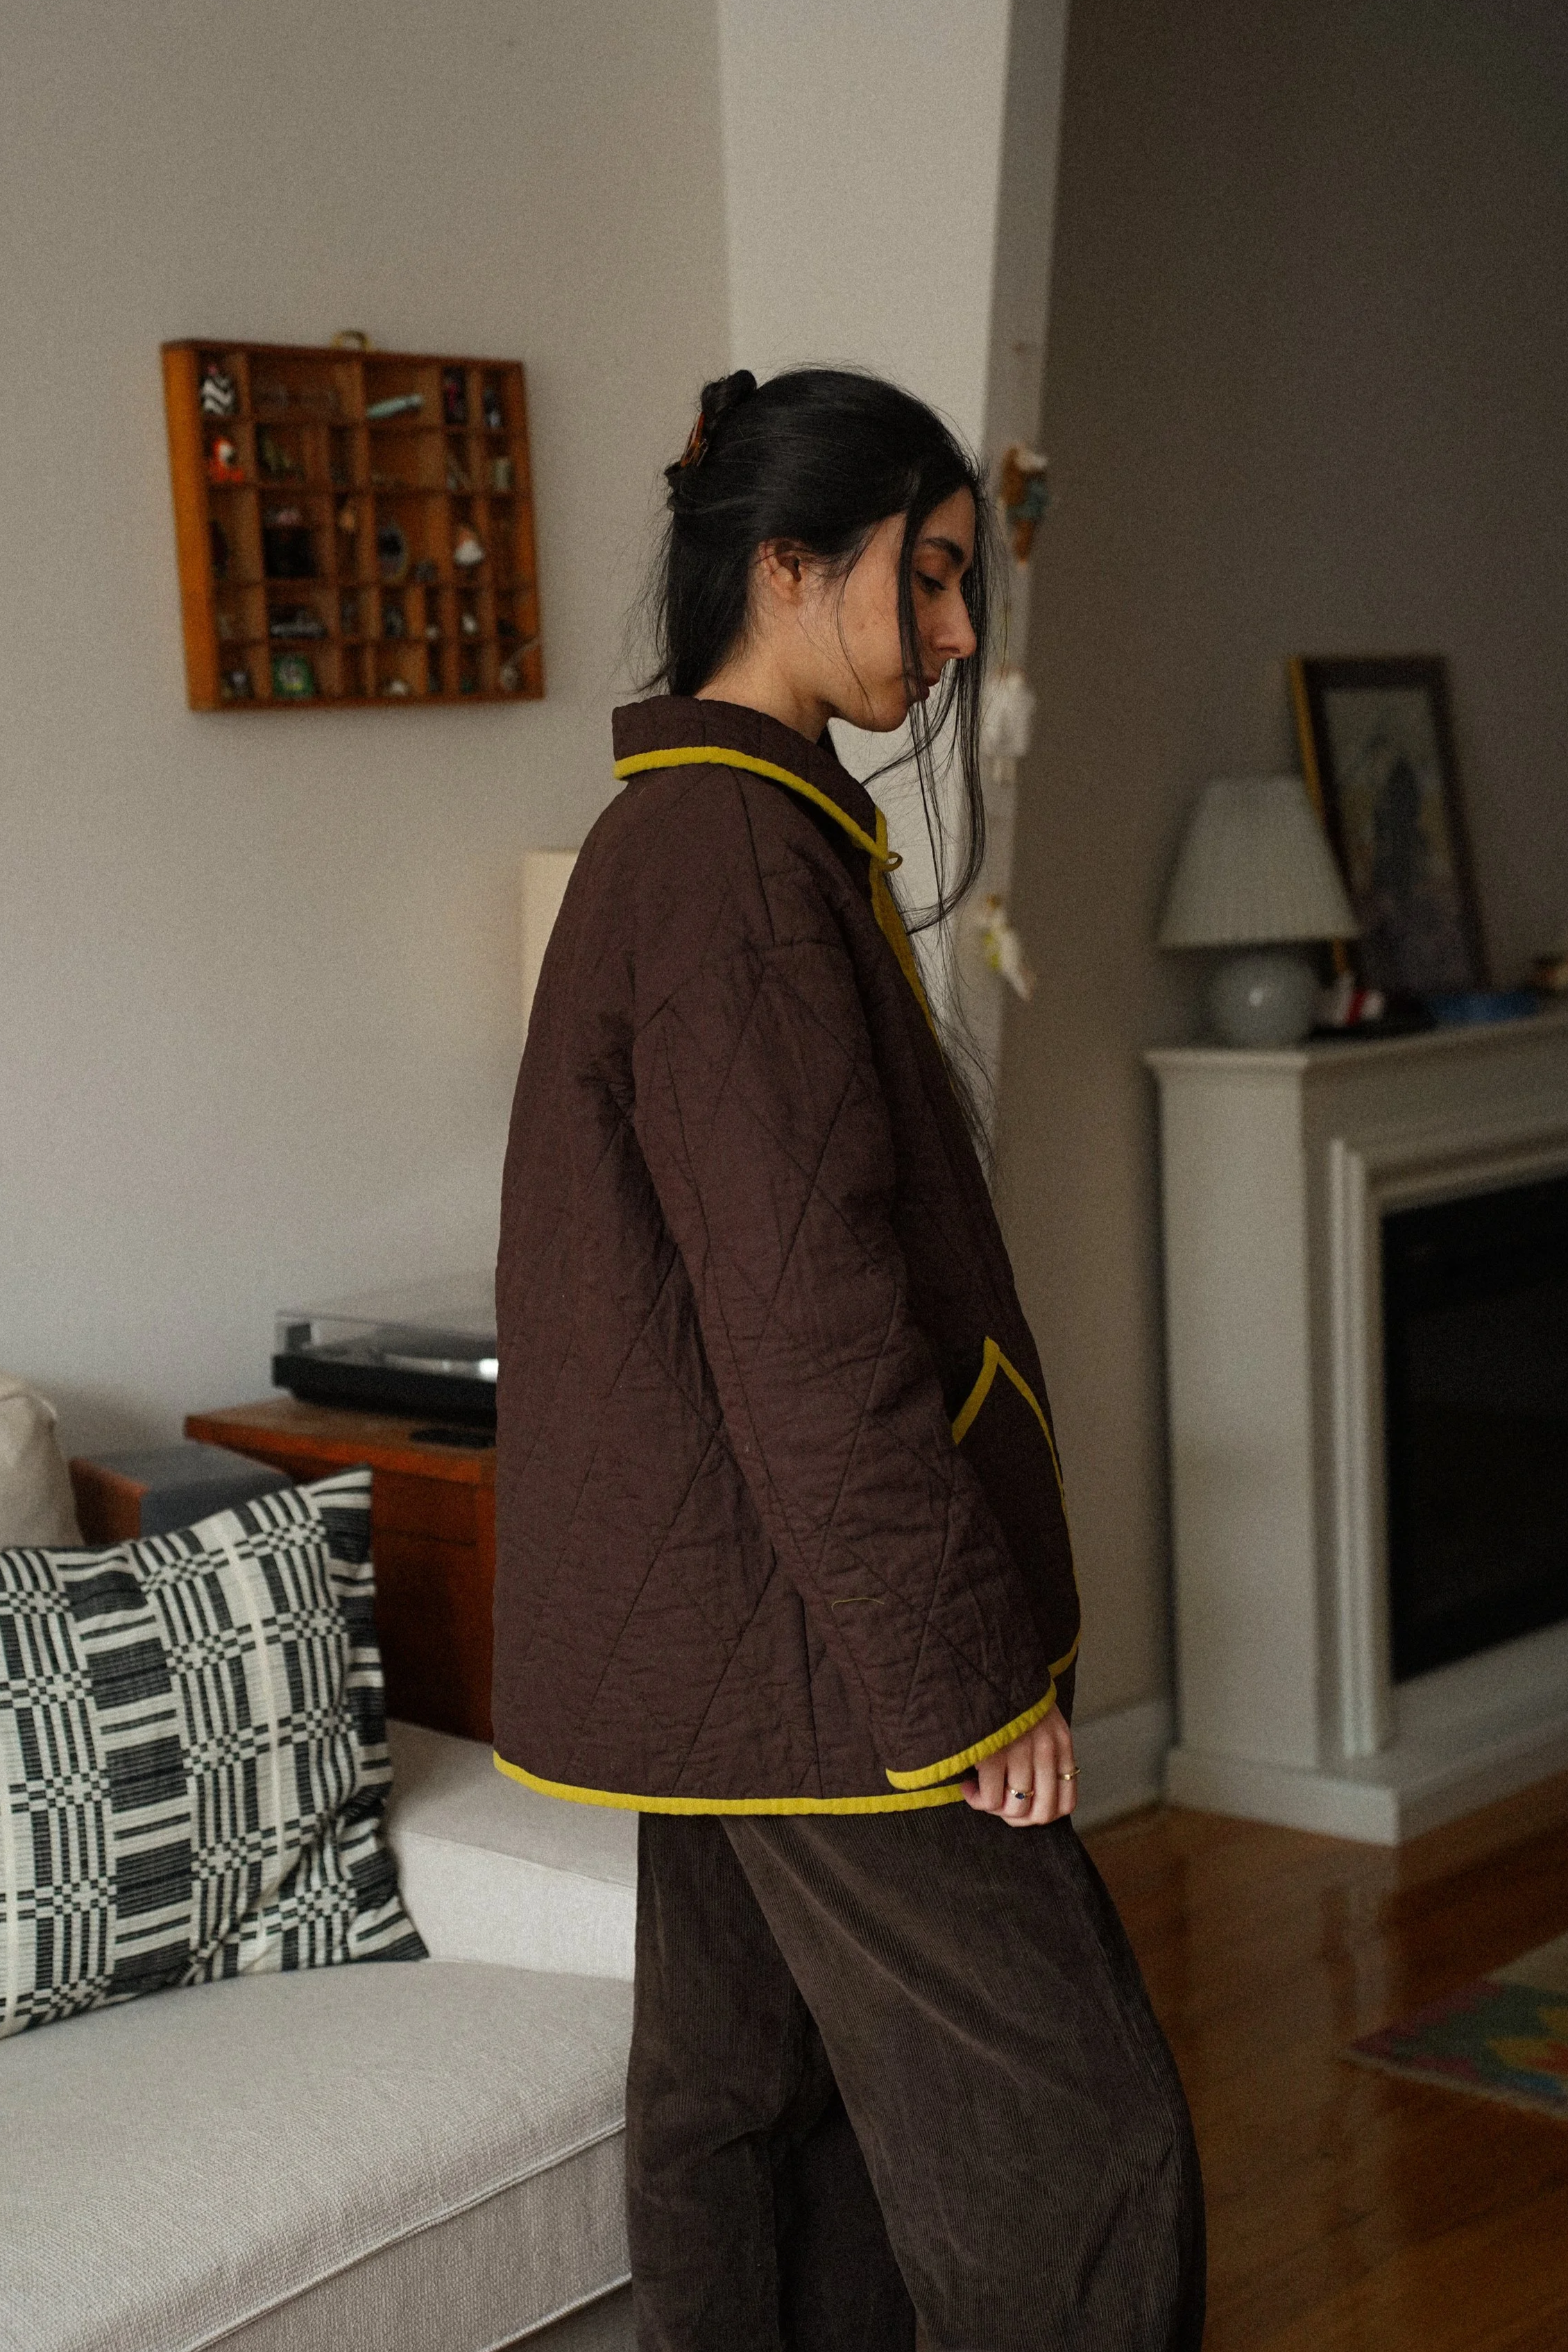
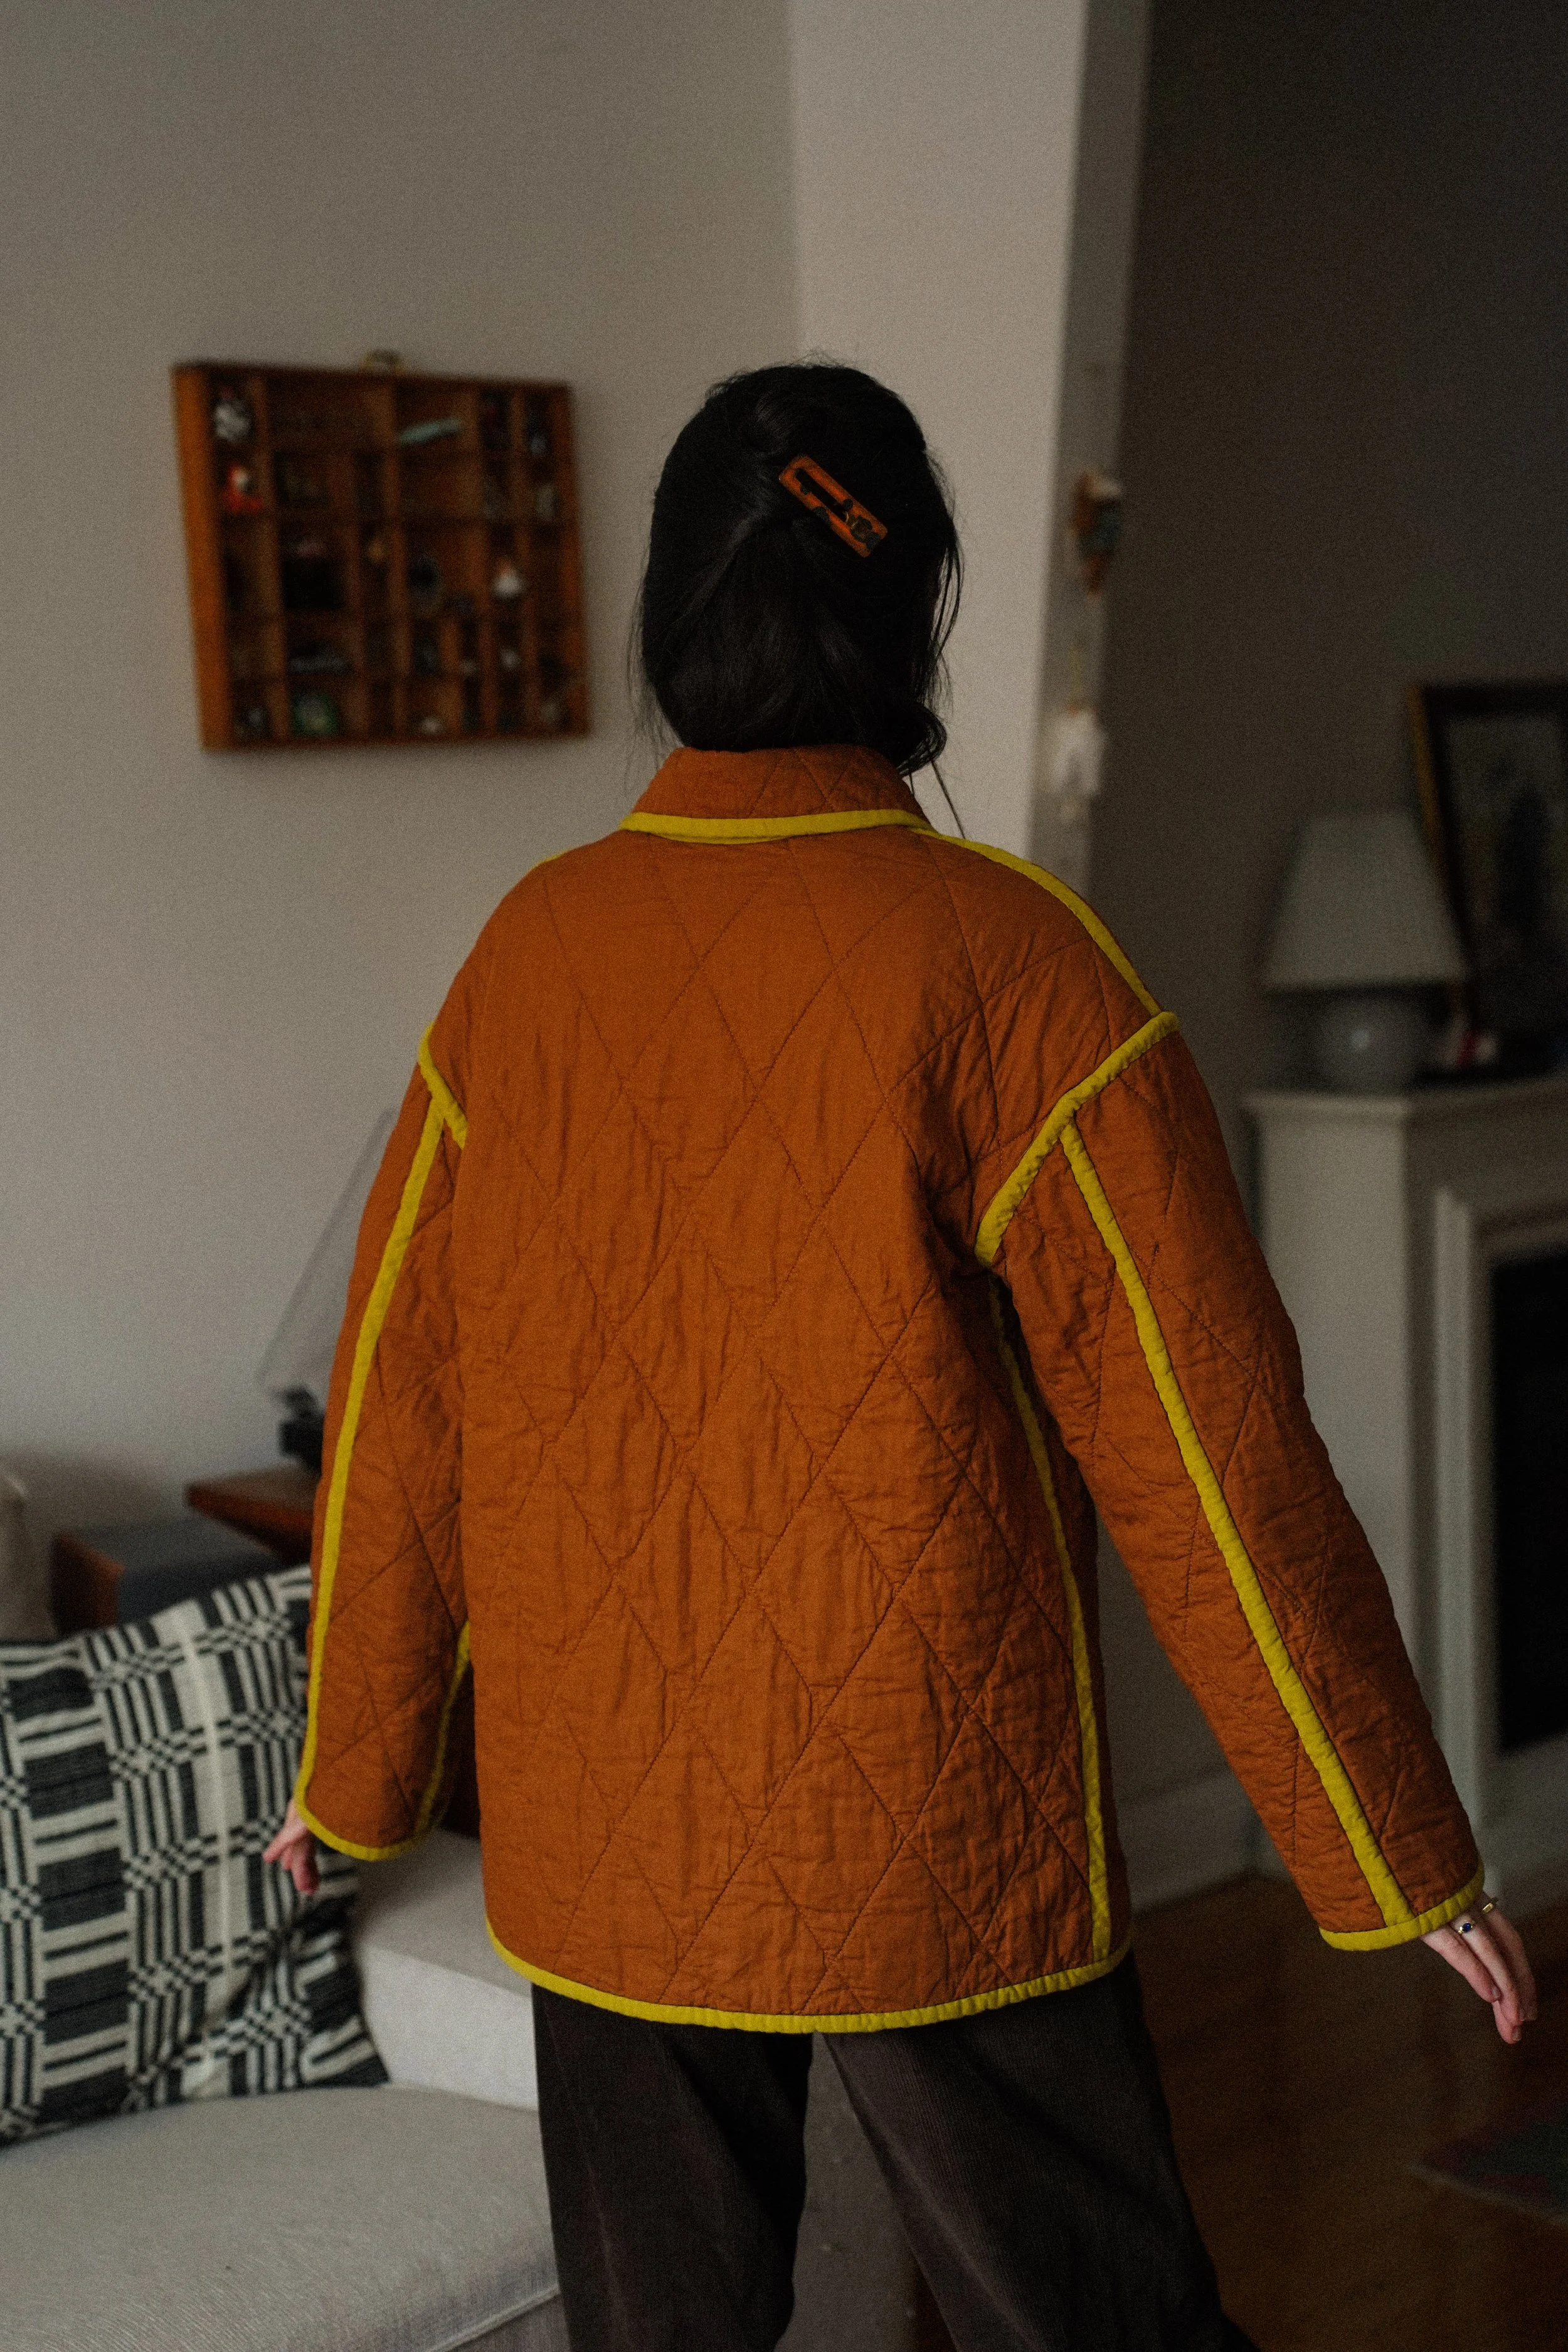
The Fowler comes with two views: View A, a classic barn coat; and view B, a quilted jacket. I made View B with a few simple modifications: I used the longer sleeve length designated for View A , omitted the centre back seam for a cleaner look, and I made it fully reversible.
Sizing + Fit
Because I wanted an extra crinkly result, I decided not to prewash my fabrics - I only washed the jacket after it was completely finished. Doing so means that the fabric slightly shrinks and puffs up in between your quilt lines, and you get this lovely, puffy, crinkly texture on both sides of your quilted fabric. To account for any shrinkage that would occur, I decided to size up to an XS (I would usually be an XXS for this pattern). This is also why I went with the longer sleeves from View A - I didn’t want to end up with sleeves that could be slightly too short post first wash.
Materials
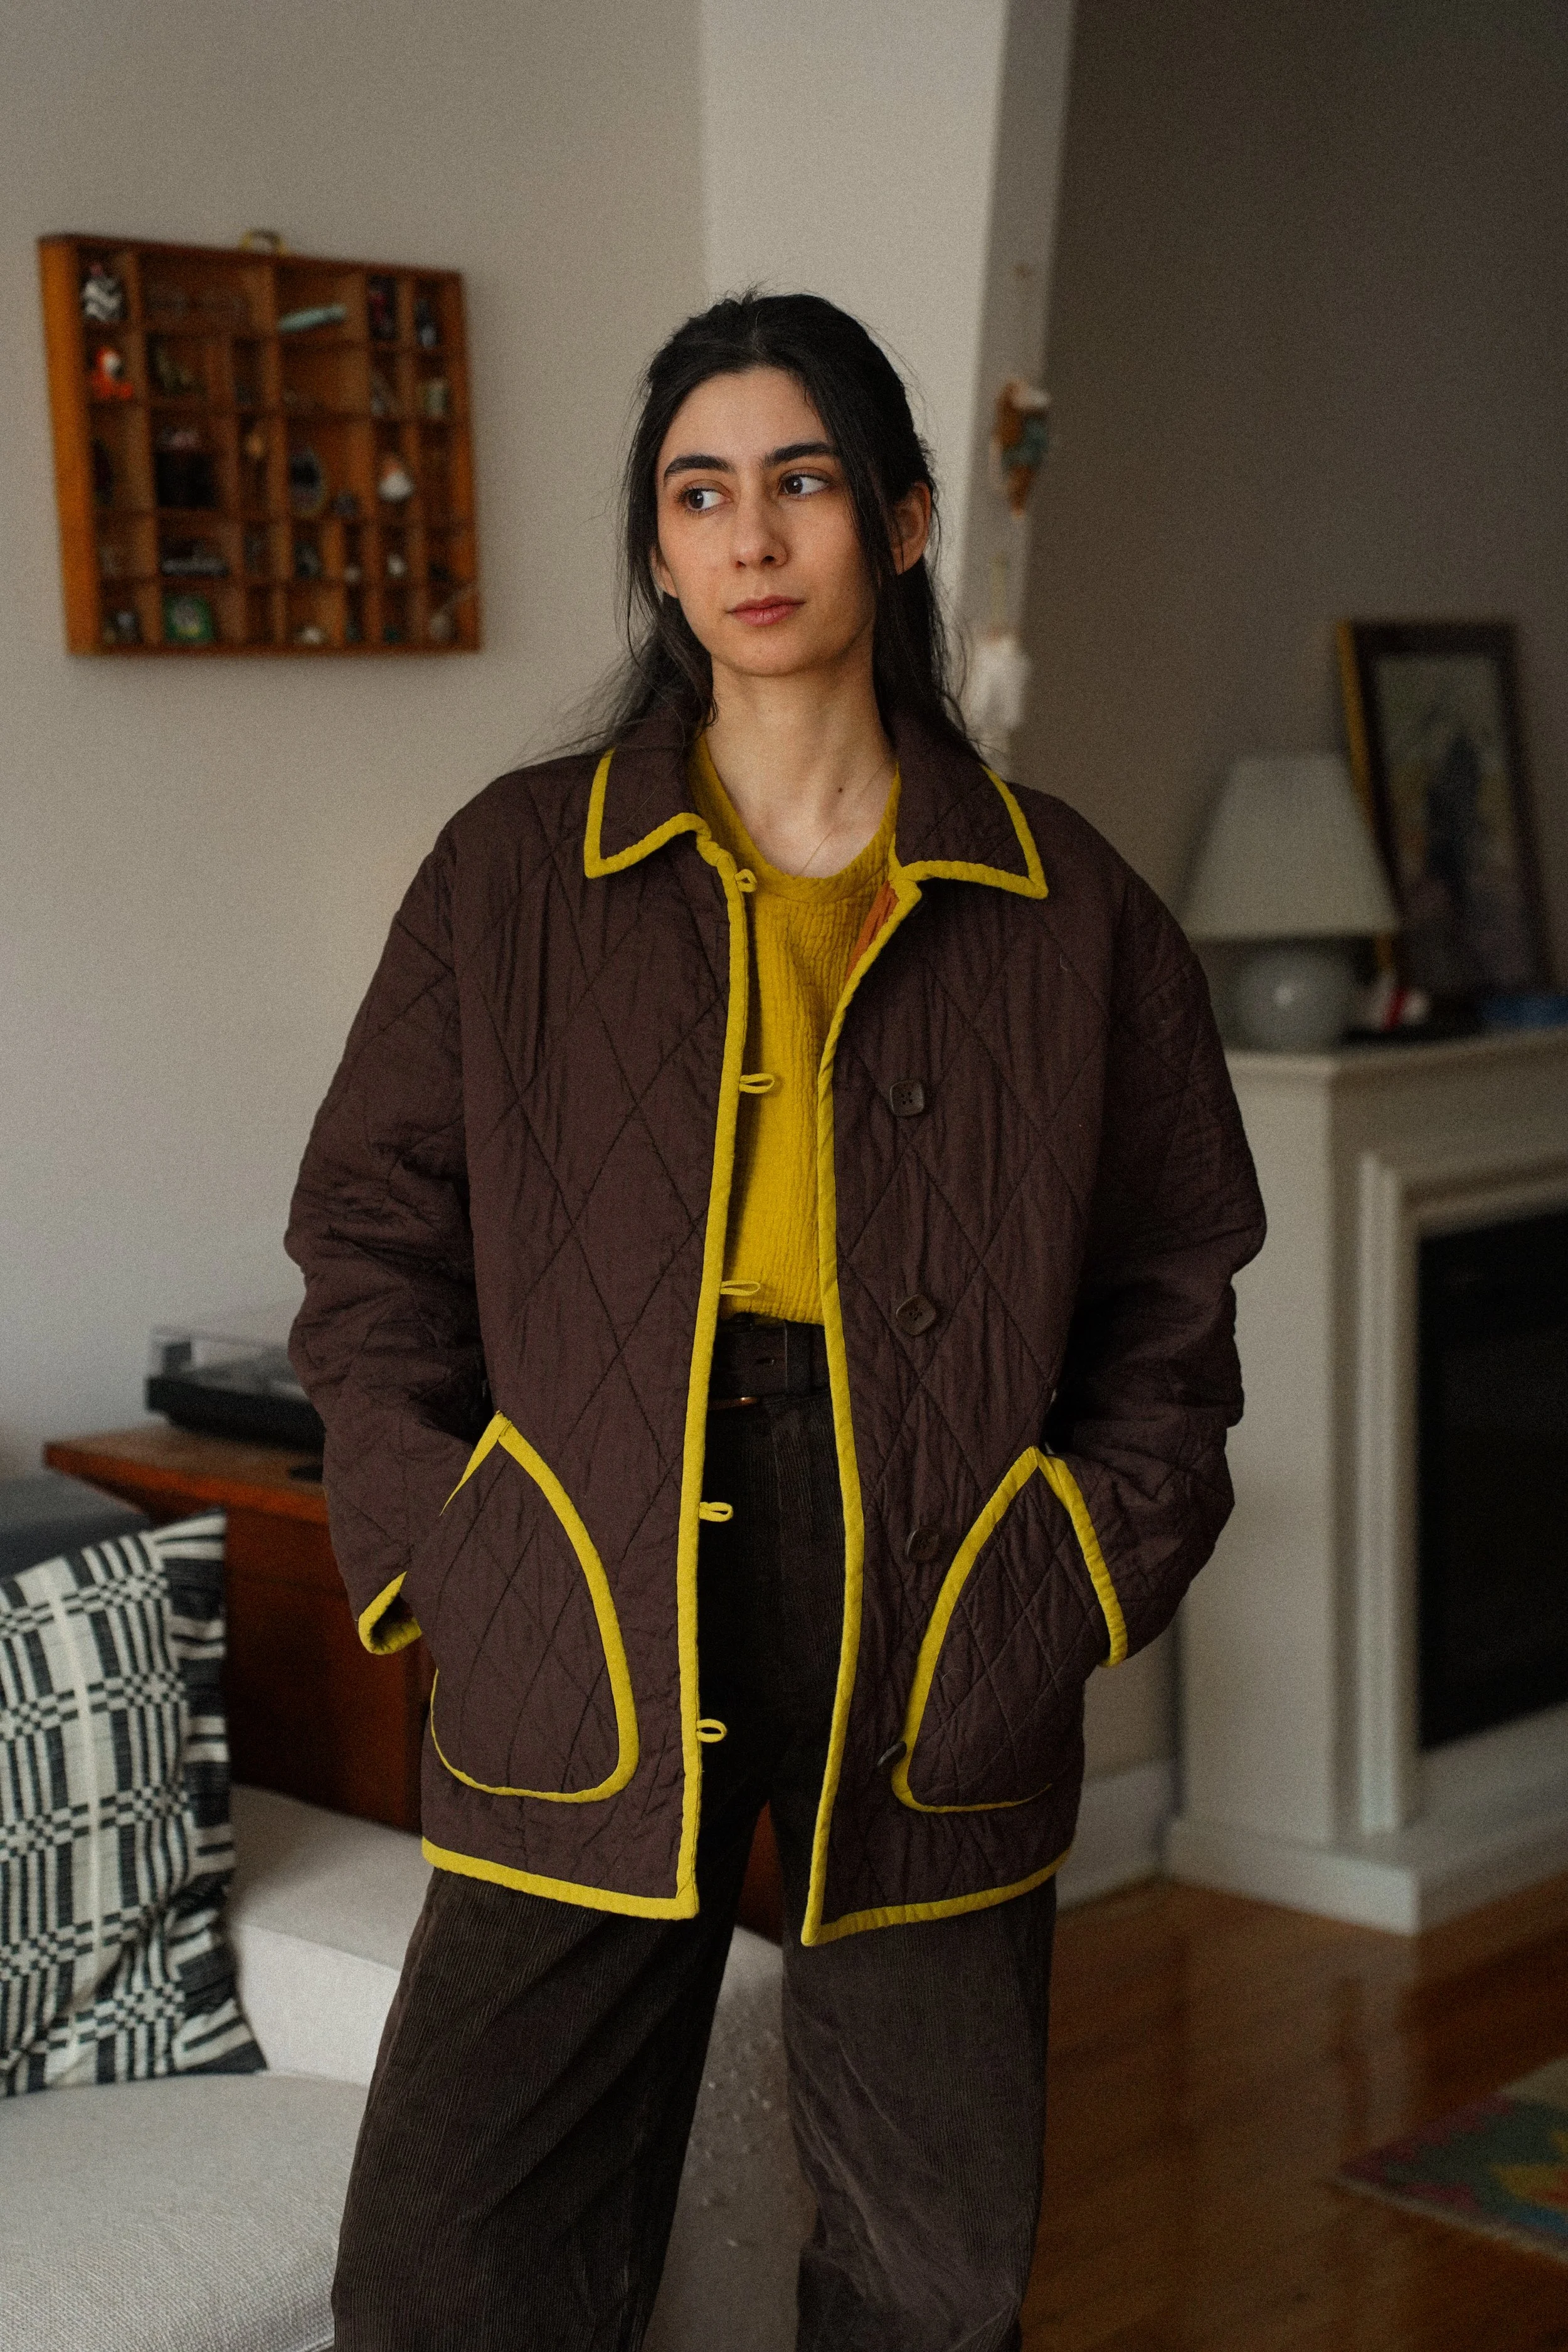
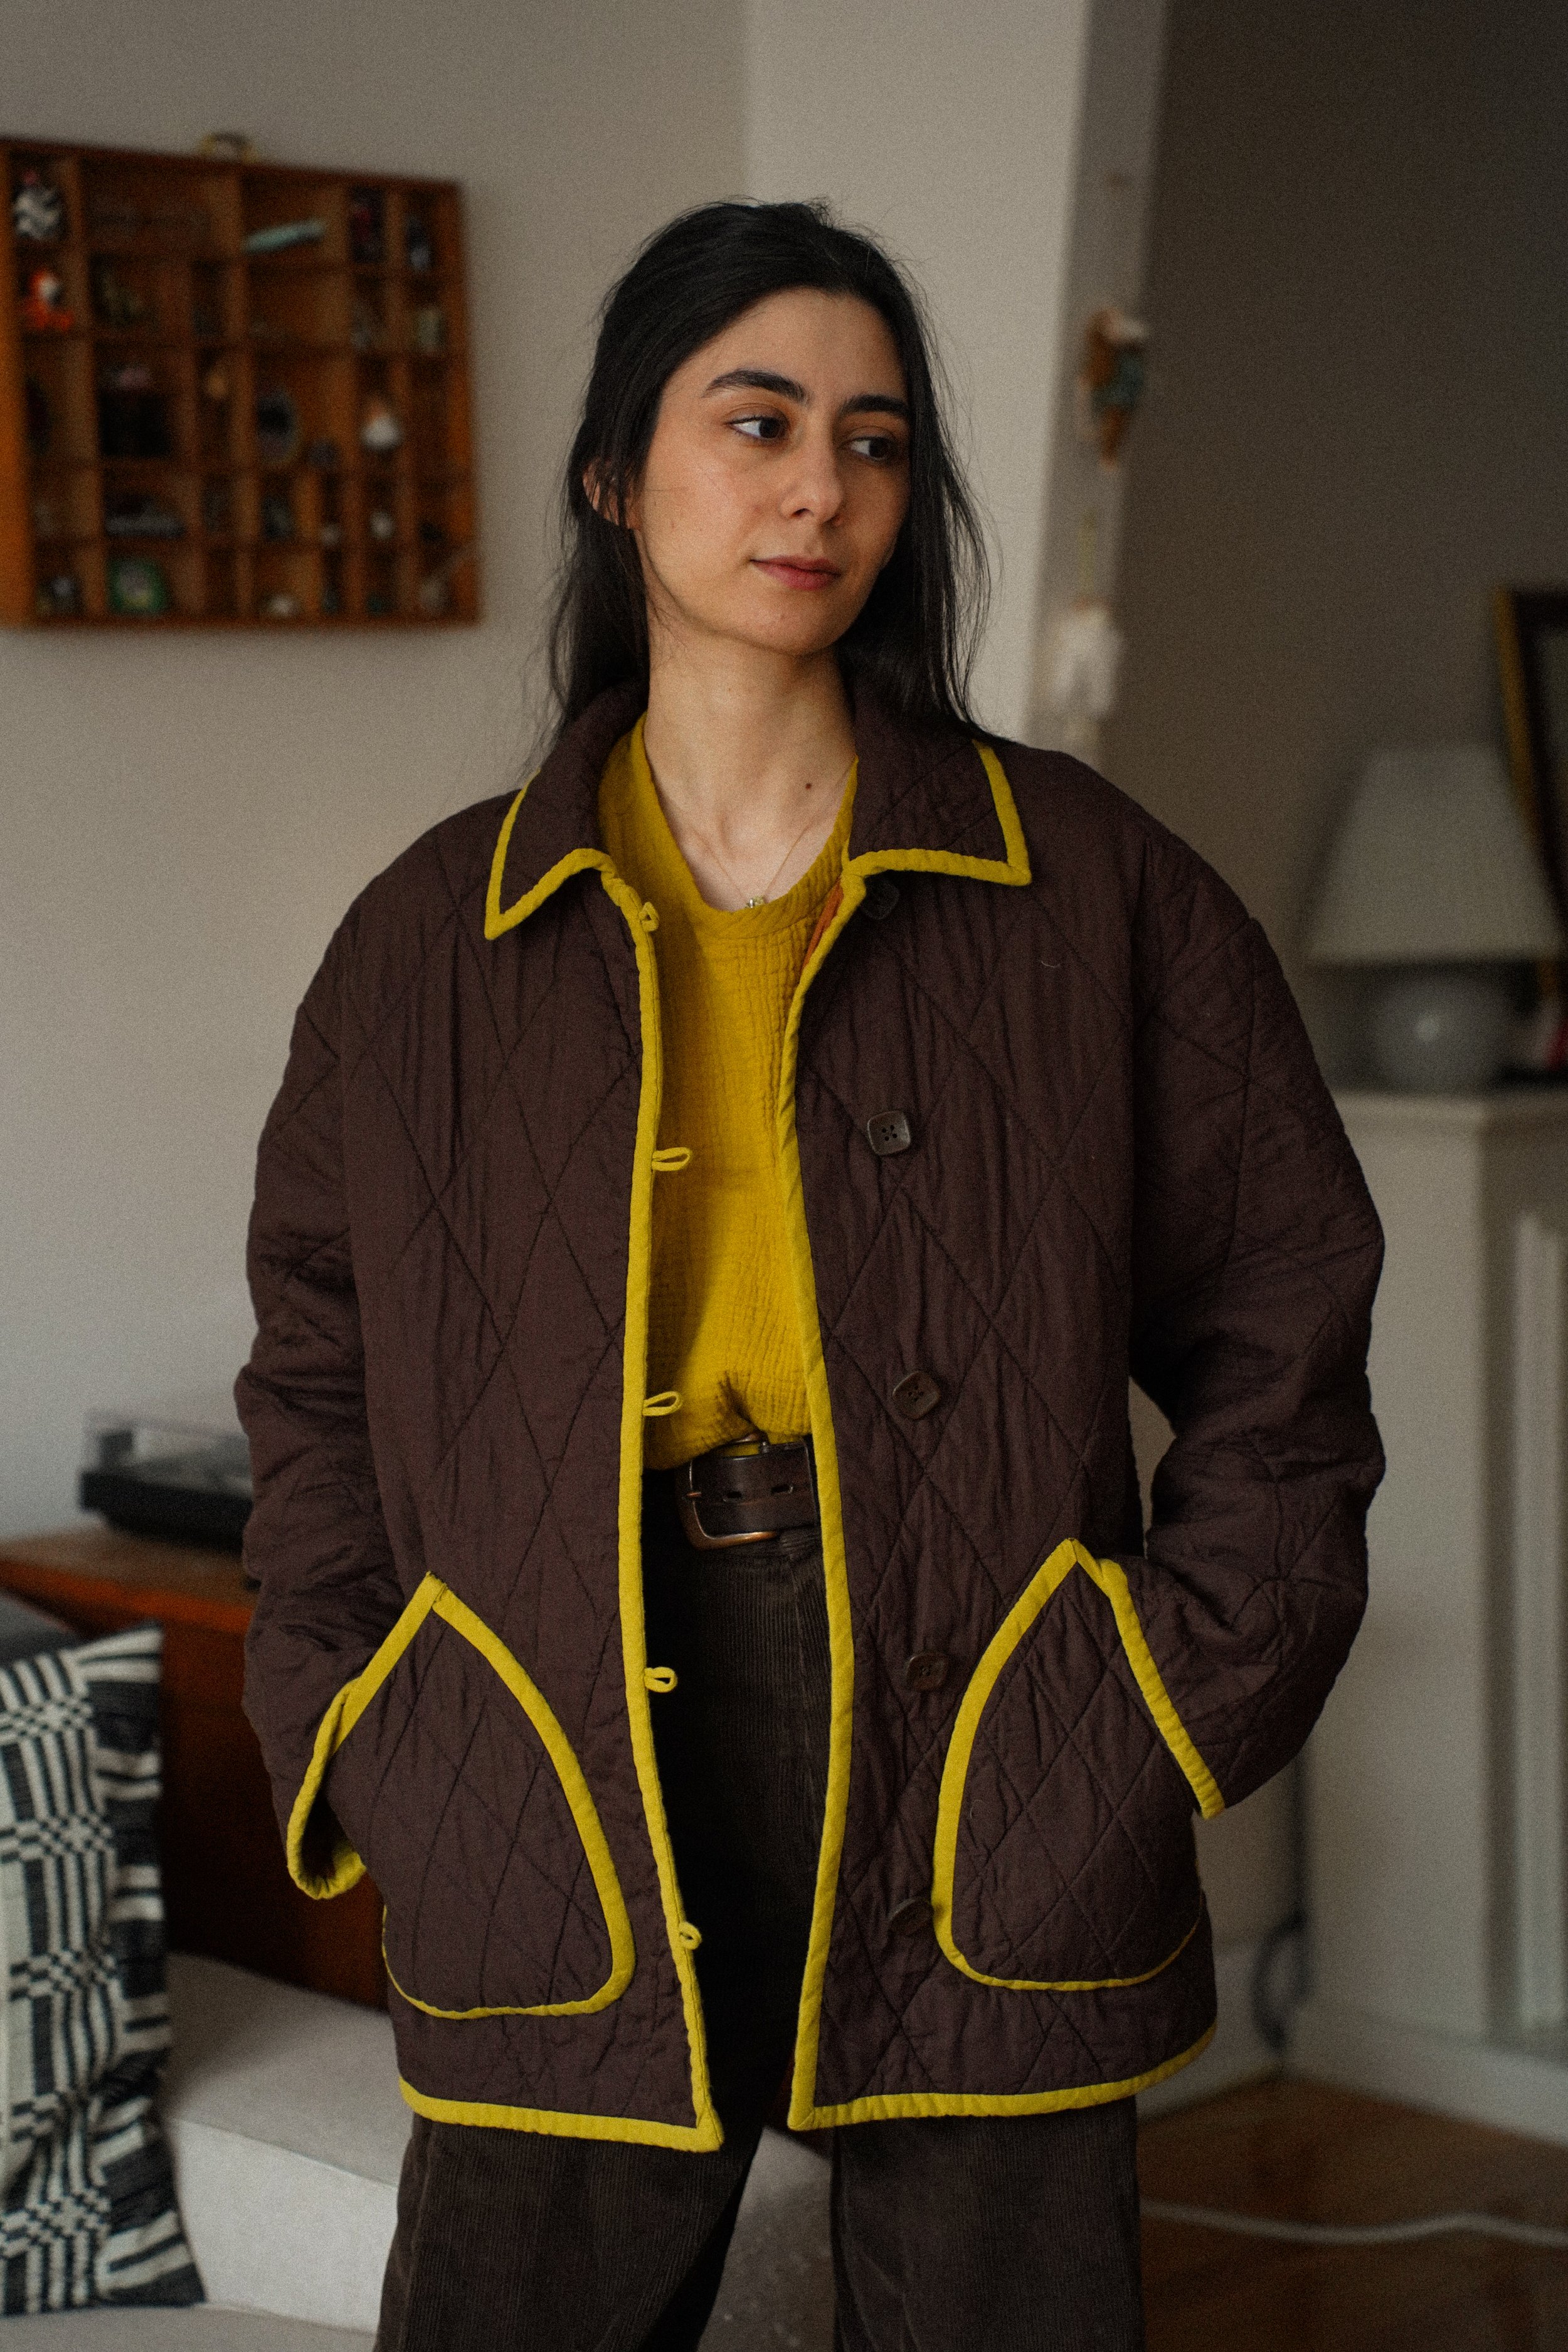
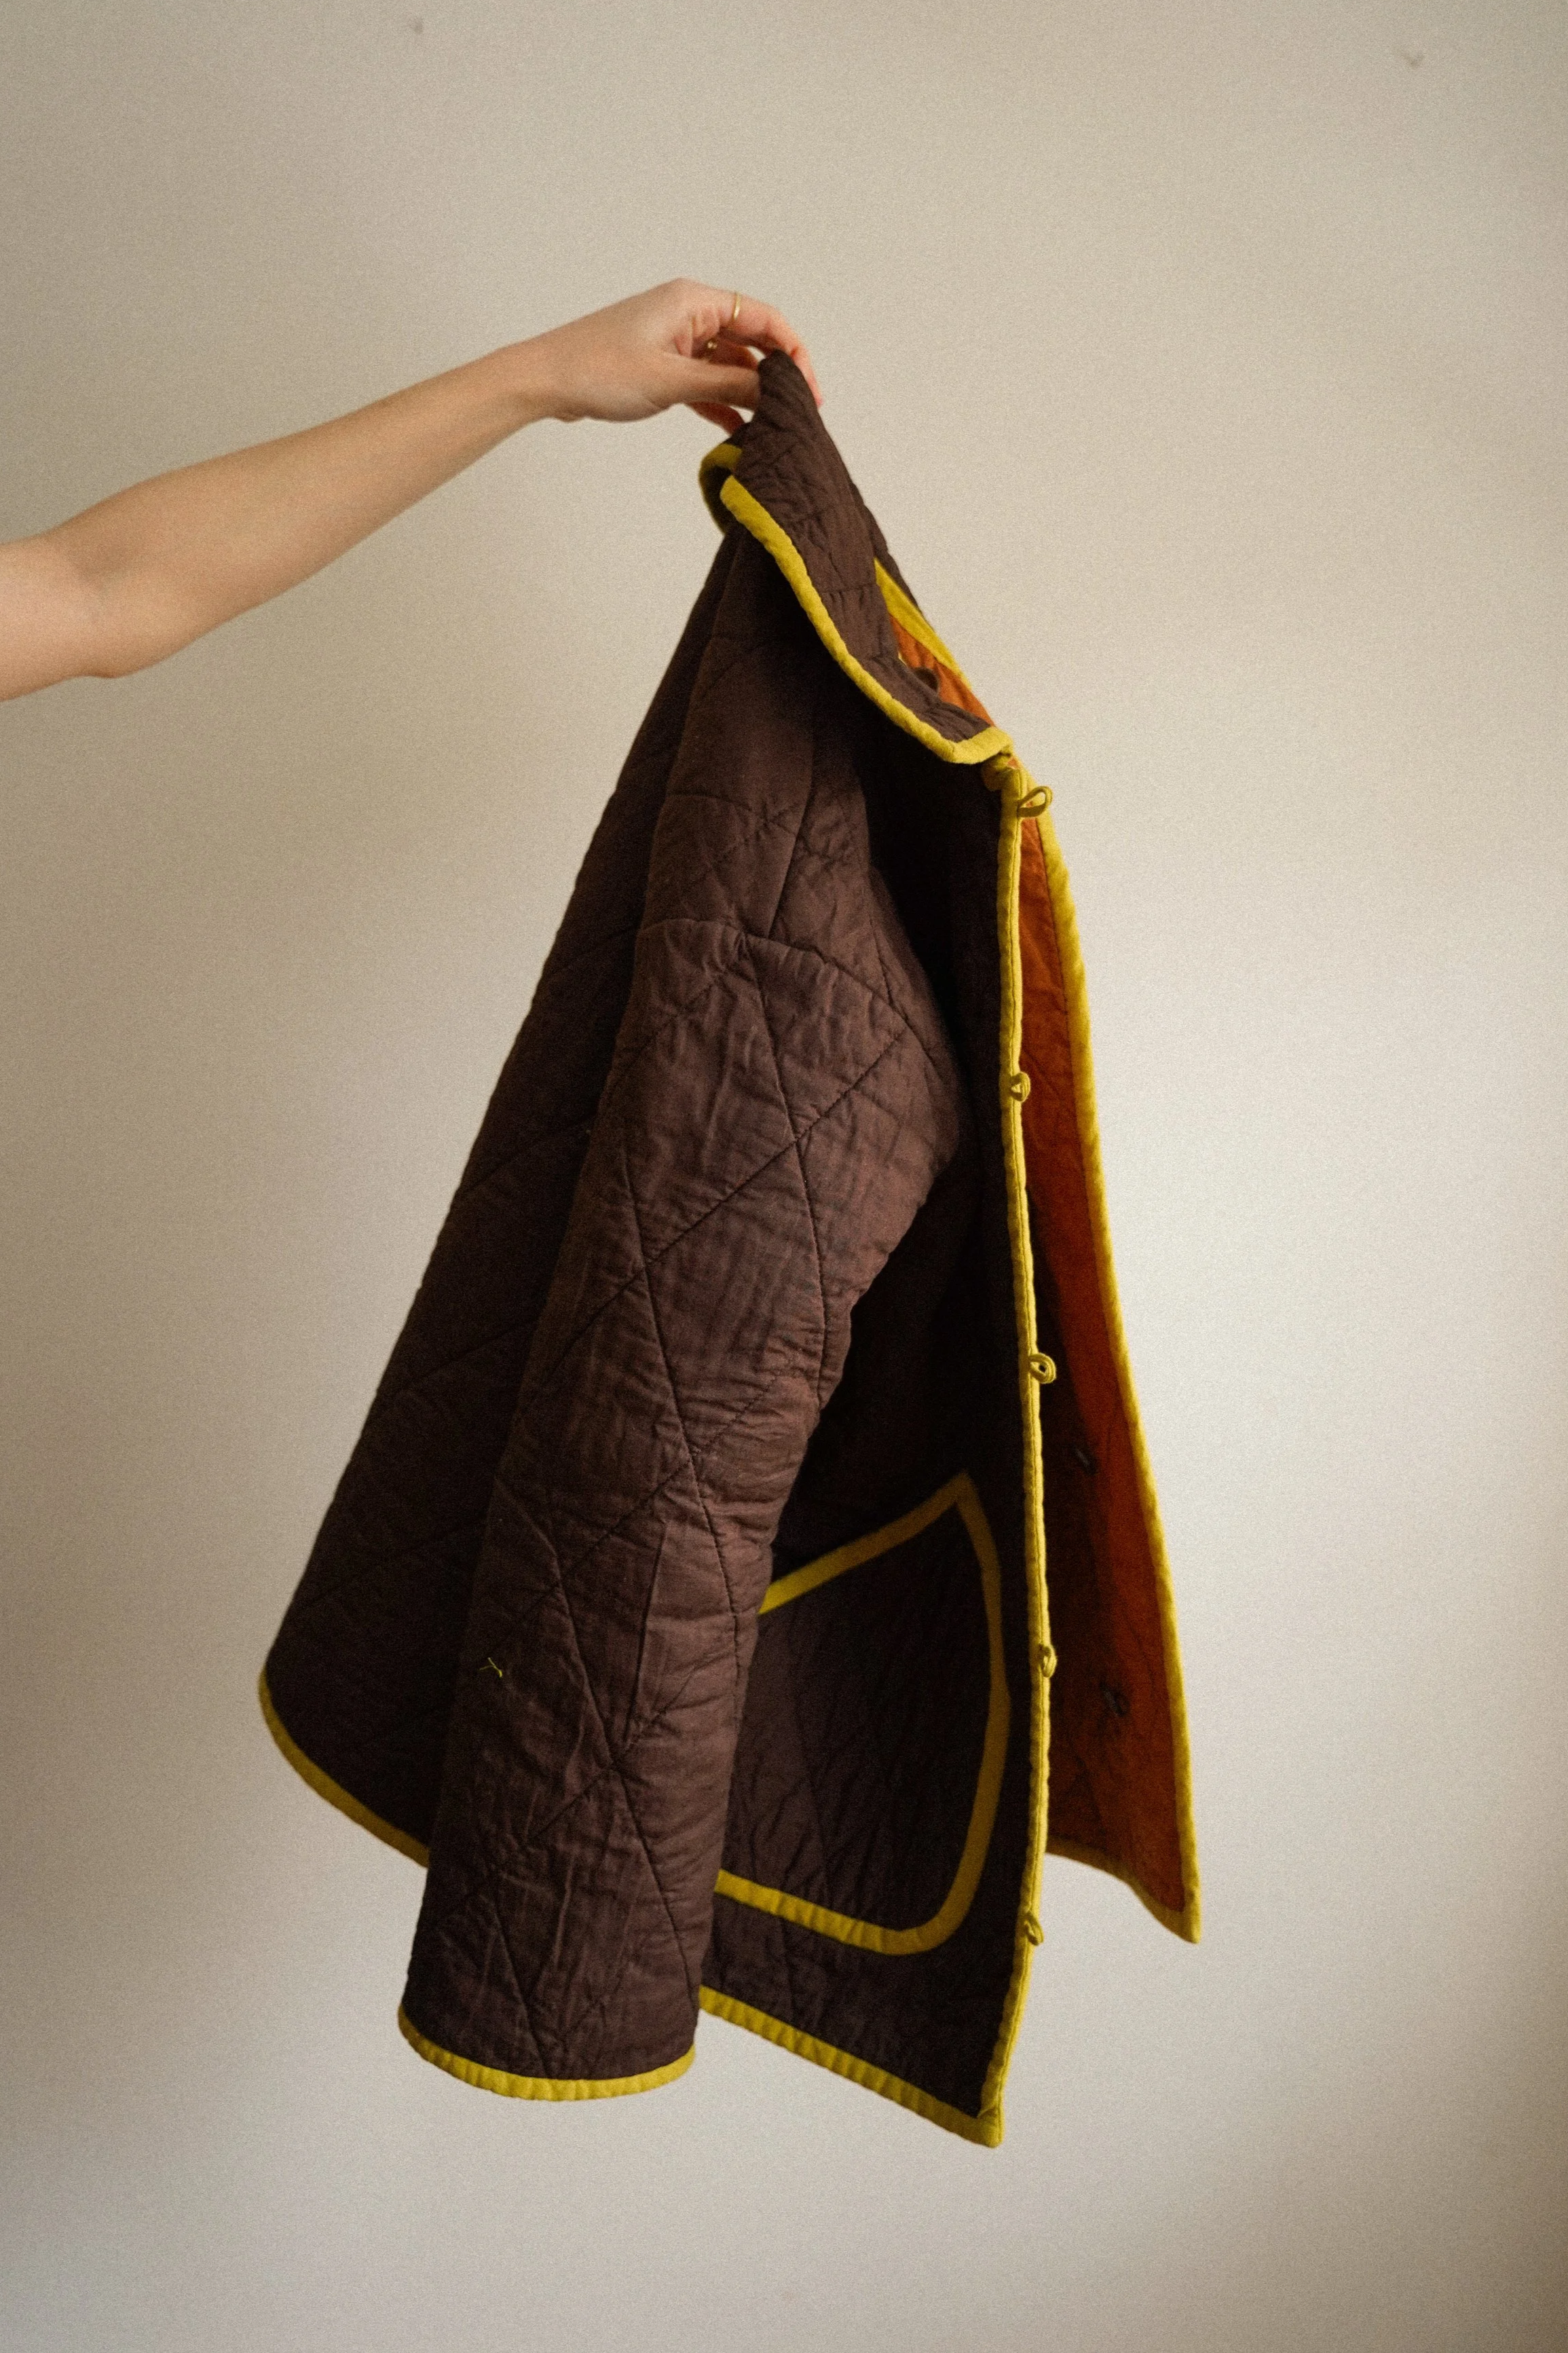
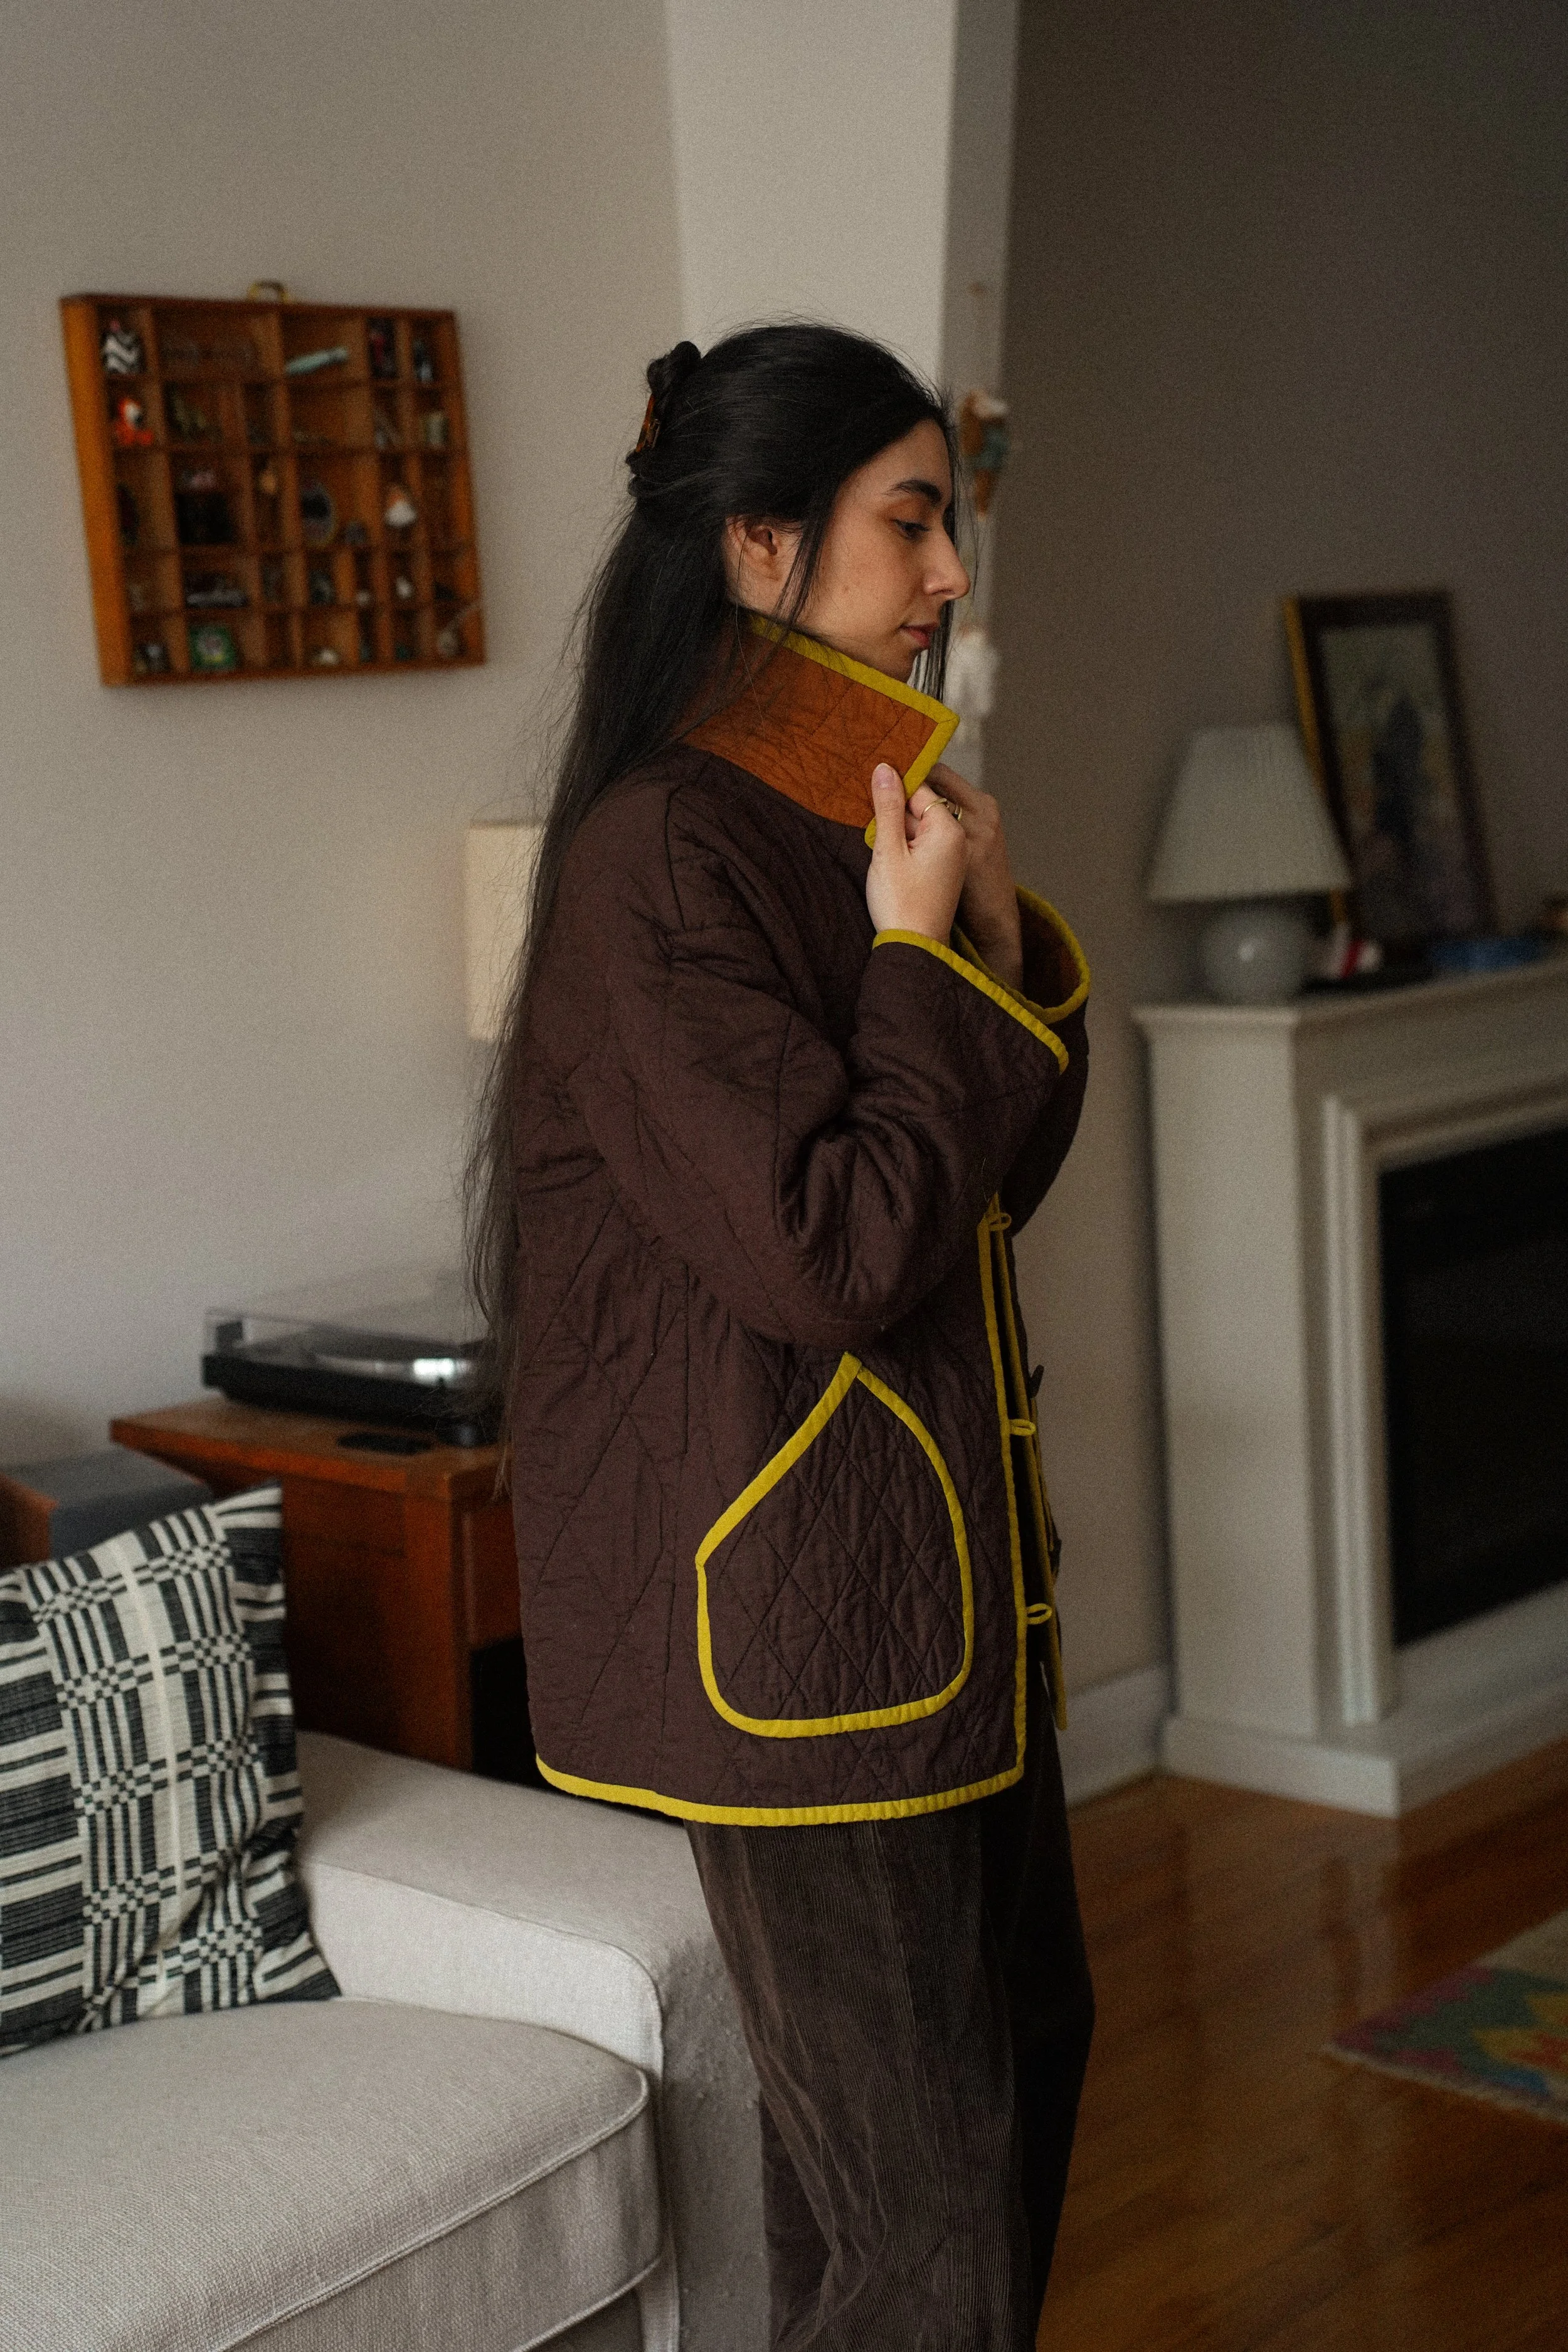
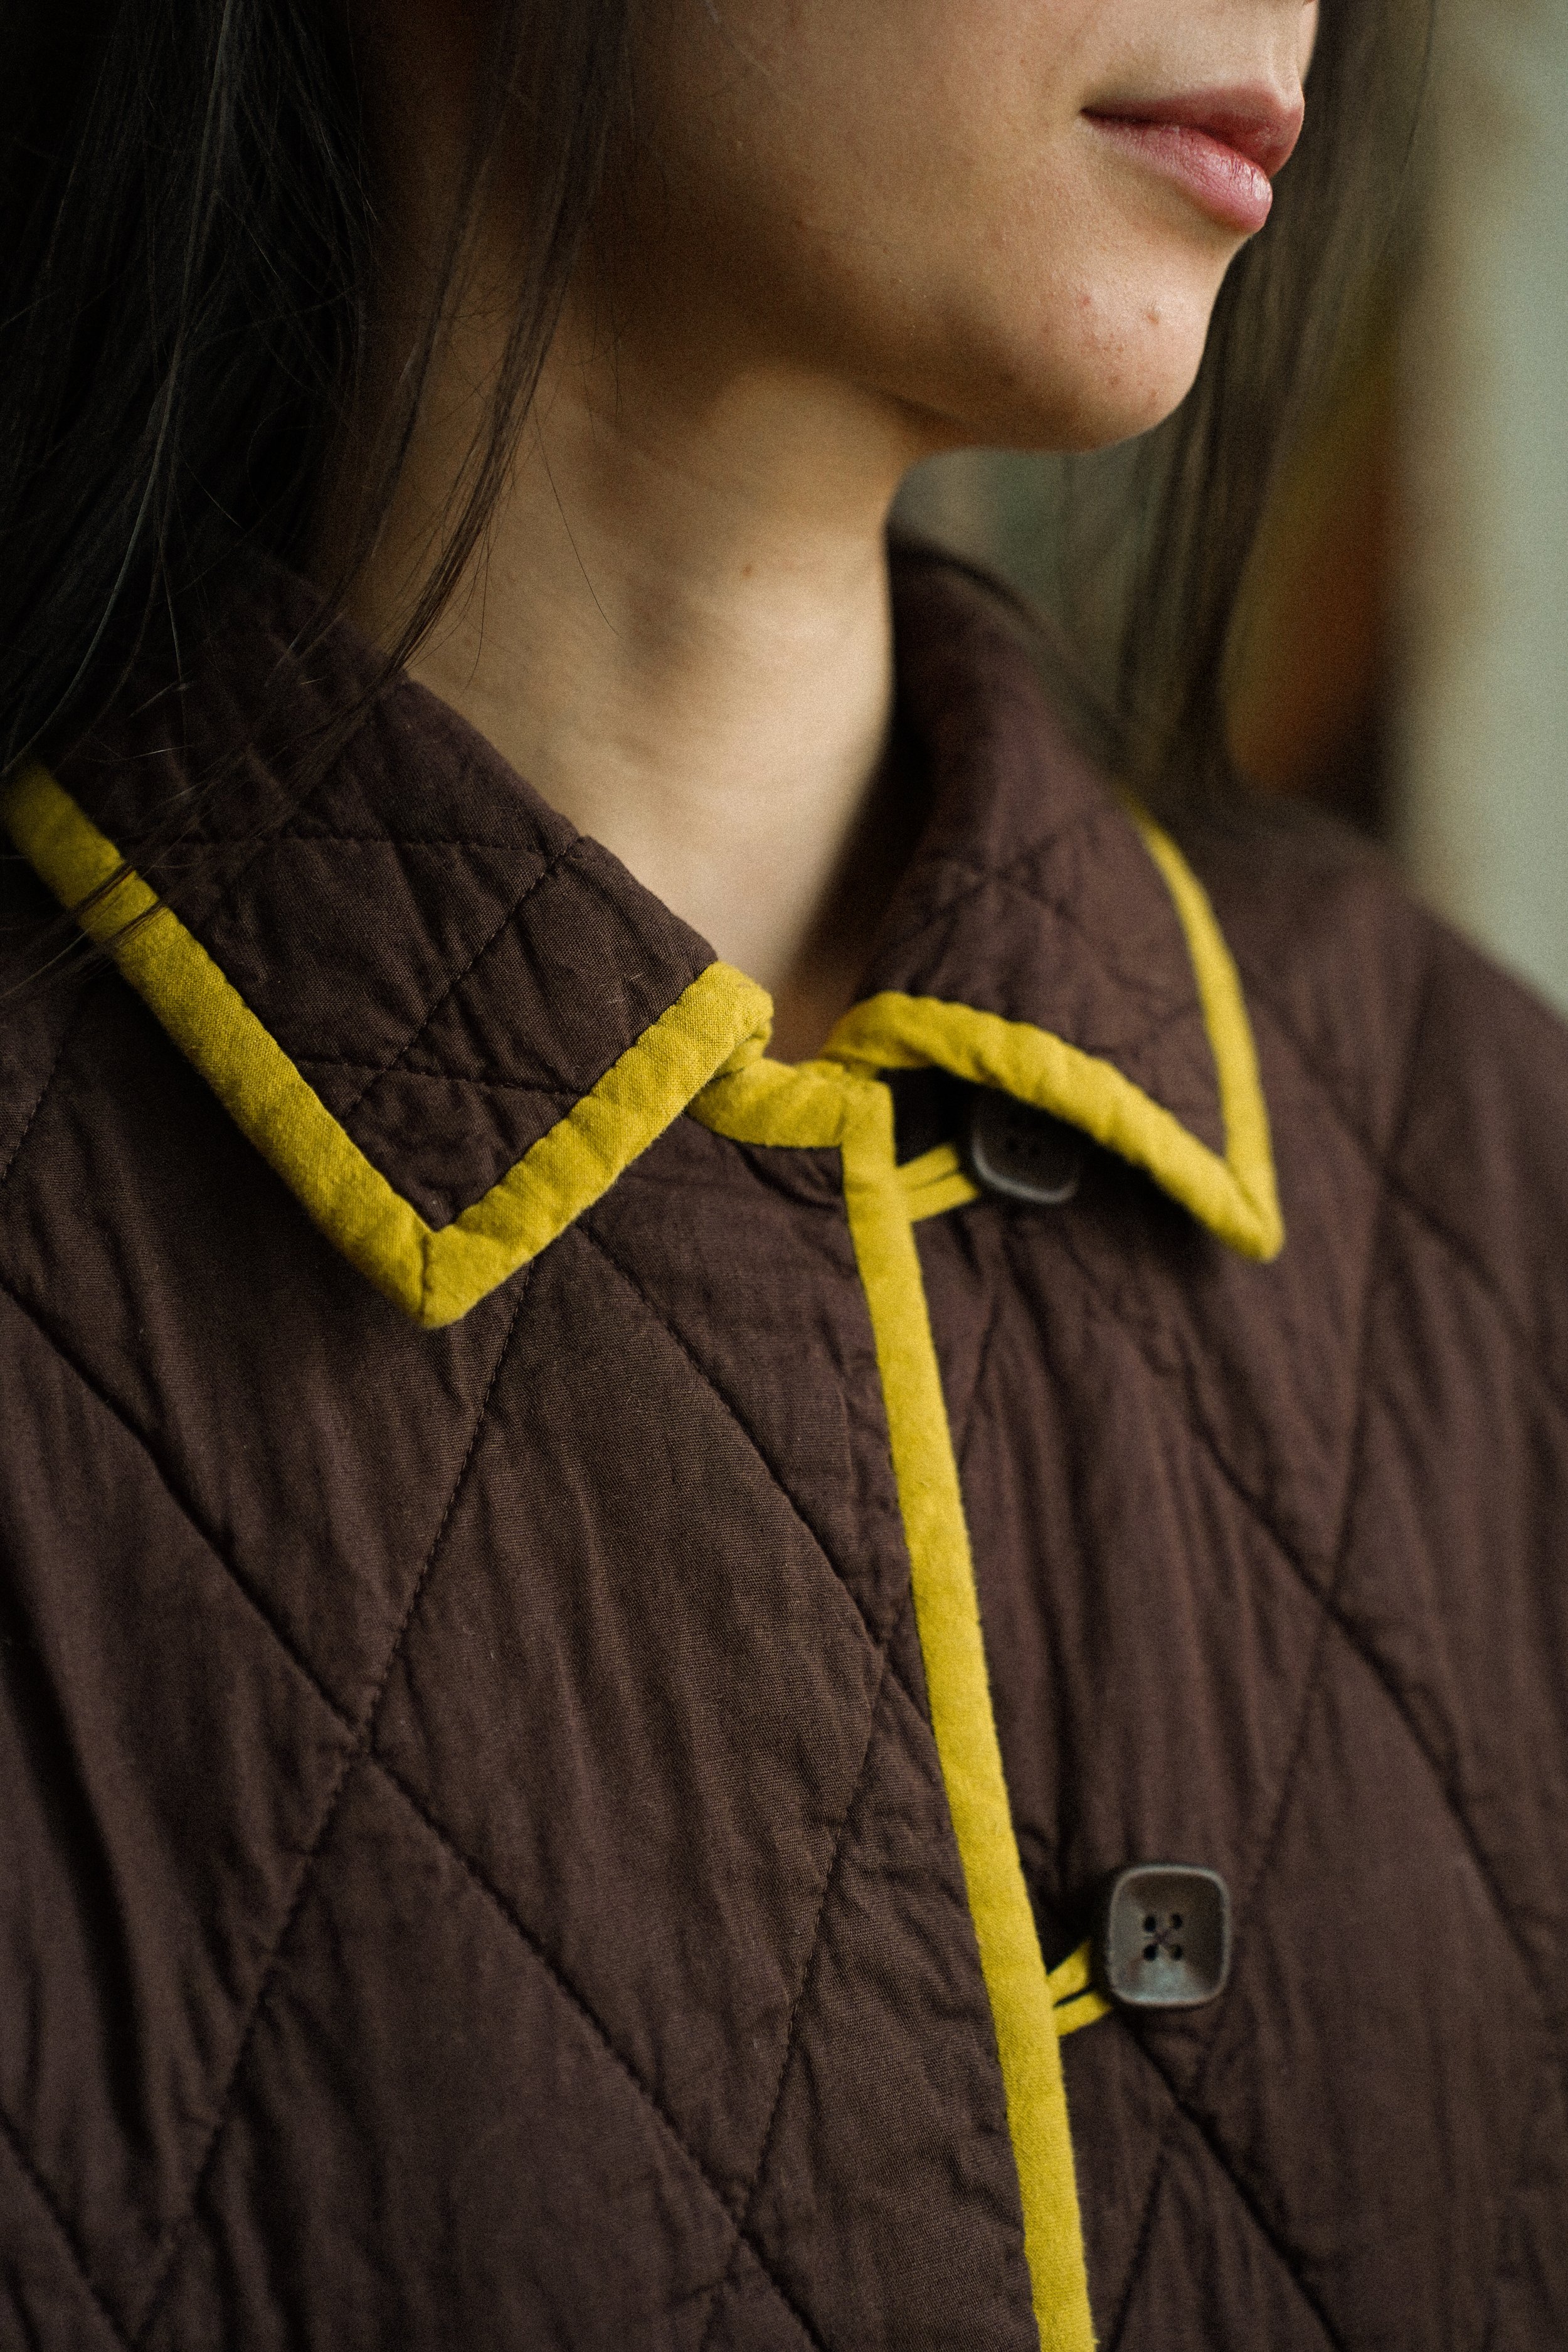
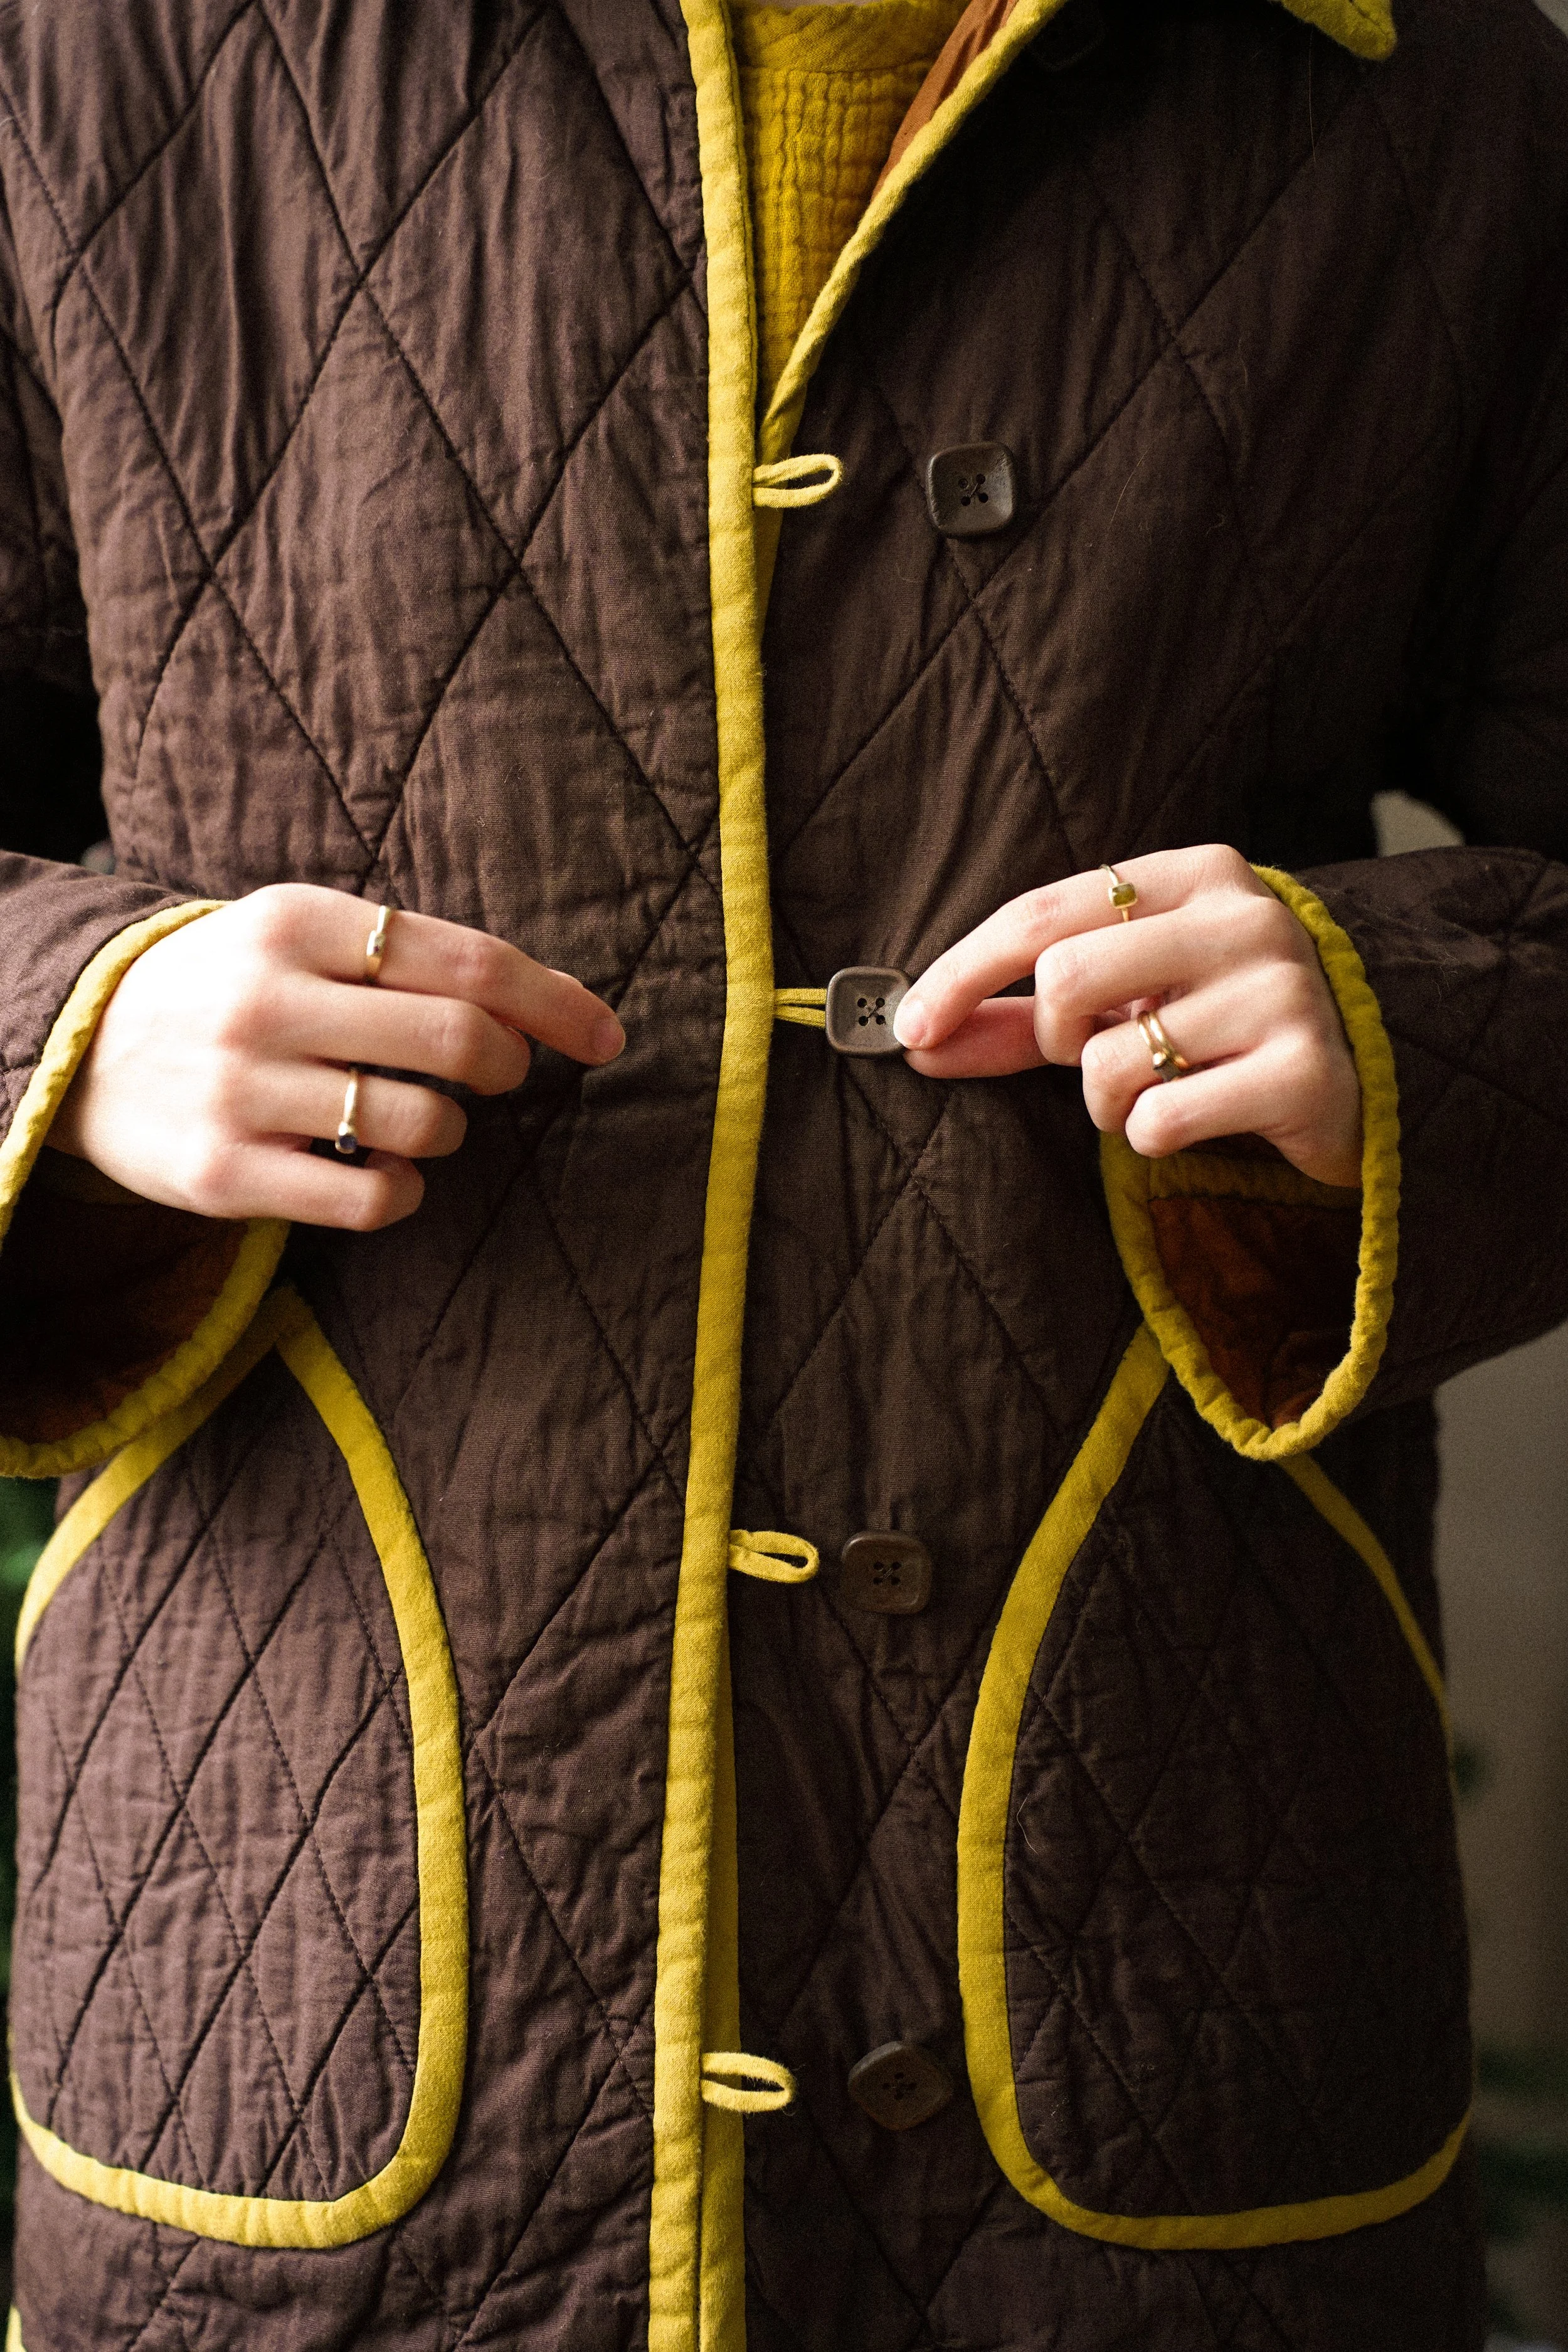
For the two layers of fabric, I used the lightweight silky poplin from Core Fabrics. The darker brown is the Chocolate colourway, and the lighter brown is Caramel. For the binding, I made my own bias tape and bias strips using the tumbled cotton in the Pistachio colour, again from Core. For the batting, I used their new cotton batting. The two sets of buttons I used are all from my favourite haberdashery store in Ankara, Turkey: both the circular and the square buttons are made of wood.

Quilting
To quilt my own fabric, I started by making my quilt sandwich by layering the batting in the middle of the two poplins. I spray basted the three layers together, and cut rectangular pieces that would comfortably fit each of my pattern pieces.
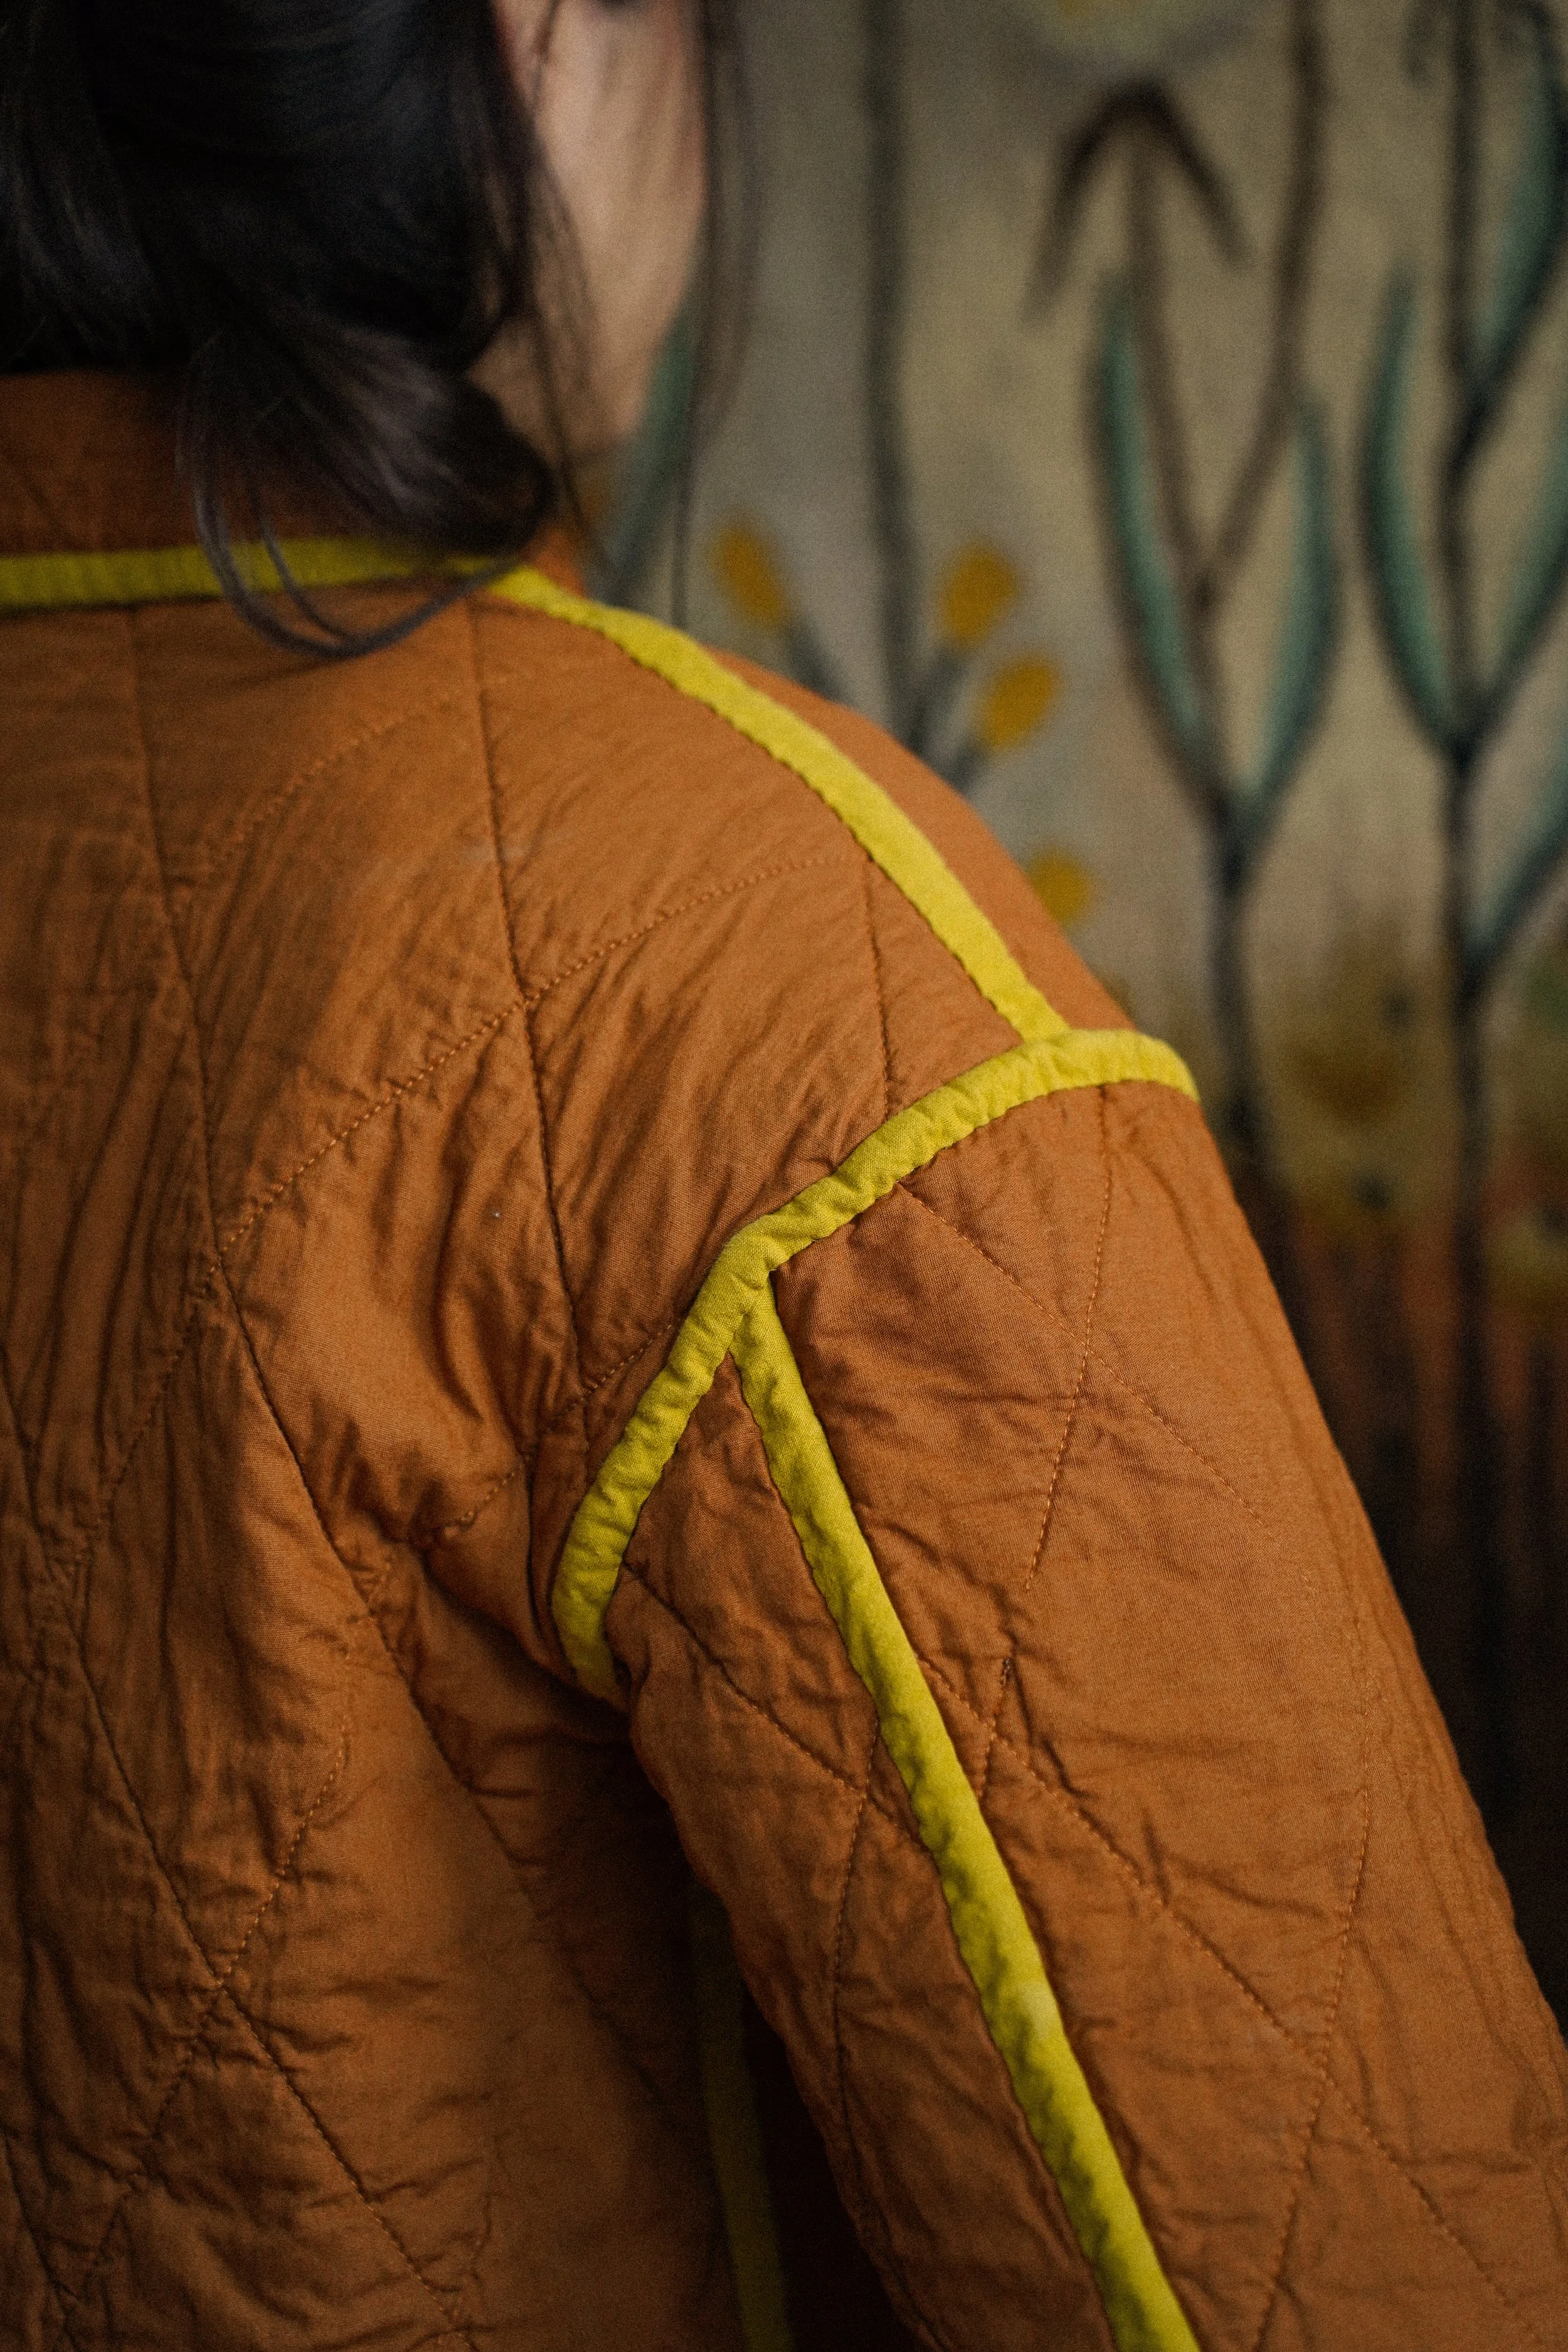
I knew I wanted a medium scale diamond pattern on the larger pattern pieces, and a smaller scale version of the same pattern on the smaller pieces like the collar and the pockets. To get a consistent pattern across my many rectangular pieces, I cut out a diamond shape out of some cardstock to use as a template. After placing the template on the fabric pieces and tracing around it with tailor’s soap, I simply used a quilting ruler to extend the lines in all directions and repeat the diamond pattern enough times to cover the entire piece. I made sure to place the first diamonds in a way that would allow me to pattern match across the center fronts, and I kept symmetrical pieces like the sleeves aligned in terms of pattern placement.
For the smaller scale pattern, I followed the same steps but finished by adding additional lines down the middle of each line that made up the larger diamonds.
Once everything was marked out, I used our industrial Juki at the studio to quickly sew over the lines and quilt each piece. I should add that I was very much rushing through these steps to be able to prep the jacket for filming a tutorial section on it the following day (I’ll link to the youtube video when it’s out!) but I would recommend using a walking foot if you have one and taking it slow. Because the industrial doesn’t have a walking foot, I put lots of tension on the fabric as I was quilting it to make sure everything was lying flat. I used two matching colours of thread on the top and the bobbin so that my stitches would disappear into the fabric on both sides of the coat.
With all the rectangular pieces quilted, I cut out my pattern pieces, again paying attention to how the quilting pattern landed on each piece.
Making the Jacket Reversible
Binding the Seams
To make the jacket fully reversible, I decided to bind each seam with the same colour fabric I used for the binding around the edges. For the edge bindings, I made some 13 mm (1/2”) wide double fold bias tape, but to bind the seams I cut 6 cm (2 3/8”) wide bias strips and only folded them in half. While constructing the jacket, I placed the fabric pieces right sides together, and added my folded bias strips on top of the fabric with the raw edges aligned. I sewed through all three layers using the appropriate seam allowance, and trimmed the seam allowance down to around 6 mm (1/4”). I then pressed the bias strip over to enclose the raw edges, and secured it in place using slip stitches.
One thing to note for this method is that you need to pay attention to the where you place the bias strip as you’re sewing. Let’s say you’re sewing the side seam of the jacket, and you want to press your seam towards the back piece. You’ll need to make sure that the bias strip is placed on top of the front pattern piece, so that it can be pressed towards the back.
Hand Finishing the Bindings
To get an extra clean finish on both sides, I decided to hand finish all the bindings using slip stitches. The binding around the inside corner created by the collar and the center front of the jacket is also much easier to finish by hand, and you know me - I’ll take any excuse I can find to do some relaxing slow sewing.
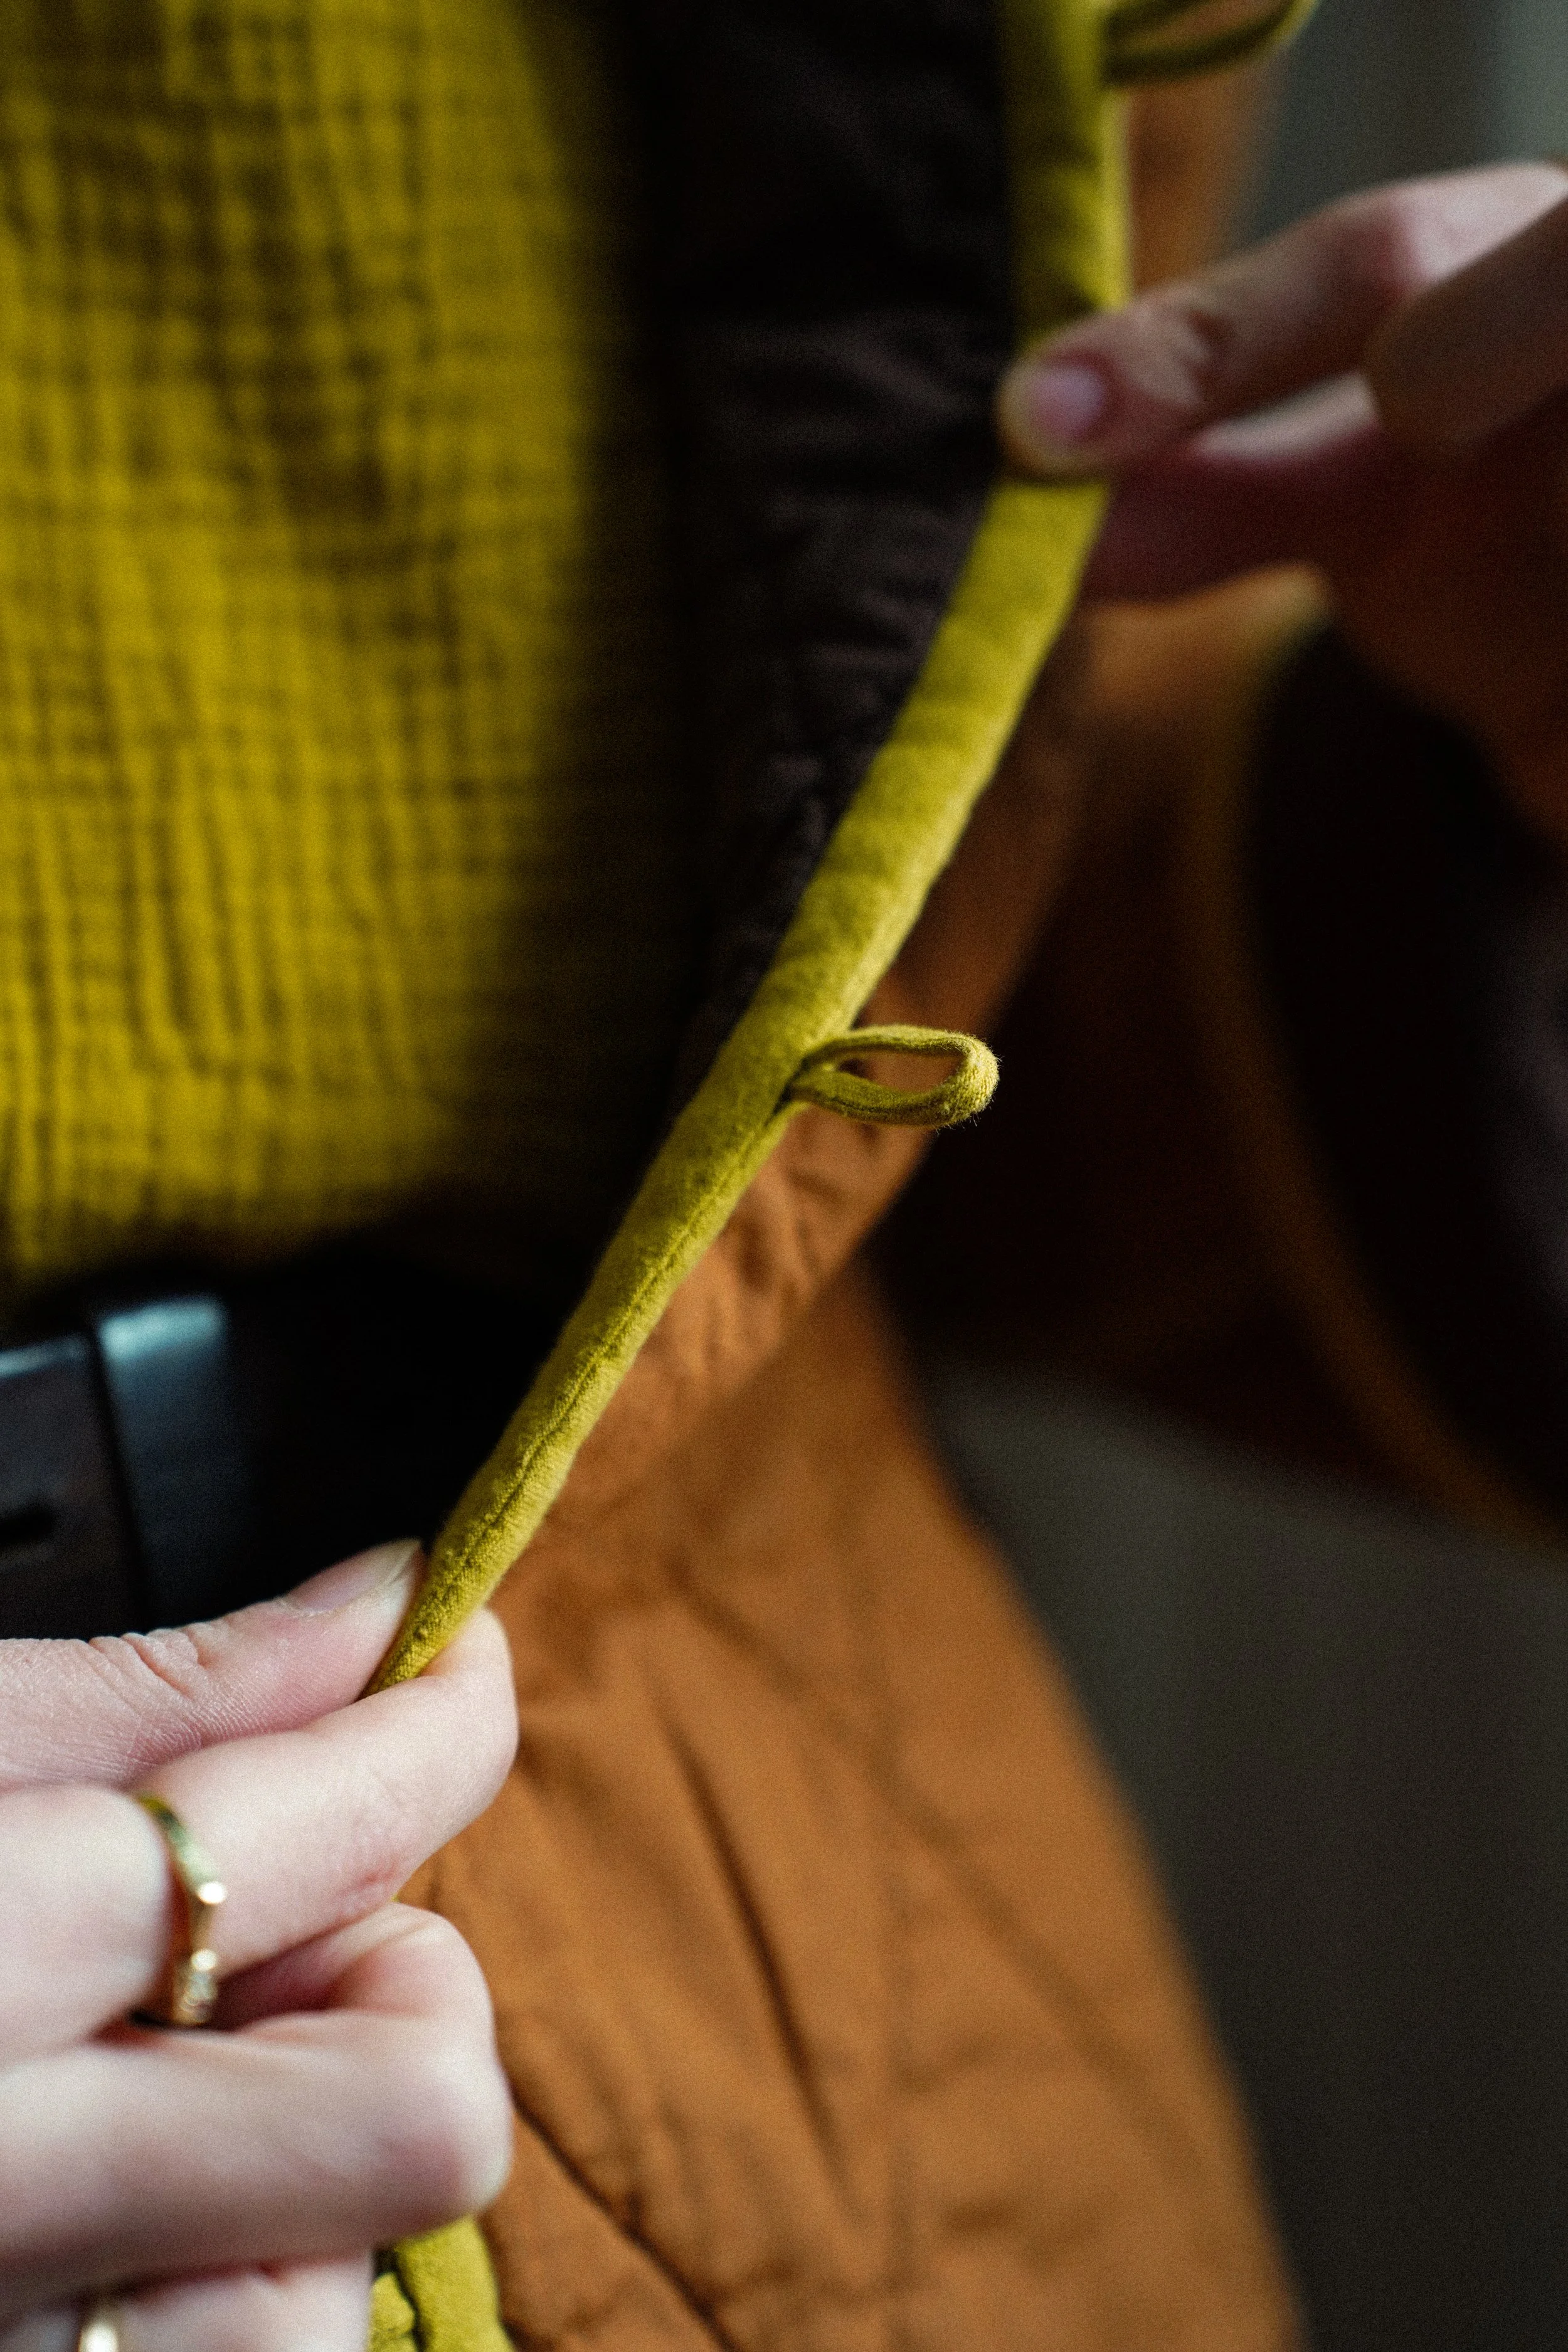
Reversible Closure
The trickiest part of making this jacket reversible was to find a closure method I liked that worked on both sides. You could definitely do regular or bound buttonholes, but I didn’t want to risk cutting through my jacket after pouring in hours and hours of work into it. Instead, I decided to make some little rouleaux loops using my binding fabric, and sew them down the center front edge on the “inside” of the jacket. I then hand sewed a folded piece of bias tape over the center front edge to clean up and strengthen that edge.
I finished by sewing a set of buttons on each side of the jacket in the corresponding locations. This means that the jacket closes right over left on the “right” side (the darker brown side) and left over right on the other, lighter brown side.

A Note on Pockets
As I was a bit on a rush to finish this project, I only added pockets to the dark brown side (which I think I’ll get more wear out of). When I have a little extra time, I’ll make two more pockets and sew them down on the light brown side to have a completely reversible piece.
I think that’s it for all the details! As always, feel free to drop any questions you may have in the comments below (or on my post on Instagram) and I’ll do my best to get back to you quickly. I hope you found it helpful to read through how I went about making this jacket! Happy sewing :o)